Posts Tagged ‘natural dyes’
harvesting colour – the vegetable stand
Gardens are bursting with fresh produce and we have gone to the farmer’s vegetable stand every couple of days to get our fill of locally grown food. We usually look for new potatoes, yellow wax beans, beets, carrots, green onions and zucchini.
~

vegetables at the farmer’s stand
~
This year, as a result of my ‘harvesting colour’ project, I am more anxious than ever to collect those carrot tops and the abundant leaves of beet and radish. Cooking these leaves in my dyeing ‘cauldron’ fills the air with the savory smell of vegetable soup, and makes me wonder what colour will emerge from the dye pot.
~
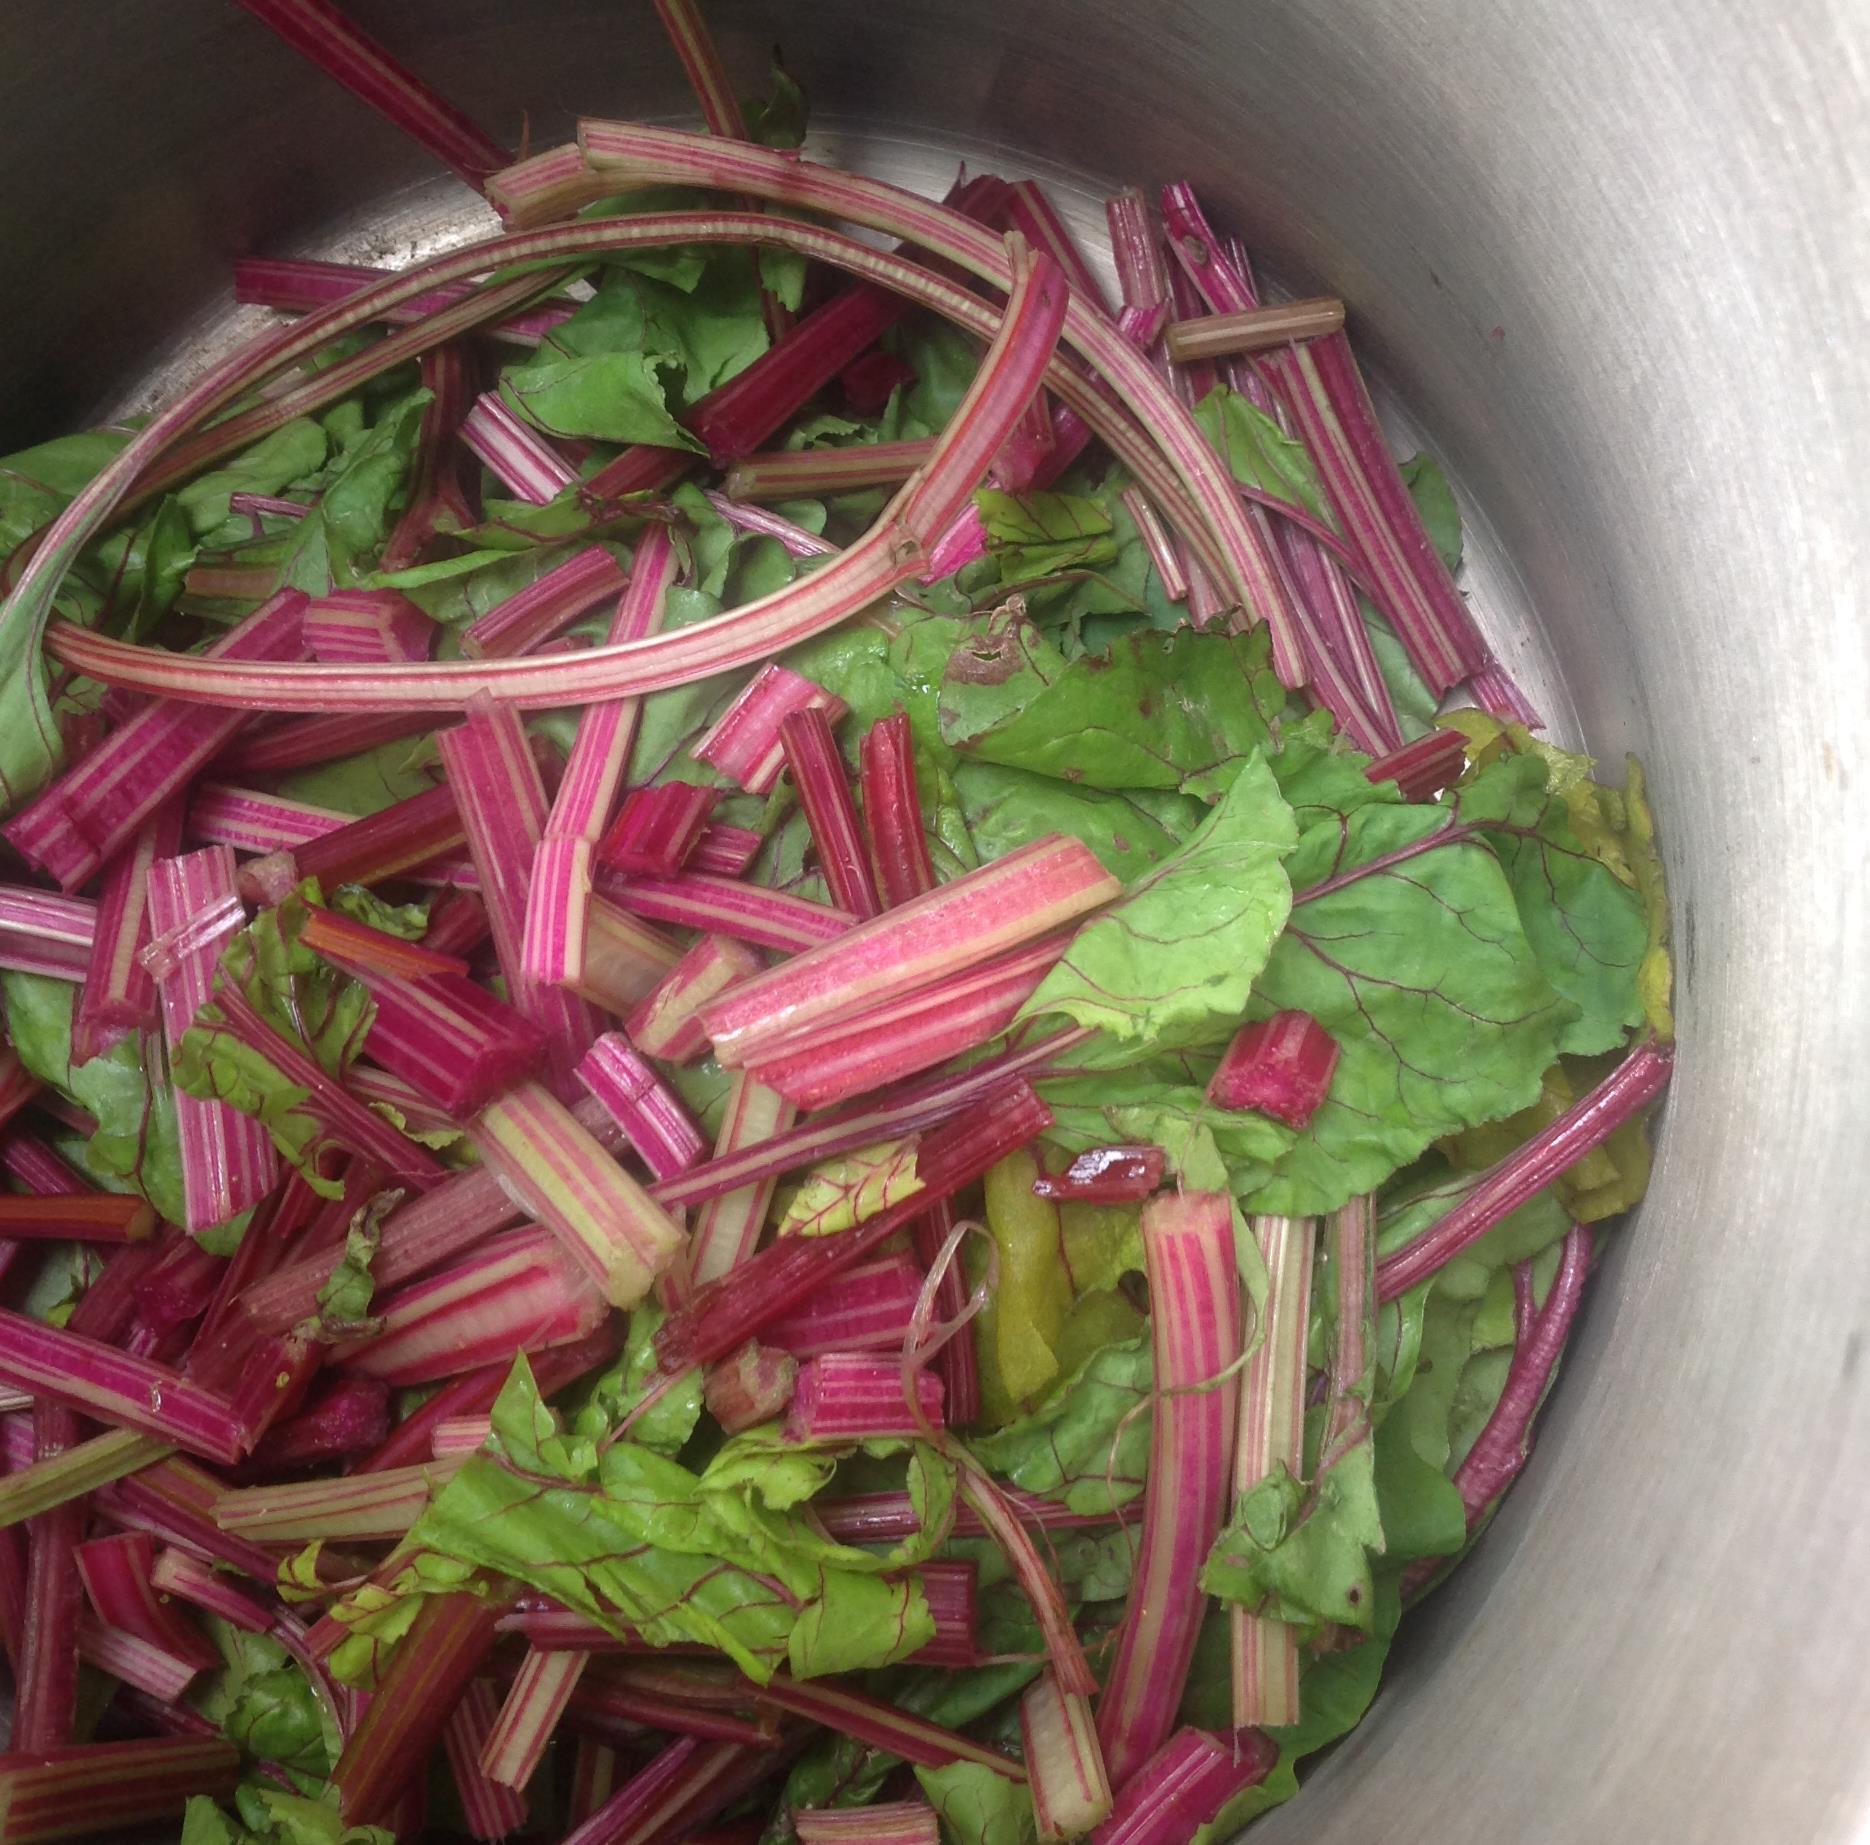
beet leaves and stems ready for the boil
~
Orange carrots, red beets and scarlet radishes … I am sad to say my expectations were low. I was certain every batch of leaves would yield yet another shade of brown. For radishes and beets, I was correct. Beautiful browns.
~

my hand-spun balls of wool from radish and beet leaves … the pink is from my earlier tests with pickled beets
~
Imagine my delight when the carrot leaves yielded a bright celery green!
~
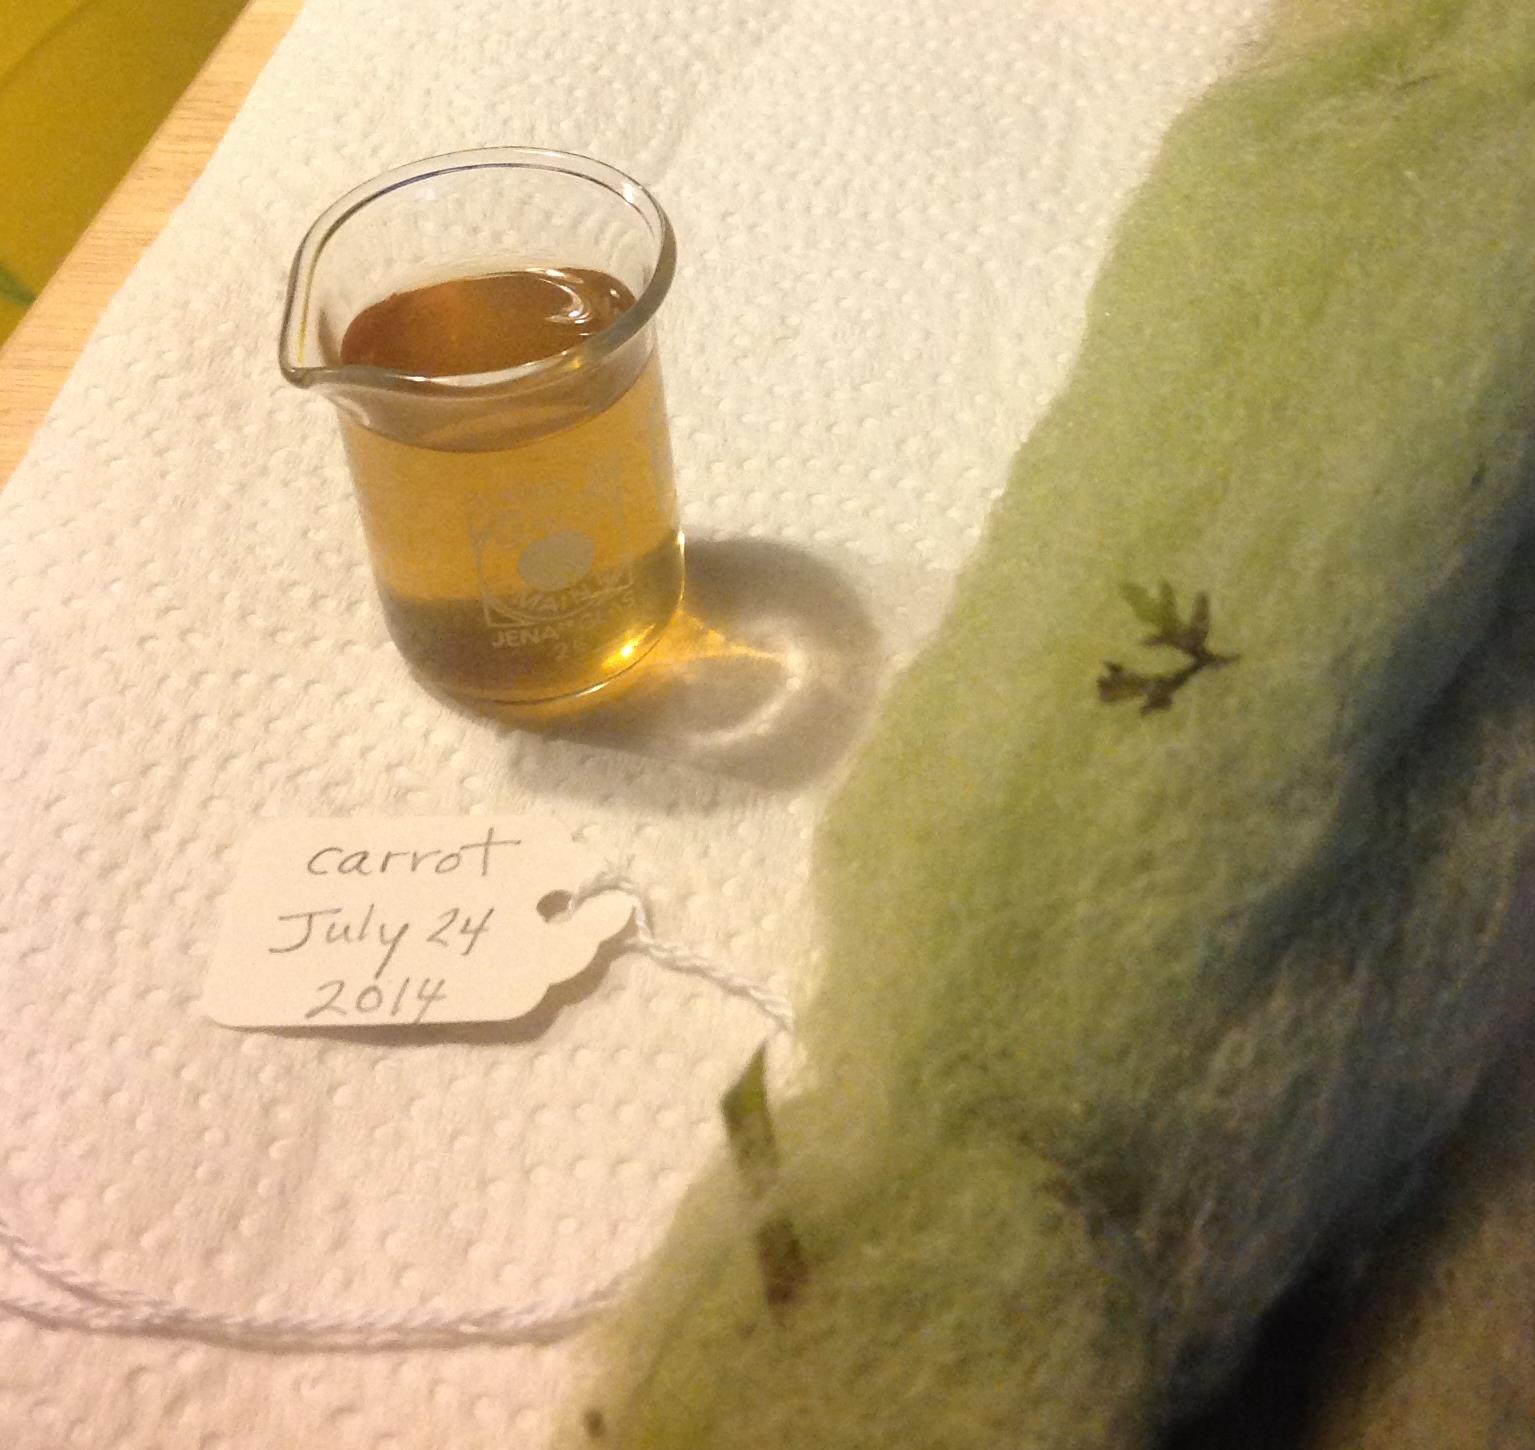
dye and wool roving from a boil of carrot tops
~
I tried to repeat the colour on a second length of wool roving, but the second simmering gave me a gold shade of brown. The dyestuff had offered up all its green colour in the first boil!
~

colours of wool obtained from the first and second boil in a dyestuff of carrot tops
~
vegetable bin
~
most look for
vitamins and
anti-oxidants
seek the colourful plate
look at the farmer’s display and see
carrot orange
radish red
spinach green
~
a dyer looks
for juicy leaves
and the possibility of yet
another shade
of brown
~
~
Copyright 2014 Jane Tims
an attempt at ecoprinting
After our drive to Canterbury over the weekend, I was anxious to capture some of the roadside flower colour in my ‘harvesting colour’ experiments. I decided to try a technique described by India Flint in her book Eco Colour: Botanical Dyes for Beautiful Textiles (Interweave Press, 2010). ‘Ecoprinting’ involves bringing a plant into close contact with a fabric in order to transfer the colour to the cloth. I am very impressed with the effects shown in Eco Colour – prints of leaves, flowers and berries.
~
For my experiment I tried a handful of the Forget-me-nots I collected on our weekend drive …
~
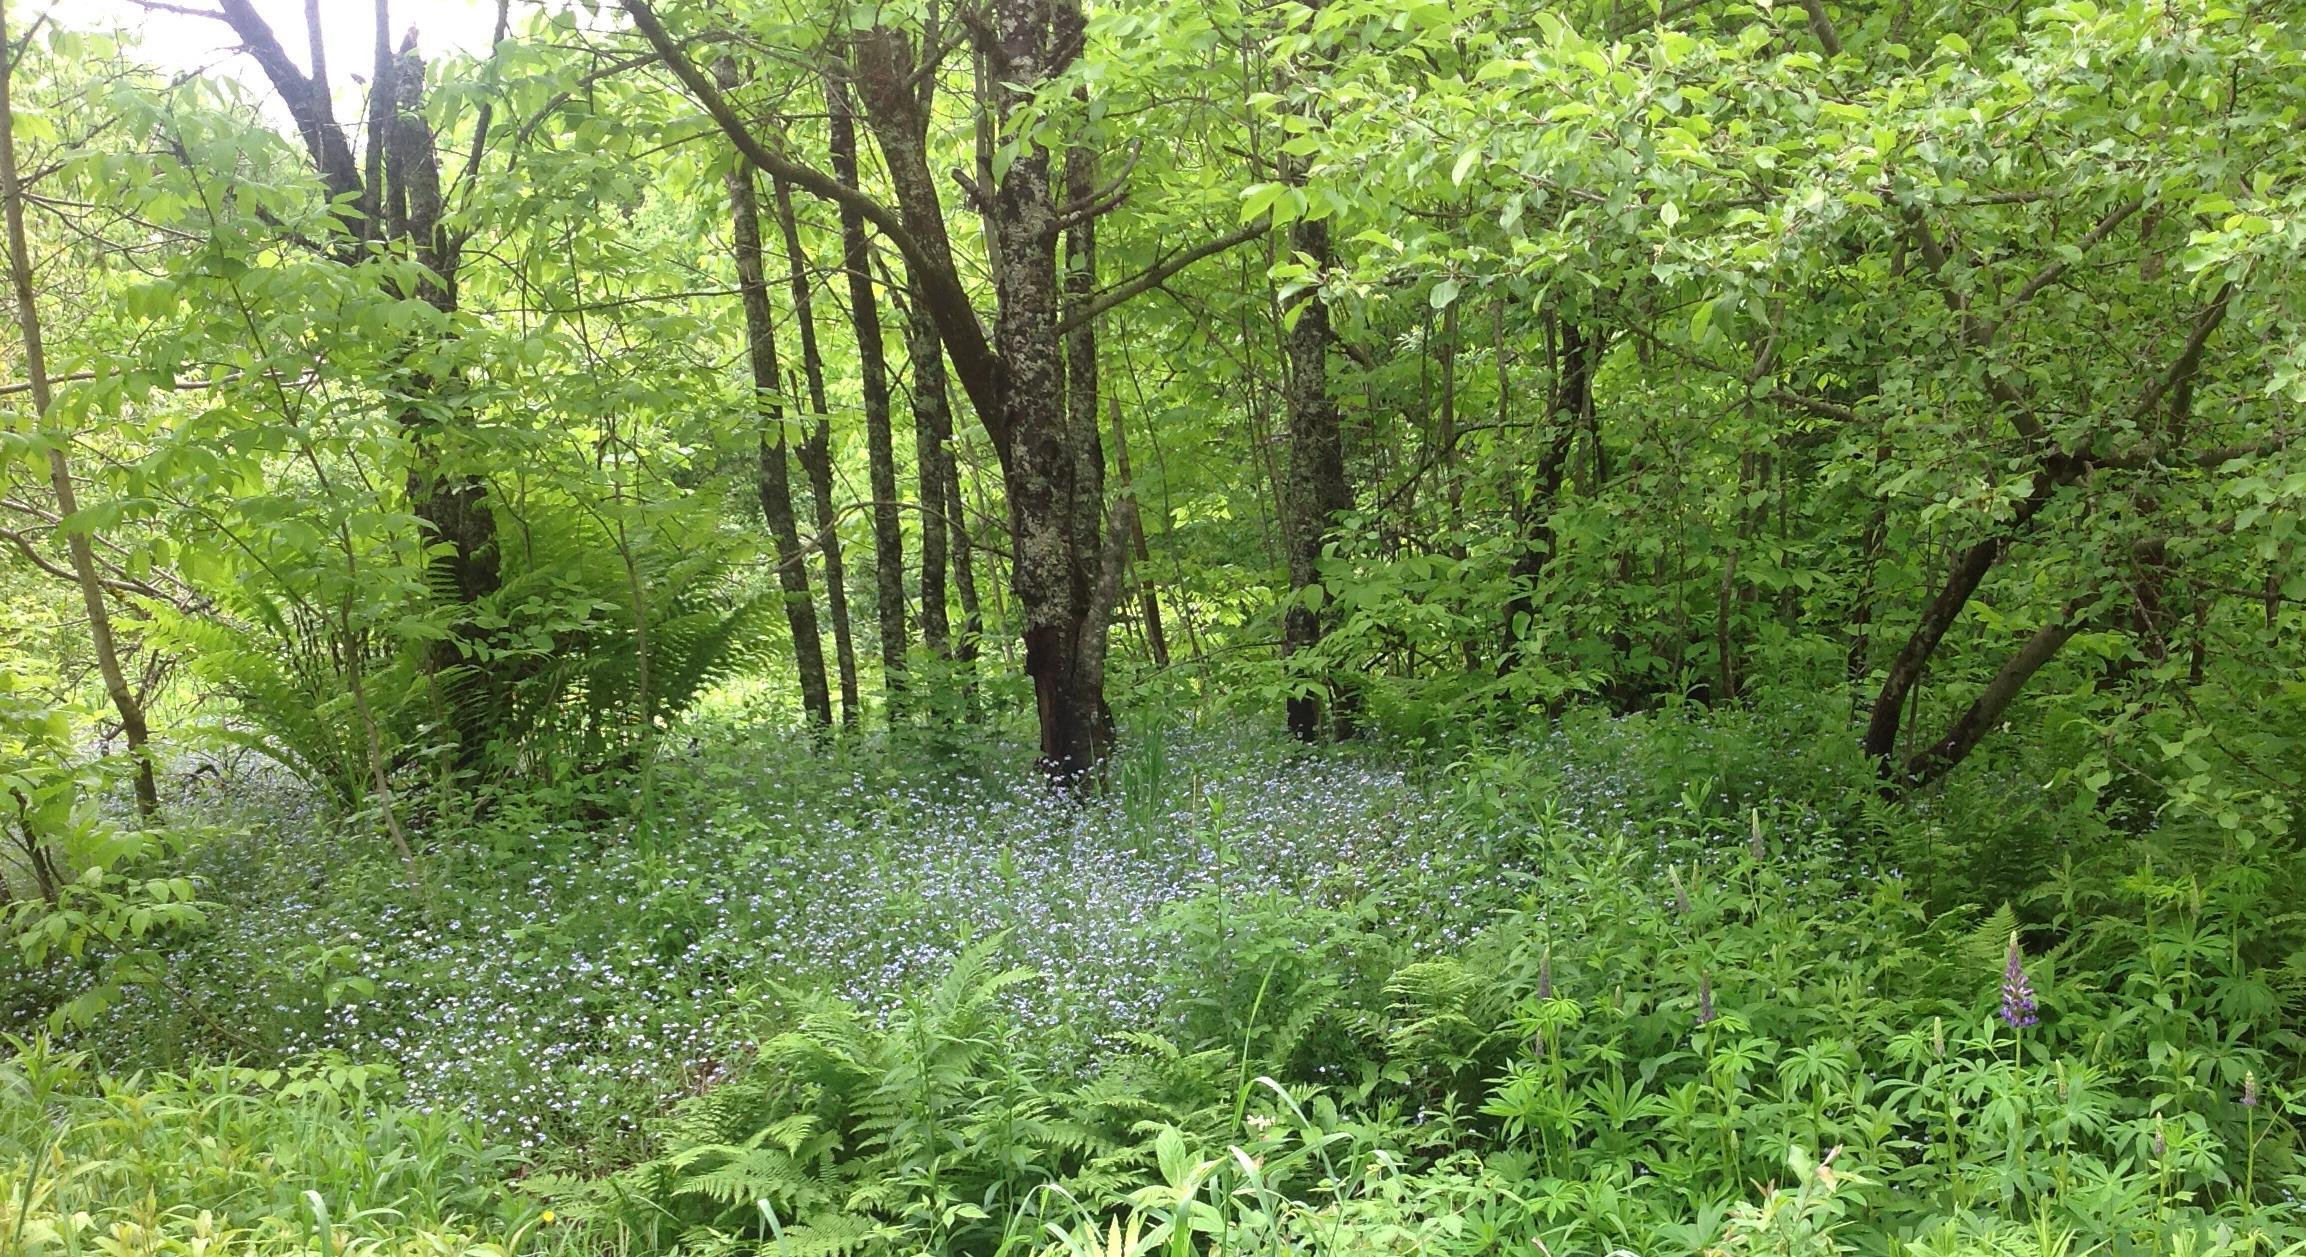
Forget-me-nots in the woods
~
a bundle of the purple Lupins growing along the road in my community …
~

Lupins along the road
~
and a bunch of a ground cover plant growing in my yard, Bugleweed (Ajuga reptans) …
~
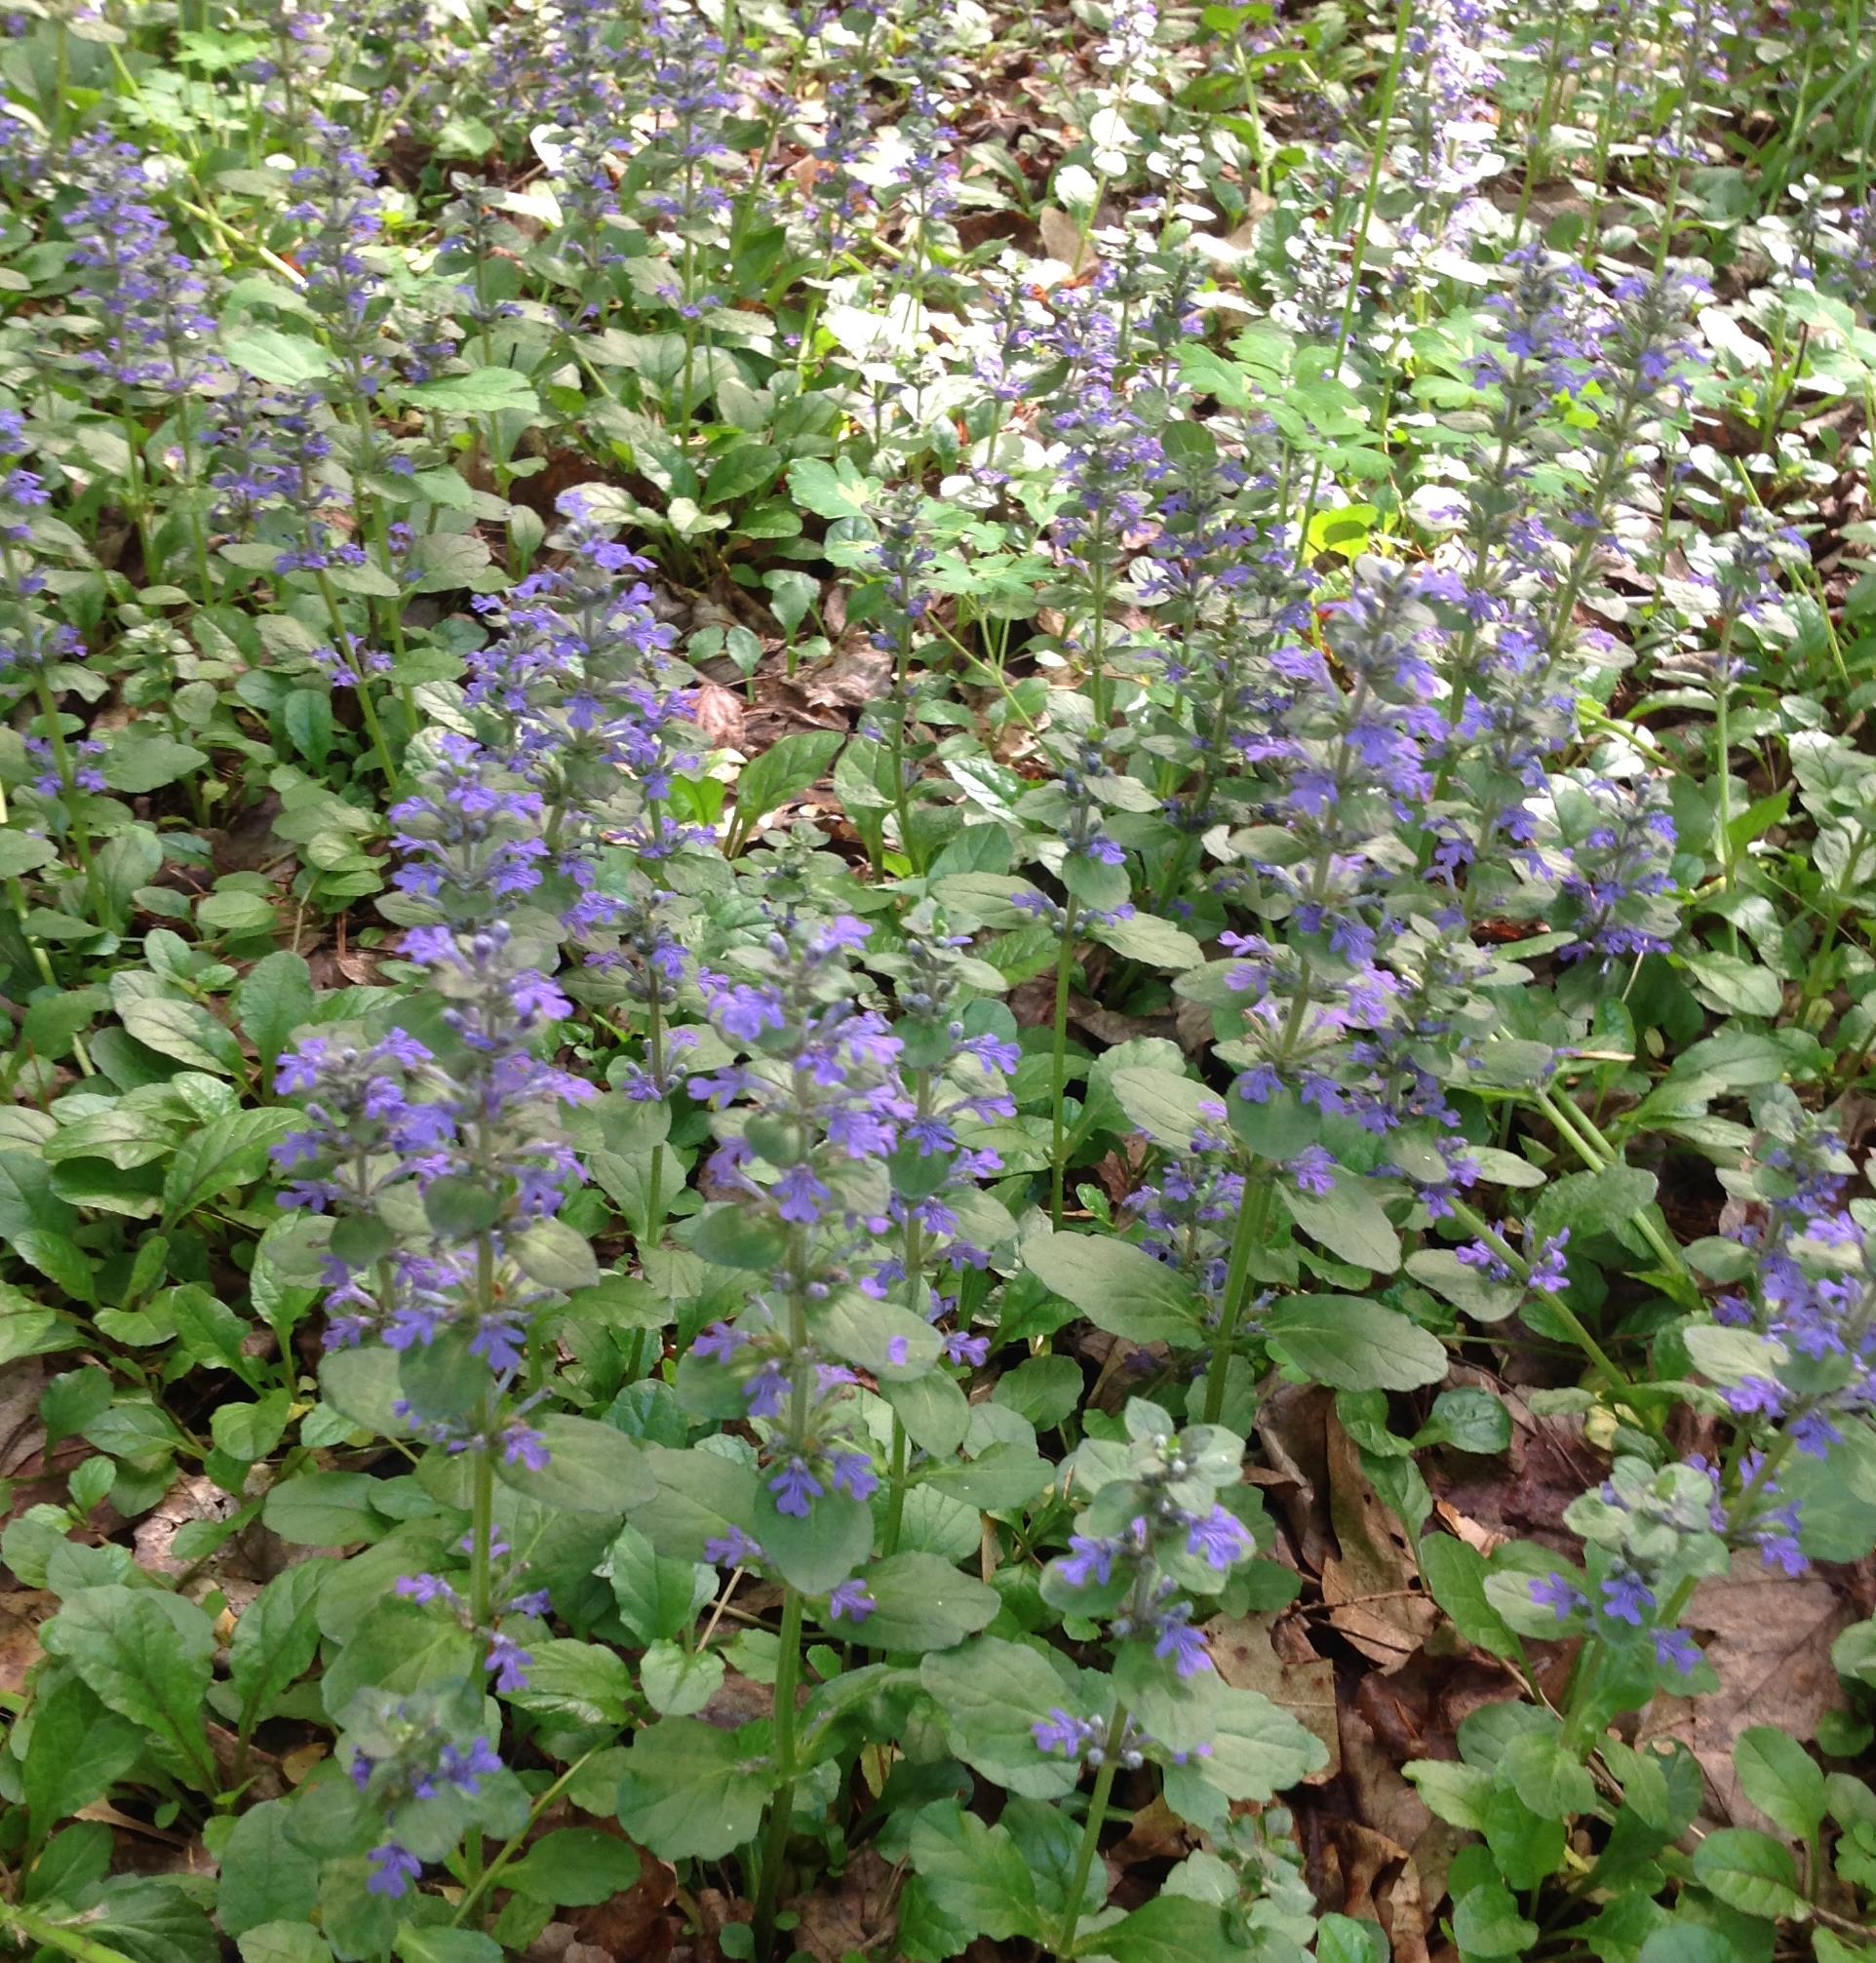
Bugleweed in the orchard
~
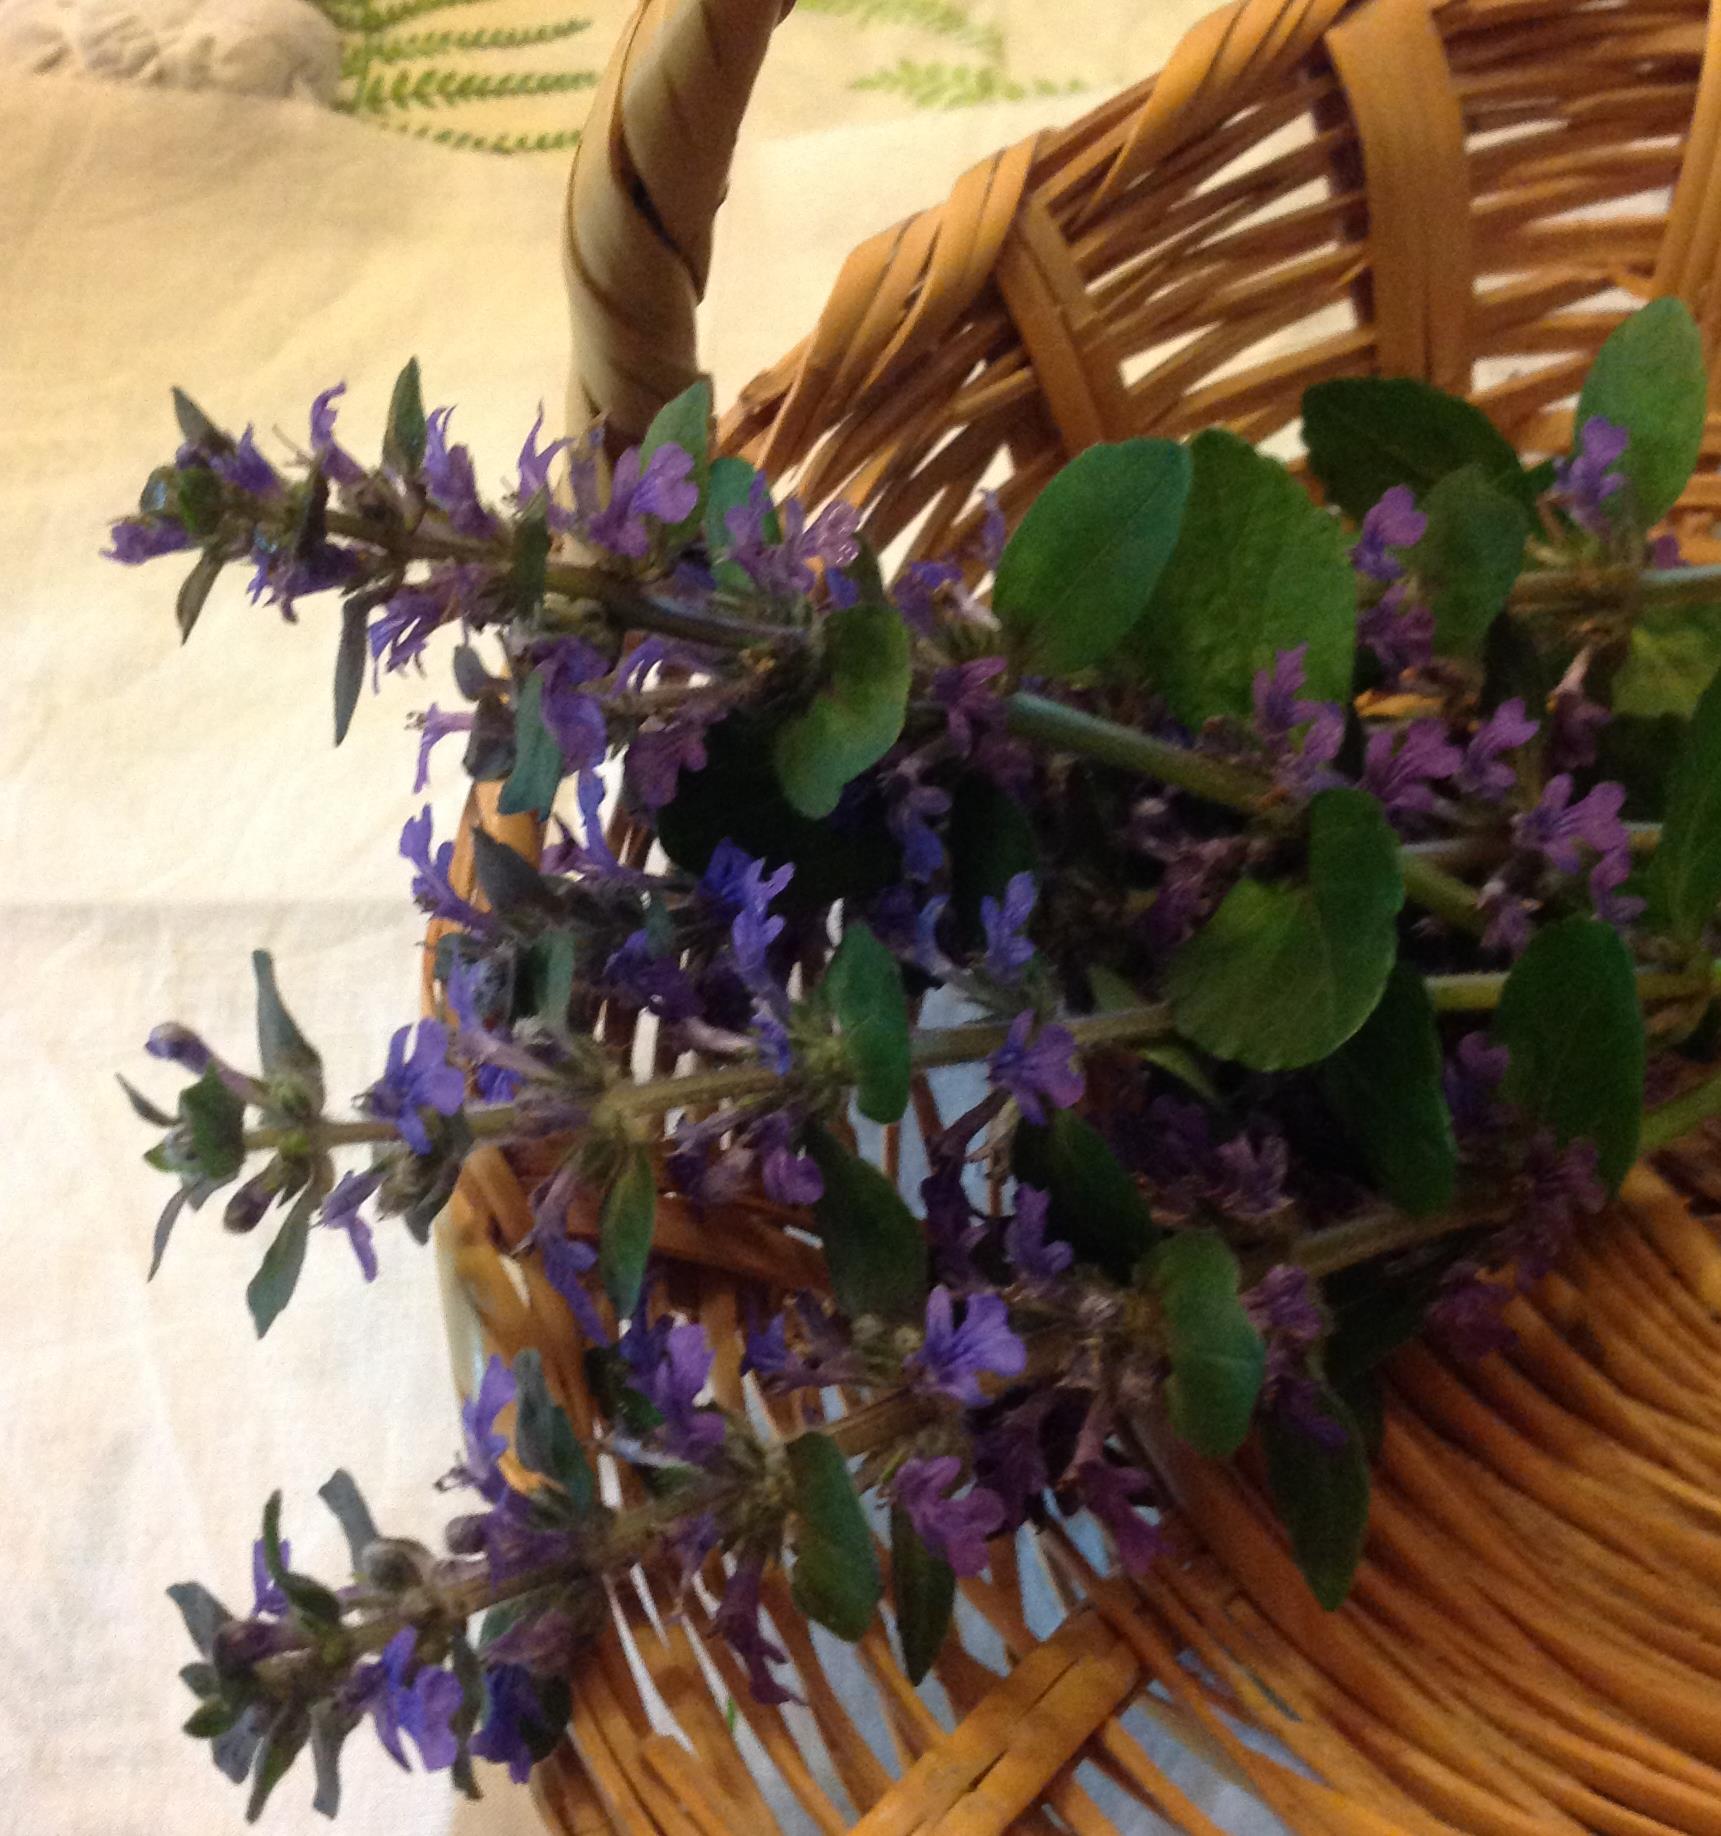
basket of Bugleweed
~
I only used small samples of cloth … my idea is to use these ‘patches’ to make a little quilt to show the results of my ‘colour harvest’. I arranged a few of the flowers, both petals and leaves, inside the cloth …
~

Forget-me-nots on cotton
~

Lupin petals and leaves on cotton
~
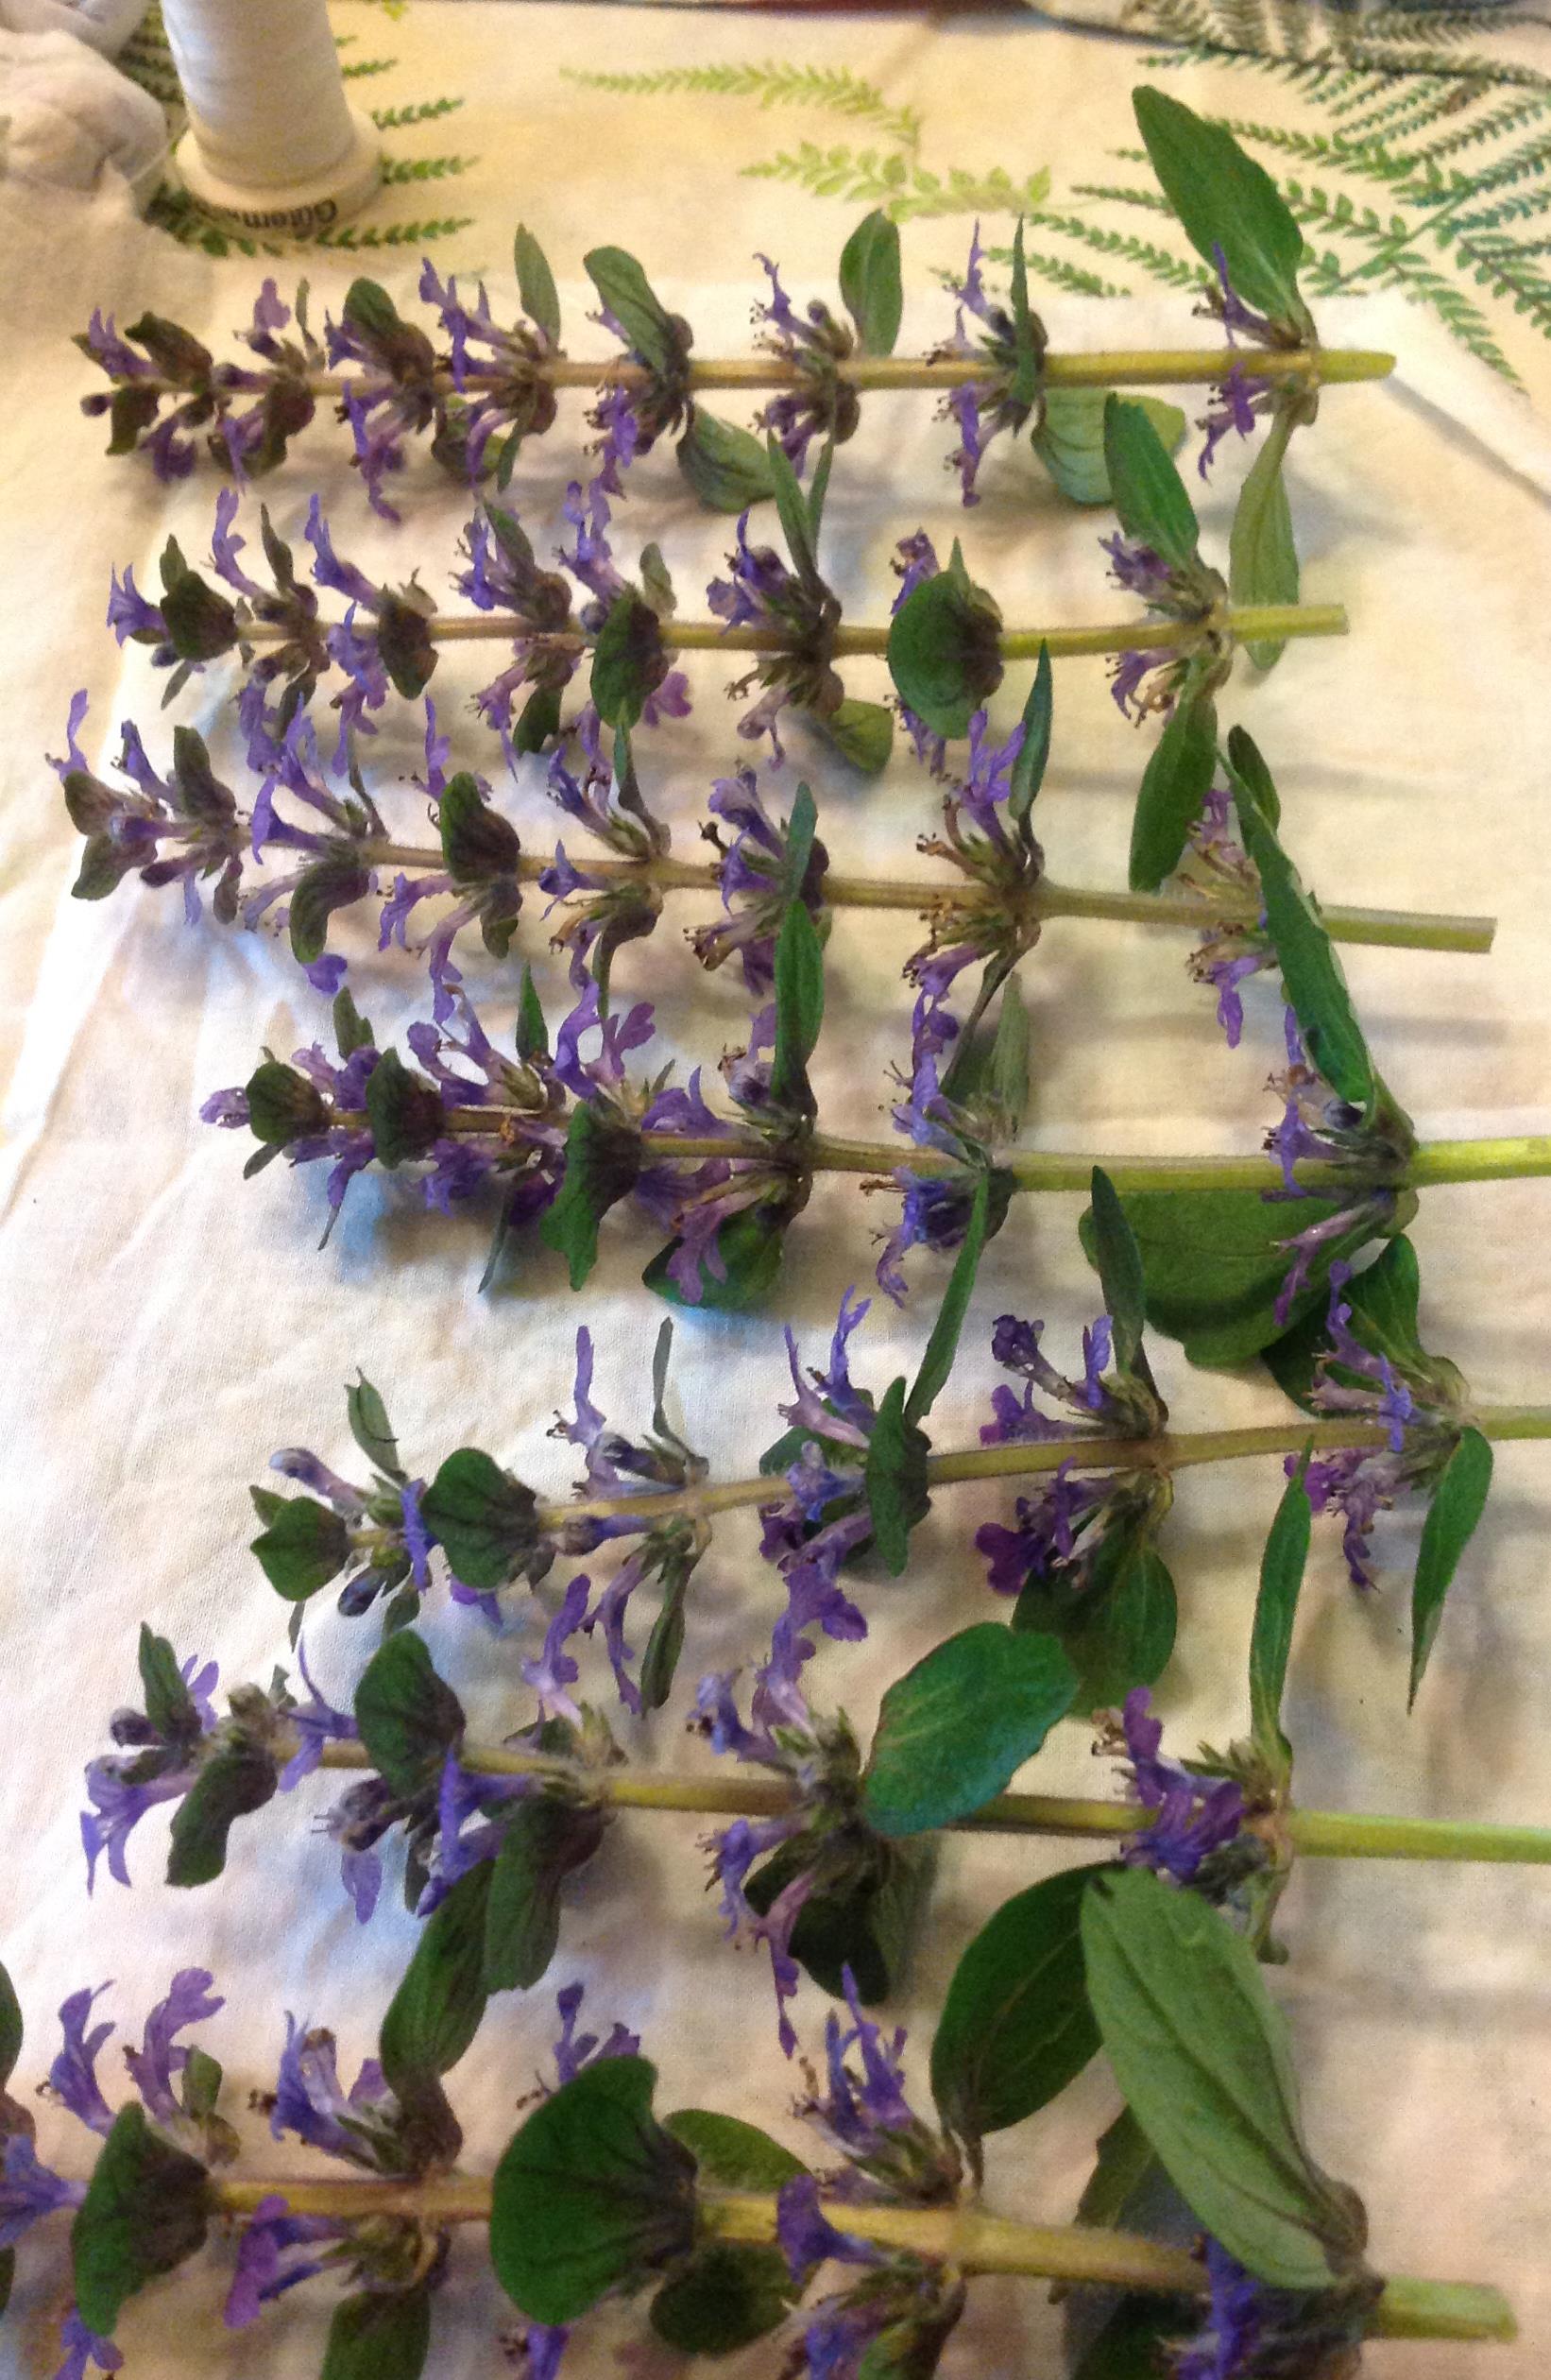
Bugleweed on cotton
~
Then I folded the cloth in half, enclosing the flowers like a sandwich …
~

flowers folded in cotton
~
and rolled the cloth up tightly …
~

rolling the bundle tightly
~
and tied it with cotton thread …
~

flower and cotton bundles
~
I put my bundles in a wire basket and steamed them for an hour …
~
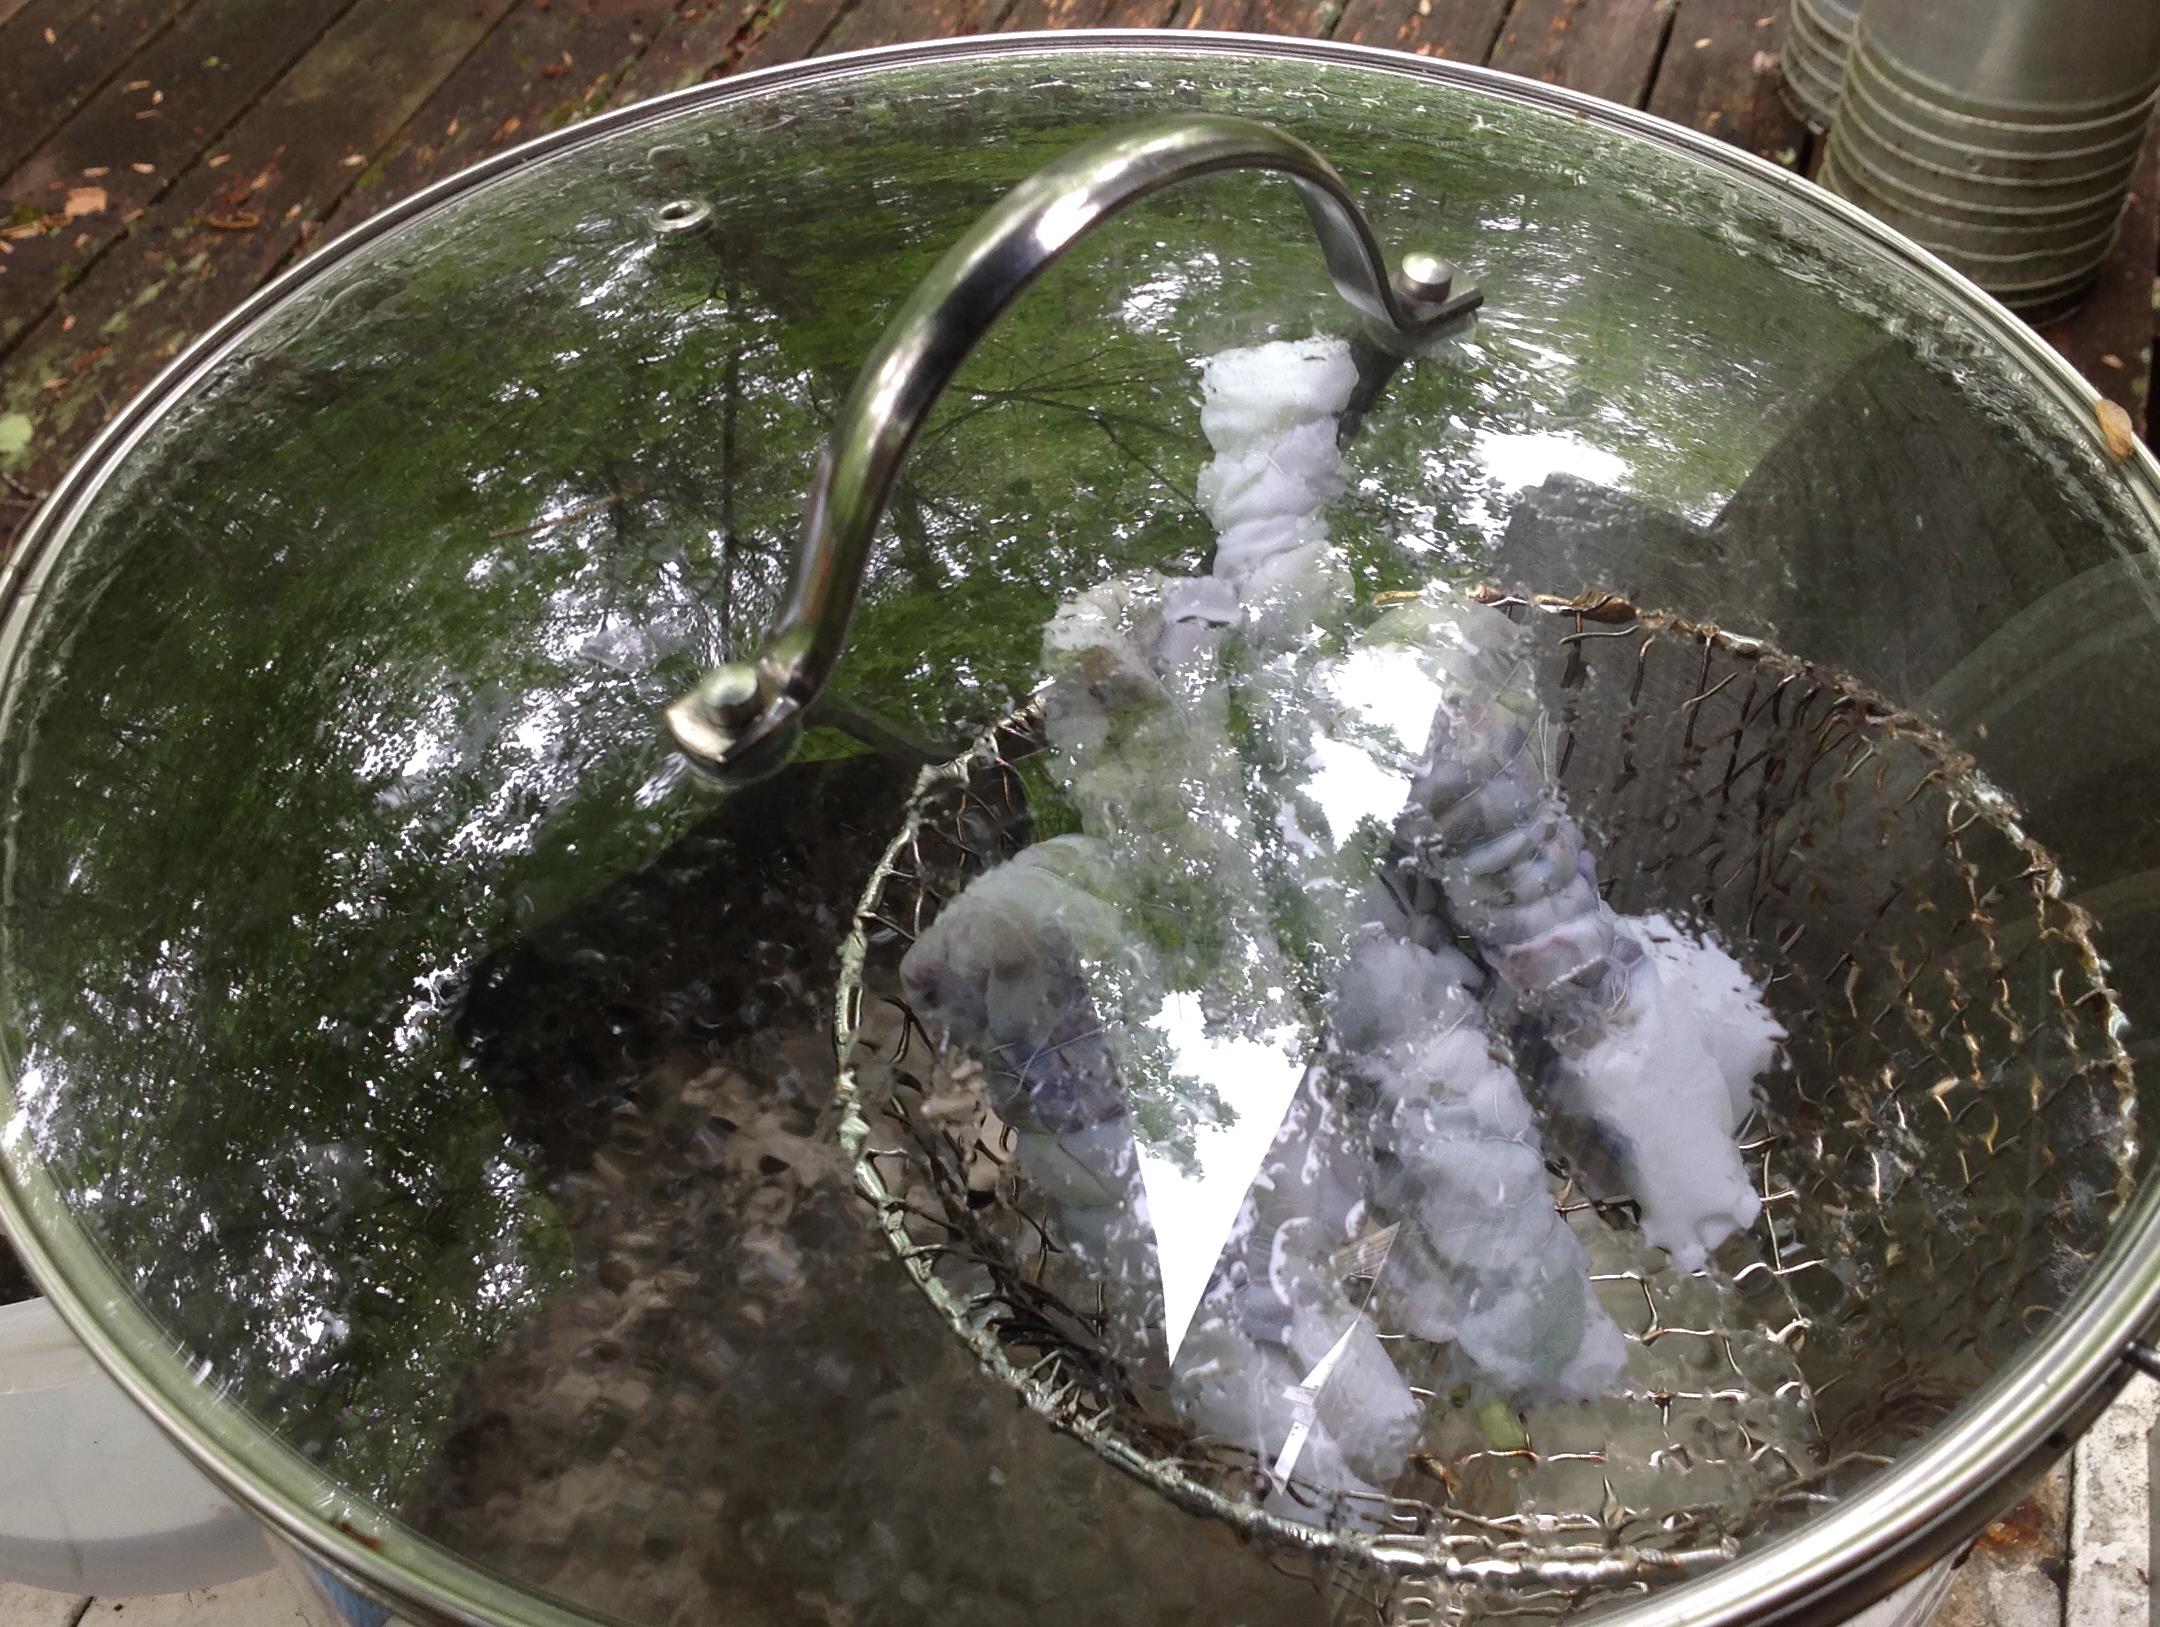
flower and cotton bundles steaming (as usual I have thrown in a bit of woods and sky)
~
After cooling, I opened the bundles, discarded the leaves and flowers, and rinsed the cloth. I was quite pleased with the results. After ironing, I have a pale array of colour. The Bugleweed left a definite lime green. The Lupin a more indefinite green and pale violet. The Forget-me-nots left a faint violet-grey.
~

pale colour
~
I did not get the flower and leaf impressions I expected, but I will keep trying. There are so many variables, steaming time and ‘unbundling’ time among them. I do hope to see that lovely lime green again!!!
~
Copyright 2014 Jane Tims
comforting Comfrey brown
As I try using various plants as a source of dye, I am realising how many shades of brown there are !!!
~
Over the weekend, I did a dye vat of Comfrey. Comfrey (Symphytum officinale) is a flowering plant often found in older gardens. It is a useful plant for gardeners … as a fertilizer, it contributes impressive amounts of nitrogen and potassium. As a compost component, it adds heat and moisture, and helps to speed up the composting process. In the past, Comfrey was recommended as a tea and a medicinal. However, the plant contains alkaloids. Taken internally, these can cause severe damage to the liver and, in Canada, the sale of products containing Comfrey is prohibited.
~
Comfrey grows in large clumps of linear leaves, up to a meter tall. Its stately foliage provides a great backdrop for smaller plants. Later in the season, it will produce curved clusters of bluish-purple flowers.
~
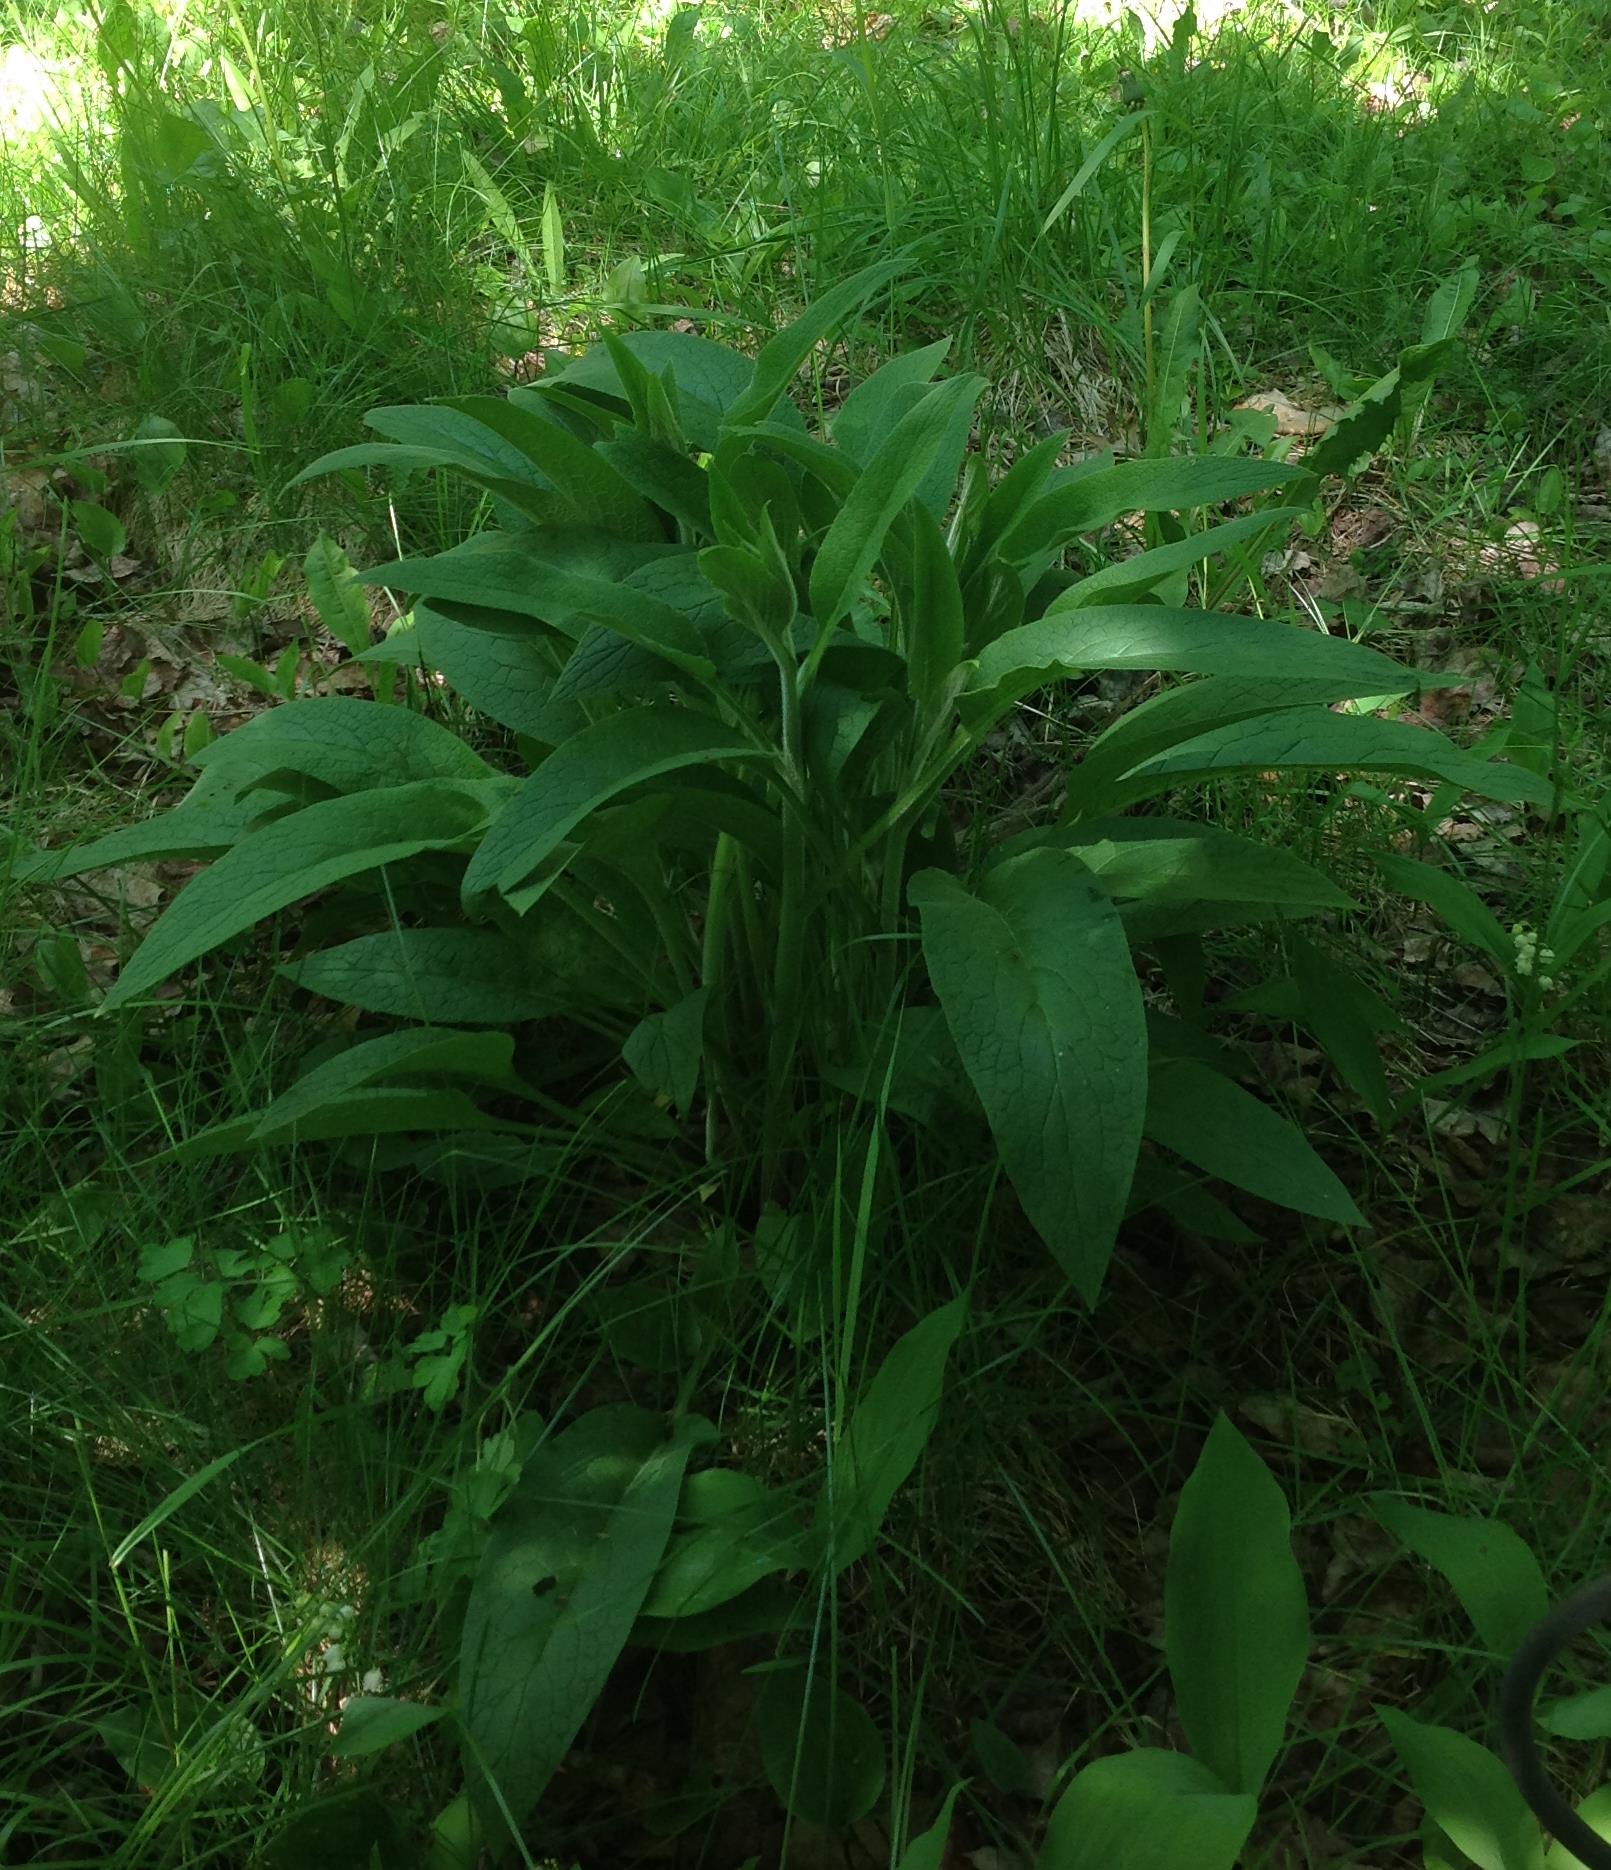
Comfrey in my garden
~
The underside of each Comfrey leaf is a maze of raised veins …
~
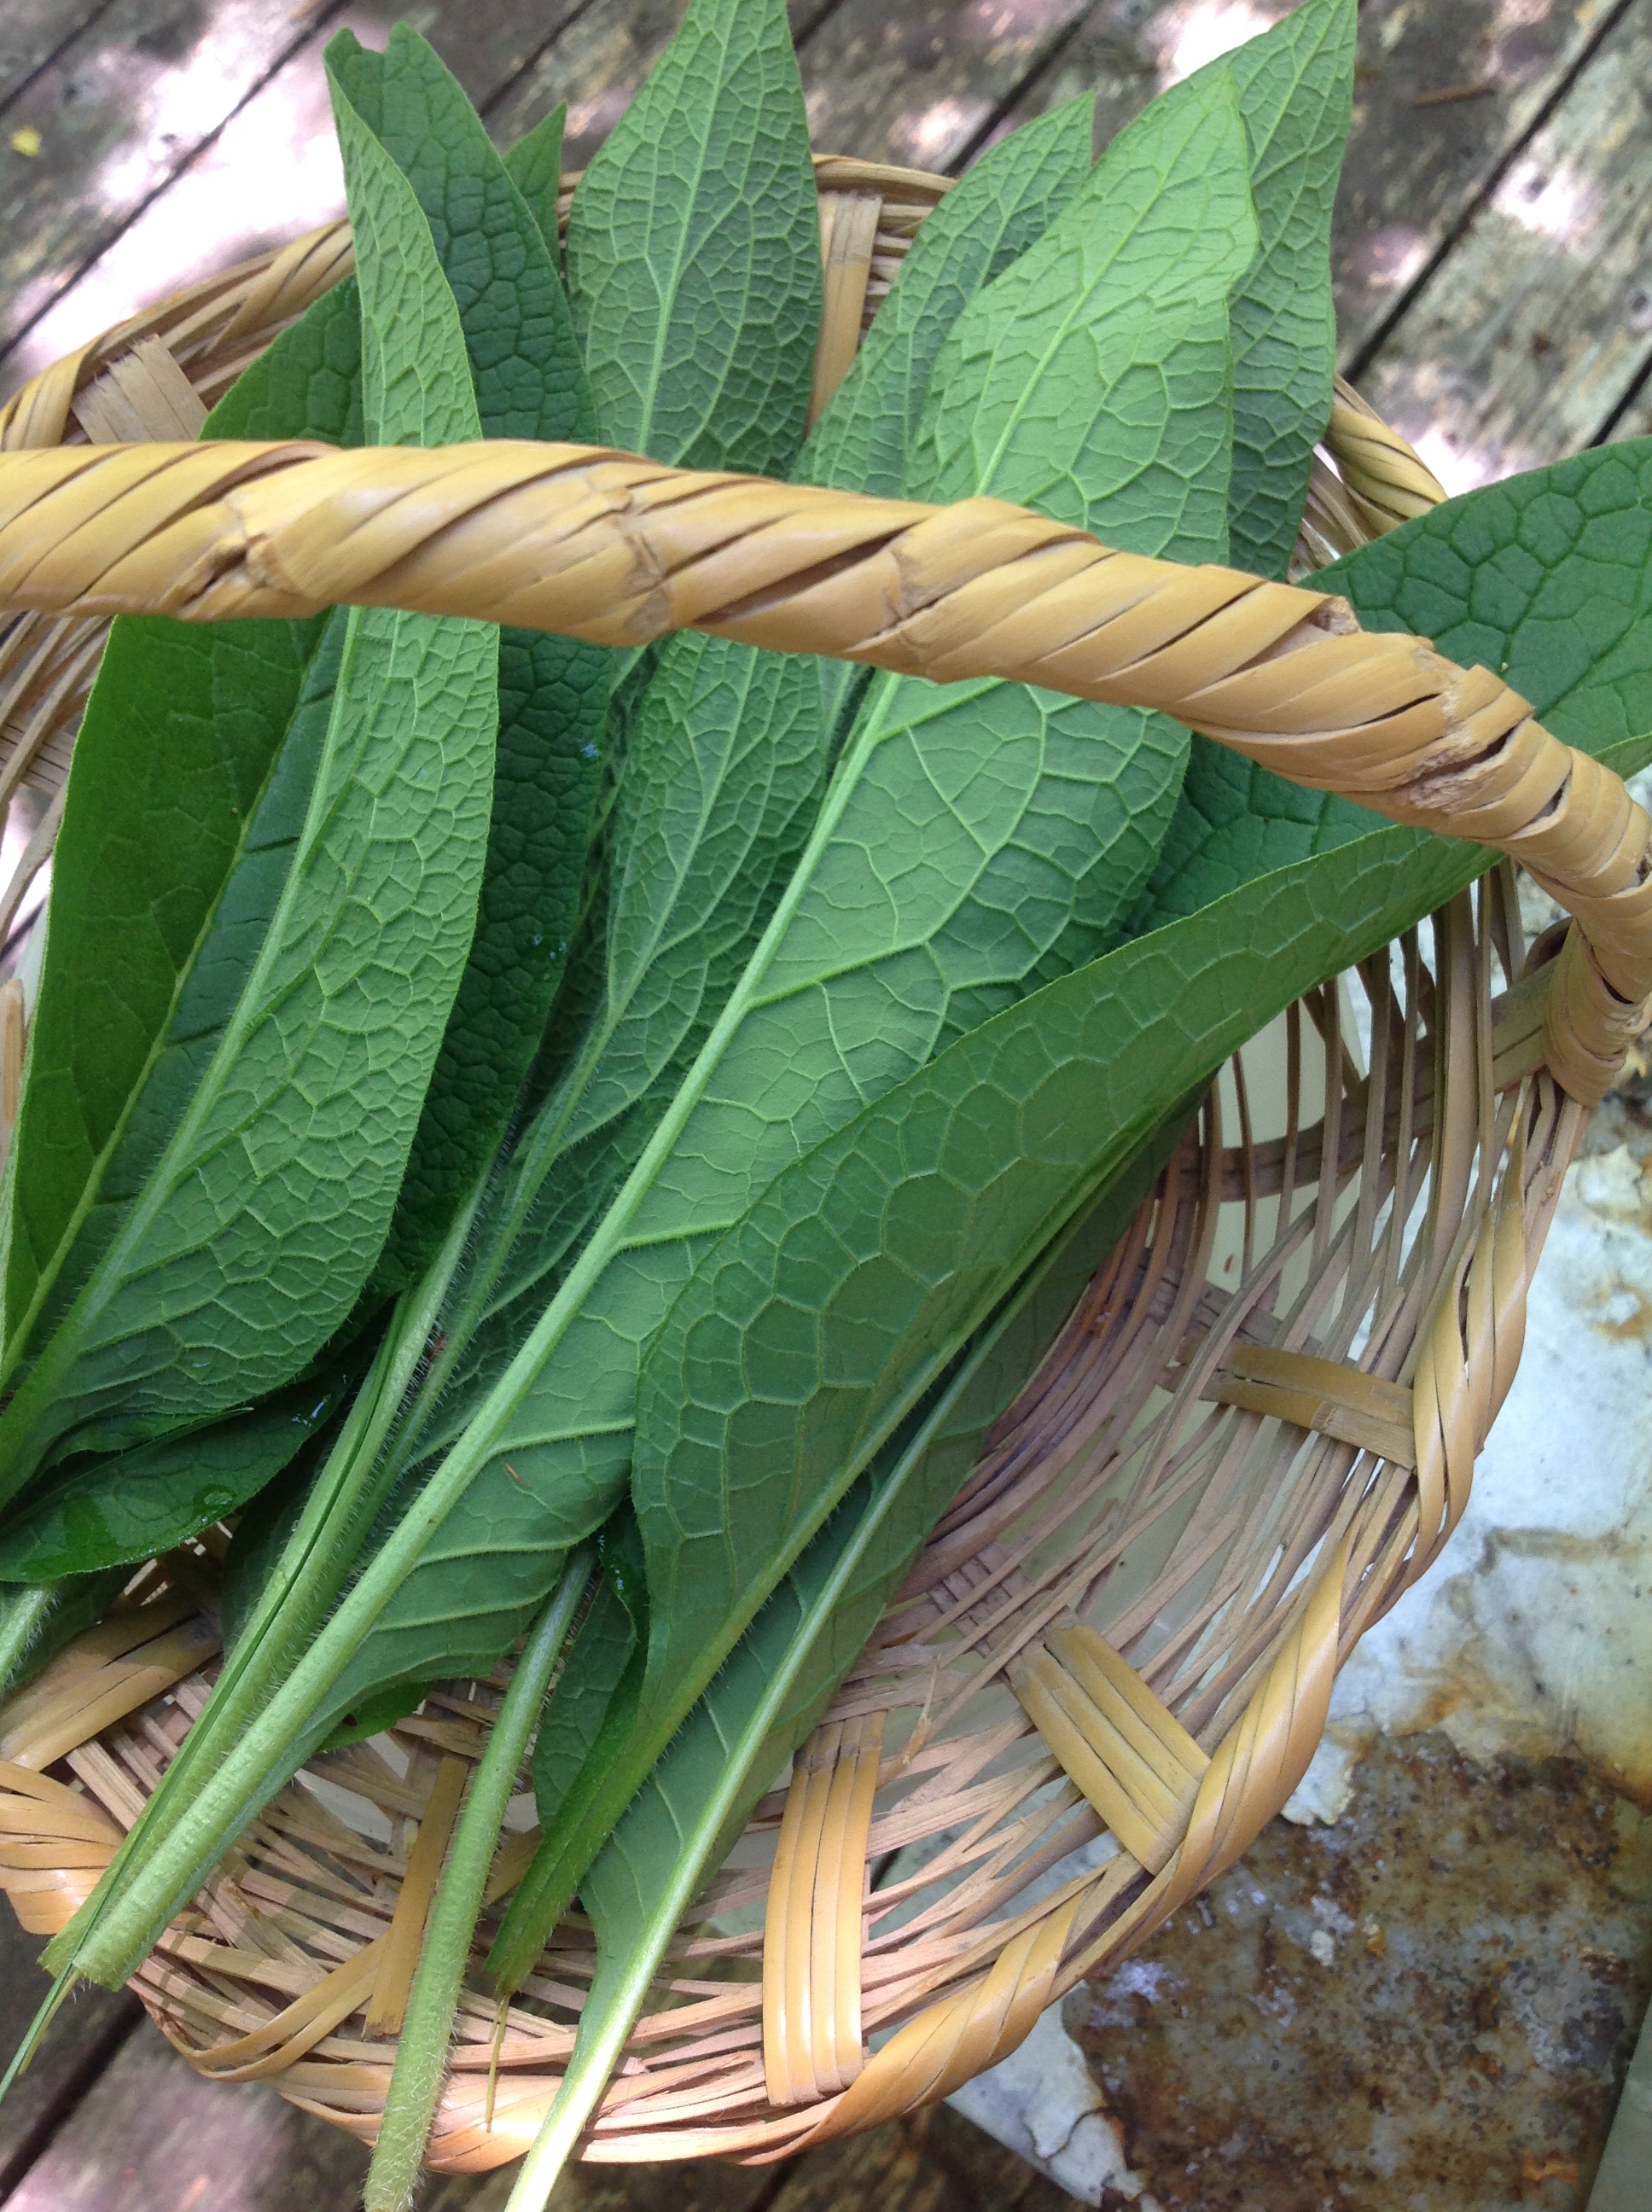
leaves of Comfrey, showing the veins on the underside of each leaf
~
To make the dye, I added the leaves, coarsely chopped, to 6 liters of water. I couldn’t resist throwing in my rusty square nail, to add a touch of iron to the mix …
~

Comfrey leaves in water, cut up and ready for the boil
~
After boiling for an hour, I had a pale apricot-coloured liquid …
~

pale apricot colour of the Comfrey dye
~
I strained and discarded the leaves (in my compost of course) and allowed the liquid to cool. Then I added some of my wool roving, pre-treated with alum, and simmered the wool for about an hour.
~
The result was yet another shade of brown, so similar, yet so different from the browns I obtained from Alder, Old Man’s Beard lichen and Tansy …
~

various dyes on wool roving (left to right): Alder bark, Old Man’s Beard lichen, Comfrey, Tansy and a glimpse of Beet
~
The Comfrey brown is a brown of the forest, without the orange or yellow undertones of the other browns I have made. This is the brown of the wild rabbit I saw in our driveway last week. It is the buff brown of the heads of Pine Siskins visiting our bird feeders in winter. This brown reminds me of soft mitten wool and caterpillar cocoons. From Comfrey comes a very comforting brown.
~
Although I could use my wool roving ‘as is’ in my weaving, I have decided to spin the wool. First, of course, I have to learn to spin. A maple drop spindle should be waiting in my mailbox later in the week. So many projects … good thing the days are getting longer !!!
~
Copyright 2014 Jane Tims
harvesting colour – soaking the bark
Birch bark is on my top ten list of natural phenomena. Just the outer covering of a tree, but for me it has so many associations.
~

~
Walking in a stand of birch is an experience like no other. The trees are ghosts, wavering and pale, unable to speak but capable of subtle quiet communication. In the slightest breeze, they whisper in short syllables, dry murmurings I cannot quite understand.
~
Birch bark is magical. Unravelled from its tree by a little tugging of the wind. Like paper, in thin dry sheets. Covered in unreadable script. You know removing the bark could be dangerous for the tree but it lures you, encourages you to reach out and strip it away in unbroken, unblemished reels.
~
Such a useful tree: birch bark canoes, tinder for a campfire, sweet sap from yellow birch, the wintergreen scent of crushed yellow birch twigs. And now, the promise of colour.
~
Using bark as dyestuff requires time rather than heat. Jenny Dean (Wild Colour, New York, 2010) suggests soaking the bark for days, even weeks to extract the first colour. She says never to boil bark since heat may release tannins and dull any resulting colour. From her book, I expect birch bark to yield colours ranging from purple to pinkish-red.
~

birch bark, donated by my brother-in-law
~
I am so grateful to my brother-in-law for allowing me to use the birch bark he has collected as he works on next winter’s stove-wood supply. I am sure he was saving it for a project of his own.
~

strips of birch bark layered in the dyepot
~
To start, I stripped the sheets of bark into narrow pieces and set it to soak in cool water in my big dye pot.
~

strips of birch bark, set to soak in water
~
I intend to leave it for a month before I take the next step of simmering the bark and dying my wool.
~
~
requesting the favour of a reply
~
these leafless trees
brush against
a linen sky
ink strokes
on rice paper
letters penned
at midnight
~
hidden in the hollow
heart of an oak
afraid to reach in
to feel only
curls of birch bark
desiccated leaves
~
these trees
all seem the same
empty envelopes
parchment ghosts
~
branches tangled
messages
lost
~
black spruce scribbled on sky
~
~
Poem previously posted 19/08/2011
Copyright 2014 Jane Tims
harvesting colour – the yellow of tansy
Since last September, a small bunch of Tansy (Tanacetum vulgare L.) has hung on the line in my kitchen. Now, with a small batch of alum-treated wool, I am able to see what colour will come from the dried and lifeless flowers.
~

dried Tansy, collected in 2013
~
To extract the dye, I crumbled the flowers and leaves and soaked them in water overnight. Then I added more water and brought them slowly to a boil in my big, well-marked dyepot (marked so I will not use it for food by mistake). After an hour’s boil, I let the dye cool and strained the liquid. The result was a clear, amber-yellow dye.
~

dye from Tansy and water, simmered
~
To dye the wool, I added water, immersed a shank of alum-treated wool and slowly brought the dye to a simmer – one hour and then the long process of cooling (I am realising that dyeing is more about waiting than doing!!!!!!!!!!!). The result is a green-yellow, almost exactly the colour shown for Tansy-dyed fibre in Jenny Dean’s book (Wild Color) !!! My photo is not clear because the drying line insists on vibrating but you can clearly see the colours – left to right – the brown of the lichen-dyed wool from a few days ago), the green-yellow of the Tansy-dyed wool and the tan of the undyed wool.
~

three shanks of wool, dyed with the lichen Usnea (left), dyed with Tansy (center) and raw wool (treated with alum)
~
I wrote my poem to the heady yet sleepy smells of the Tansy boiling in its dye pot. I remembered the living Tansy, growing in the ditch last summer, each flower cluster hiding a sleepy bumblebee that had to be shaken from its resting. I was also reminded in my reading that Tansy was used so often at funerals in New England in the 19th century that people associated its smell with death.
~

Tansy in the ditch
~
sleep before dyeing
~
Tanacetum vulgare L. – Common Tansy, Mugwort, Bitter Buttons
~
Bitter Buttons hover in the dye pot
simmering on the kitchen stove
drowsy scent of camomile
camphor and rosemary
liquid amber, saffron sallow
jaundiced pale of Tansy
reclines in the roadside ditch
each flat-topped cluster
hibernaculum
for a furred and yellow
unconcerned
and mellow
bumblebee
~
~
Copyright 2014 Jane Tims
harvesting colour – beautiful brown!
I will never see brown with the same eyes again!
~
Today I finished a batch of alum-treated raw wool and I was ready to try my first experiment with dyeing animal fibre. The alum, you will remember, is a mordant, added to the fibre to increase its colour-fast and light-fast qualities. In some cases, it also makes the colours brighter.
~
Remember my gathering of Old Man’s Beard lichen? (https://nichepoetryandprose.wordpress.com/2014/03/26/colour-on-the-snow/)
~

jar with Old Man’s Beard lichen, water and ammonia
~
The lichen has been ‘fermenting’ in ammonia about a week and developed a lovely brown colour with tones of orange, reminiscent of root beer.
~

a sample of the dye obtained from the Old Man’s Beard lichen
~
I sieved out the lichen and added the dye to my dye pot. I added a little vinegar to neutralize the alkalinity since basic solutions can harm the wool. I put about one once of the alum-treated wool into the dye pot and added water, to cover the wool. Then I increased the temperature very, very slowly since sudden changes in temperature can damage the texture and weaken the fibres. I left the dye pot on simmer for about an hour and then left it to cool slowly. Now the wool is drying on the line in my dining room.
~
The result may seem like an unimpressive brown, but to me it is the most wonderful brown in the world. Reminds me of the ice cream in a root beer float! My first effort at dyeing wool, and obtained from a lichen of the palest green. I feel a poem stirring!
~

to the right, my lichen-dyed wool, and to the left, my un-dyed alum-treated wool
~
Copyright 2014 Jane Tims
lichens on the snow
As you may know, we are still under a blanket of snow here in New Brunswick. And later today a Nor’easter is predicted to bring another 30 cm. Not the best place for collecting plants as dyestuff. But, as I always find – nature provides!
Our windy weather this past week has dropped lots of Old Man’s Beard lichen (Usnea subfloridana) along our driveway. These lichens grow in the maple and spruce trees on our property but usually they grow too high to reach. I was able to collect quite a handful.
And now my experiment begins.
~

~
Lichens have been used for centuries as a source of dye. The Roccella species, for example, makes a purple dye called orchil. I may not get purple from my Usnea lichens, but I am ‘dyeing’ to try!
~

~
The typical extraction process for lichens is called ‘ammonia fermentation’ – soaking the lichens in ammonia for two or three weeks. Lichens also yield dye with boiling. I have decided to try the ammonia method first, although I will not use urine as was traditionally done!
~

~
So I stuffed the Usnea lichens into a canning jar, added water and a tablespoon of ammonia, labelled the jar and put it on the shelf.
~

~
And now we wait. I’ll let you know what, if any, colour develops. I feel like a housewife of old, wanting some dyestuff to add colour to my life, willing to make do with what is available.
~
Copyright 2014 Jane Tims
harvesting colour – gathering more materials
As I get ready for my first experiences with dyeing, I have thought about the materials I will be using. I don’t want to get too complicated and sabotage my real aim, the poetry I will write. I will try to keep it simple and generate lots of fuel for my writing.
Textile fibre: As I explained in my previous post on ‘harvesting colour’, I will use both plant (three old cotton shirts) and animal fibres (unspun wool and silk fabric).
Source water: I will be using our well water – slightly acidic and high in several minerals. Our water is so acid, it reacts with the copper piping in our house to stain all the drains in our house a copper sulphate blue. I know that the acidity of the source water influences the colour outcome. For some of the plant dyes I will use (for example madder), I will want to adjust the water acidity to get a full range of possible colours.
during our problems with our pump and well in 2013, we missed our tasty well water
~
Utensils: Last fall I bought myself a large stainless steel pot for my dyeing projects since I know it is important to keep my dying utensils separate from our cookware. I also have my Mother-in-law’s copper teapot if I want to add some ‘copper kettle’ to my dye projects (copper is a mordant, an addition that helps keep textiles colourfast).
~

my mother-in-law’s copper kettle – since my husband doubts it is solid copper, I may have to add some copper pennies to get the mordant effect of copper
~
Plant material: Even in winter, I have access to many plant materials for dying. I have various flower petals and other plant material from my various botanizing adventures. The drying line in my kitchen has a bouquet of tansy gathered last fall and a net bag of onion peelings I have collected since Christmas. I have acorns collected last fall and, outside, access to the bark of various trees, including birch (I am anxious to try this since I understand birch bark can dye in hues of red). In my freezer, I have frozen berries, including a tub of red currents picked by my Mom over ten years ago – I plan to use her berries to dye material for my weaving, after I have gained a little experience. As for in-season plants, I know my husband is looking forward to being dragged all over the countryside in search of various kinds of plants (he was a very helpful participant in my ‘growing and gathering’ project.
~

oak leaves with a cluster of acorns
~
For next Friday’s ‘harvesting colour’ post, I’ll talk a little about mordants and colour modifiers and I think I’ll post my first poem in the series!
~
Copyright 2014 Jane Tims