Archive for April 2014
The Light Never Lies – A Guest Post from Francis Guenette
I am so pleased to welcome a guest in this post. Francis Guenette is a Canadian writer, the author of two books, ‘Disappearing in Plain Sight’ ( FriesenPress, 2013) and ‘The Light Never Lies’ (Huckleberry Haven Publishing, 2014). When I read ‘Disappearing in Plain Sight’, I was drawn to the setting – Crater Lake, the cabins and the garden. In this post, Frances writes about the setting, its origins and how the setting influences the story. Welcome Frances! And thank you so much for your Crater Lake Series of books!
~
 To begin – a synopsis of The Light Never Lies:
As circumstances spiral out of control, Lisa-Marie is desperate to return to Crater Lake. The young girl’s resolve is strengthened when she learns that Justin Roberts is headed there for a summer job at the local sawmill. Her sudden appearance causes turmoil. The mere sight of Lisa-Marie upsets the relationship Liam Collins has with trauma counsellor, Izzy Montgomery. All he wants to do is love Izzy, putter in the garden and mind the chickens. Bethany struggles with her own issues as Beulah hits a brick wall in her efforts to keep the organic bakery and her own life running smoothly. A native elder and a young boy who possesses a rare gift show up seeking family. A mystery writer arrives to rent the guest cabin and a former client returns looking for Izzy’s help. Life is never dull for those who live on the secluded shores of Crater Lake. Set against the backdrop of Northern Vancouver Island, The Light Never Lies is a story of heartbreaking need and desperate measures. People grapple with the loss of cherished ideals to discover that love comes through the unique family ties they create as they go.
~
My first order of business is to extend many thanks to Jane for inviting me over to her blog. Jane thought it would be interesting to hear how architectural and garden elements of the setting for Disappearing in Plain Sight and The Light Never Lies contributed to the story.
~
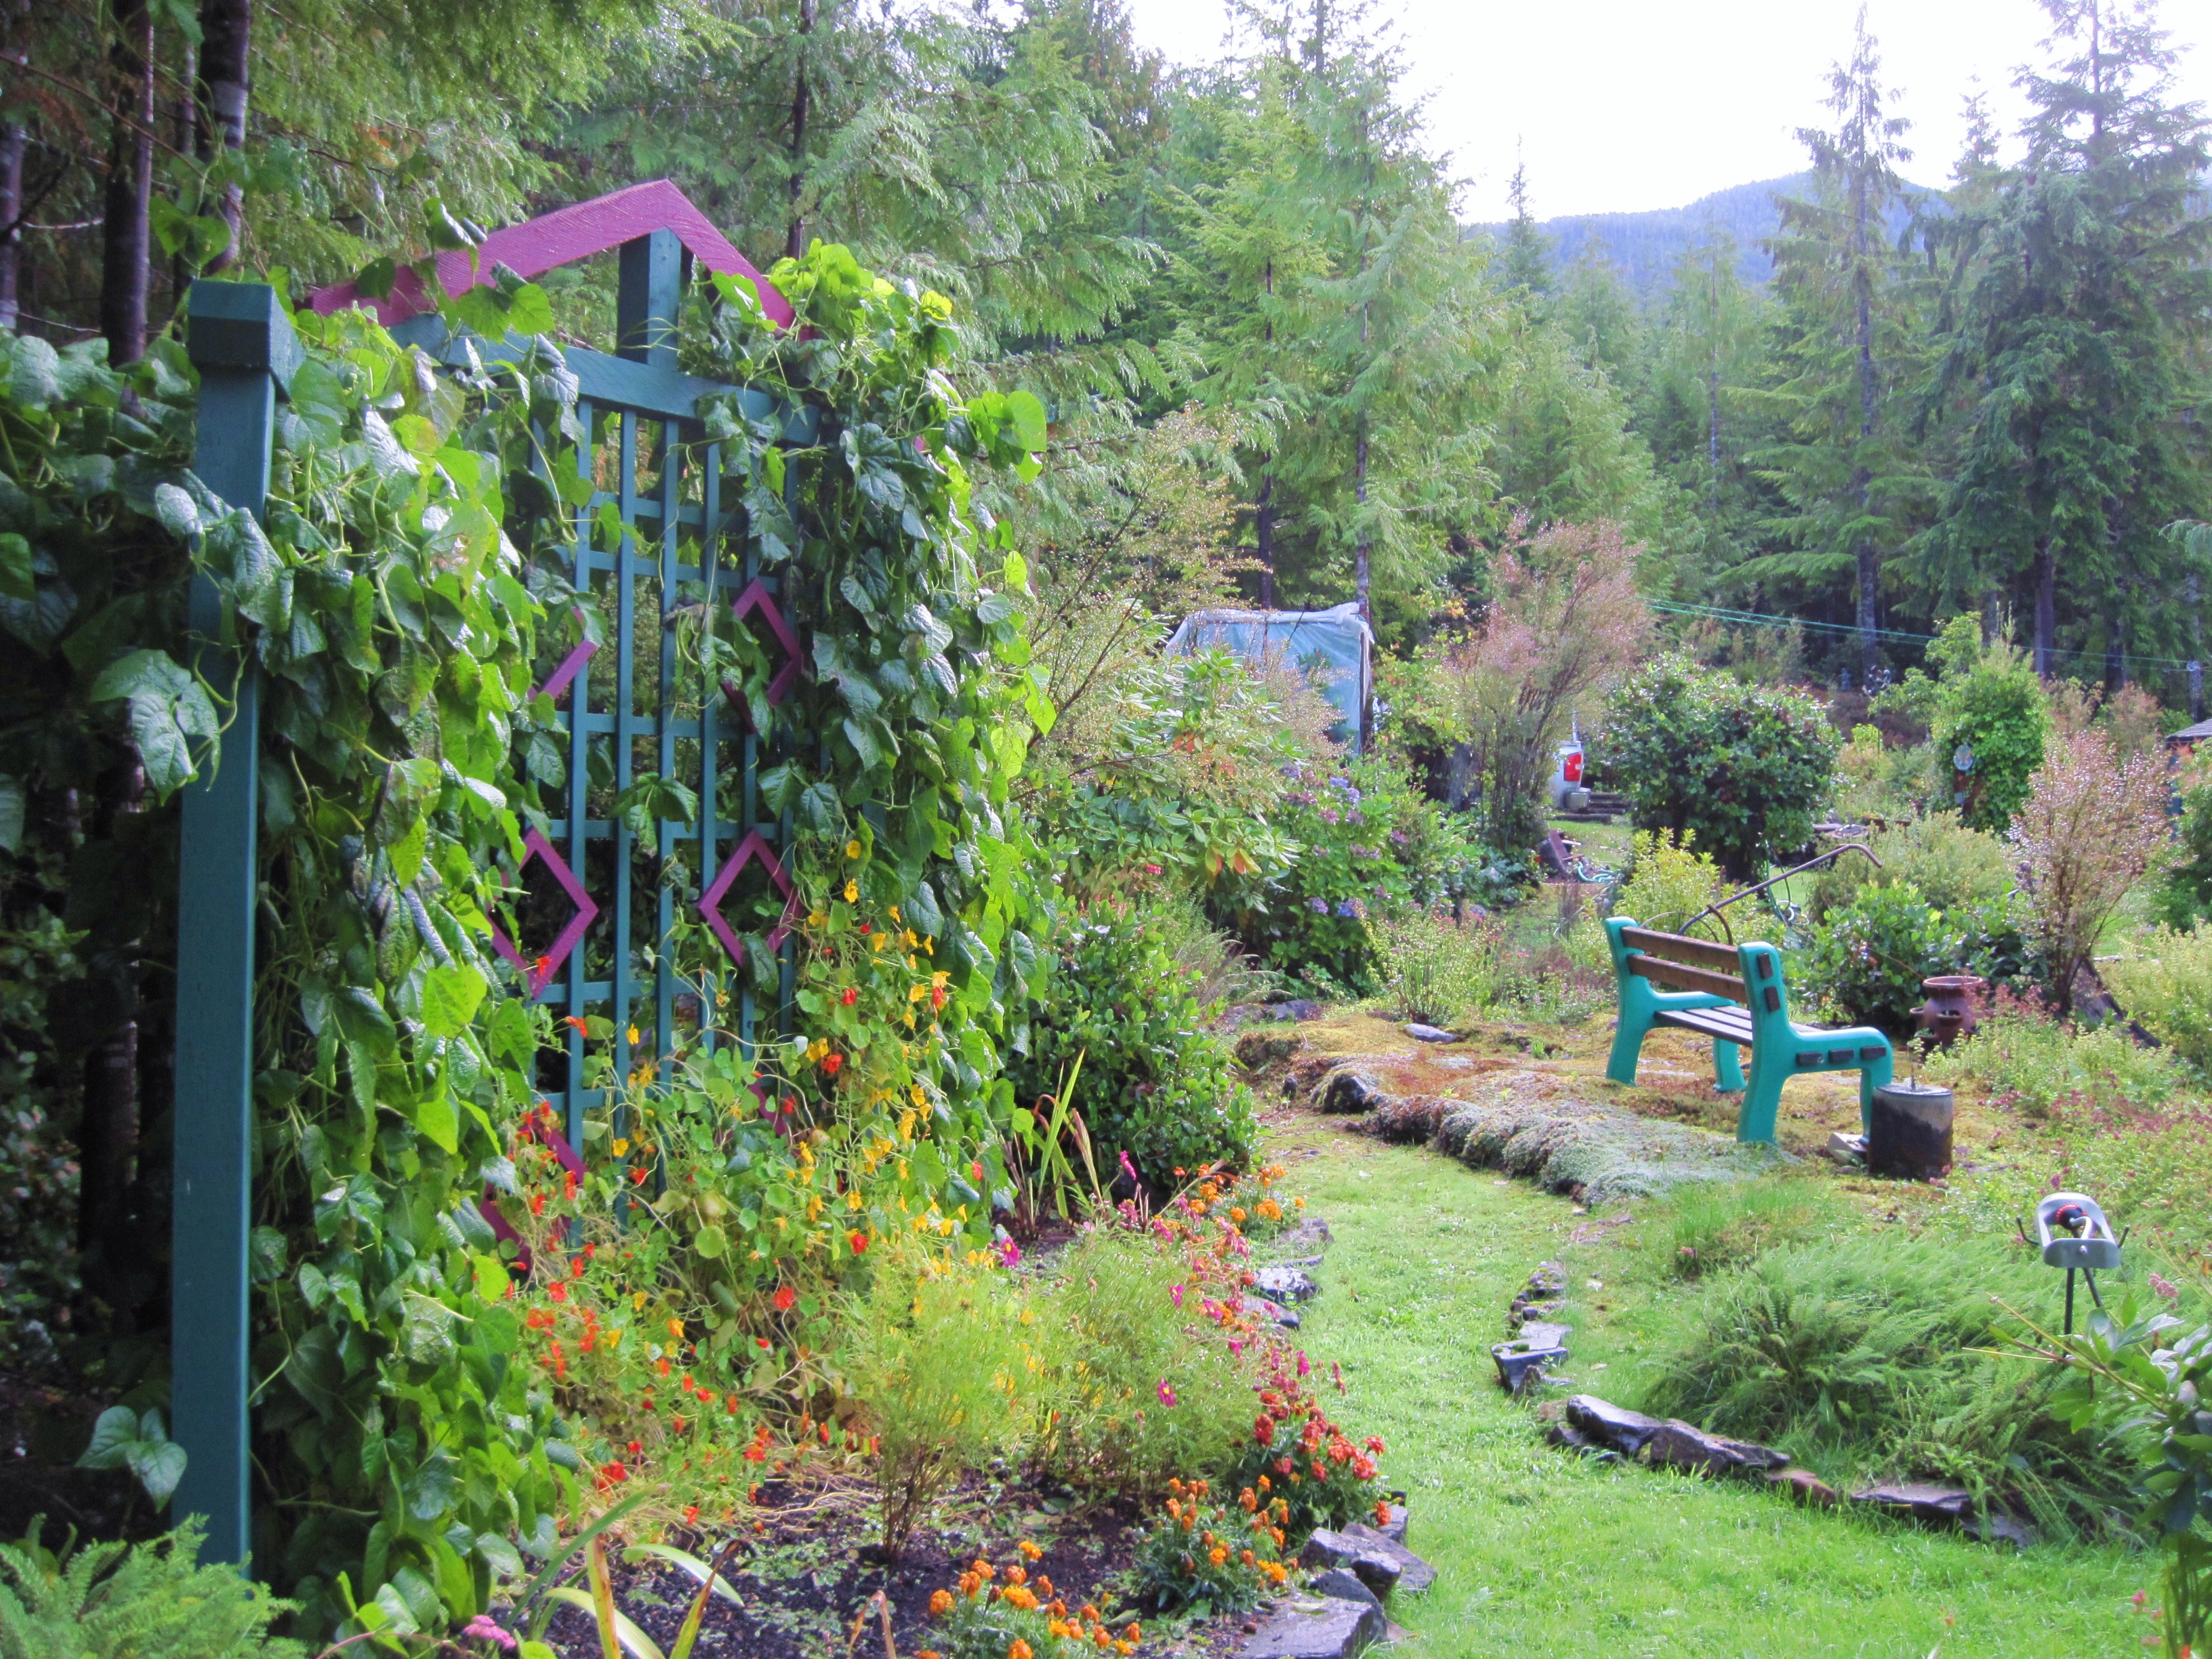
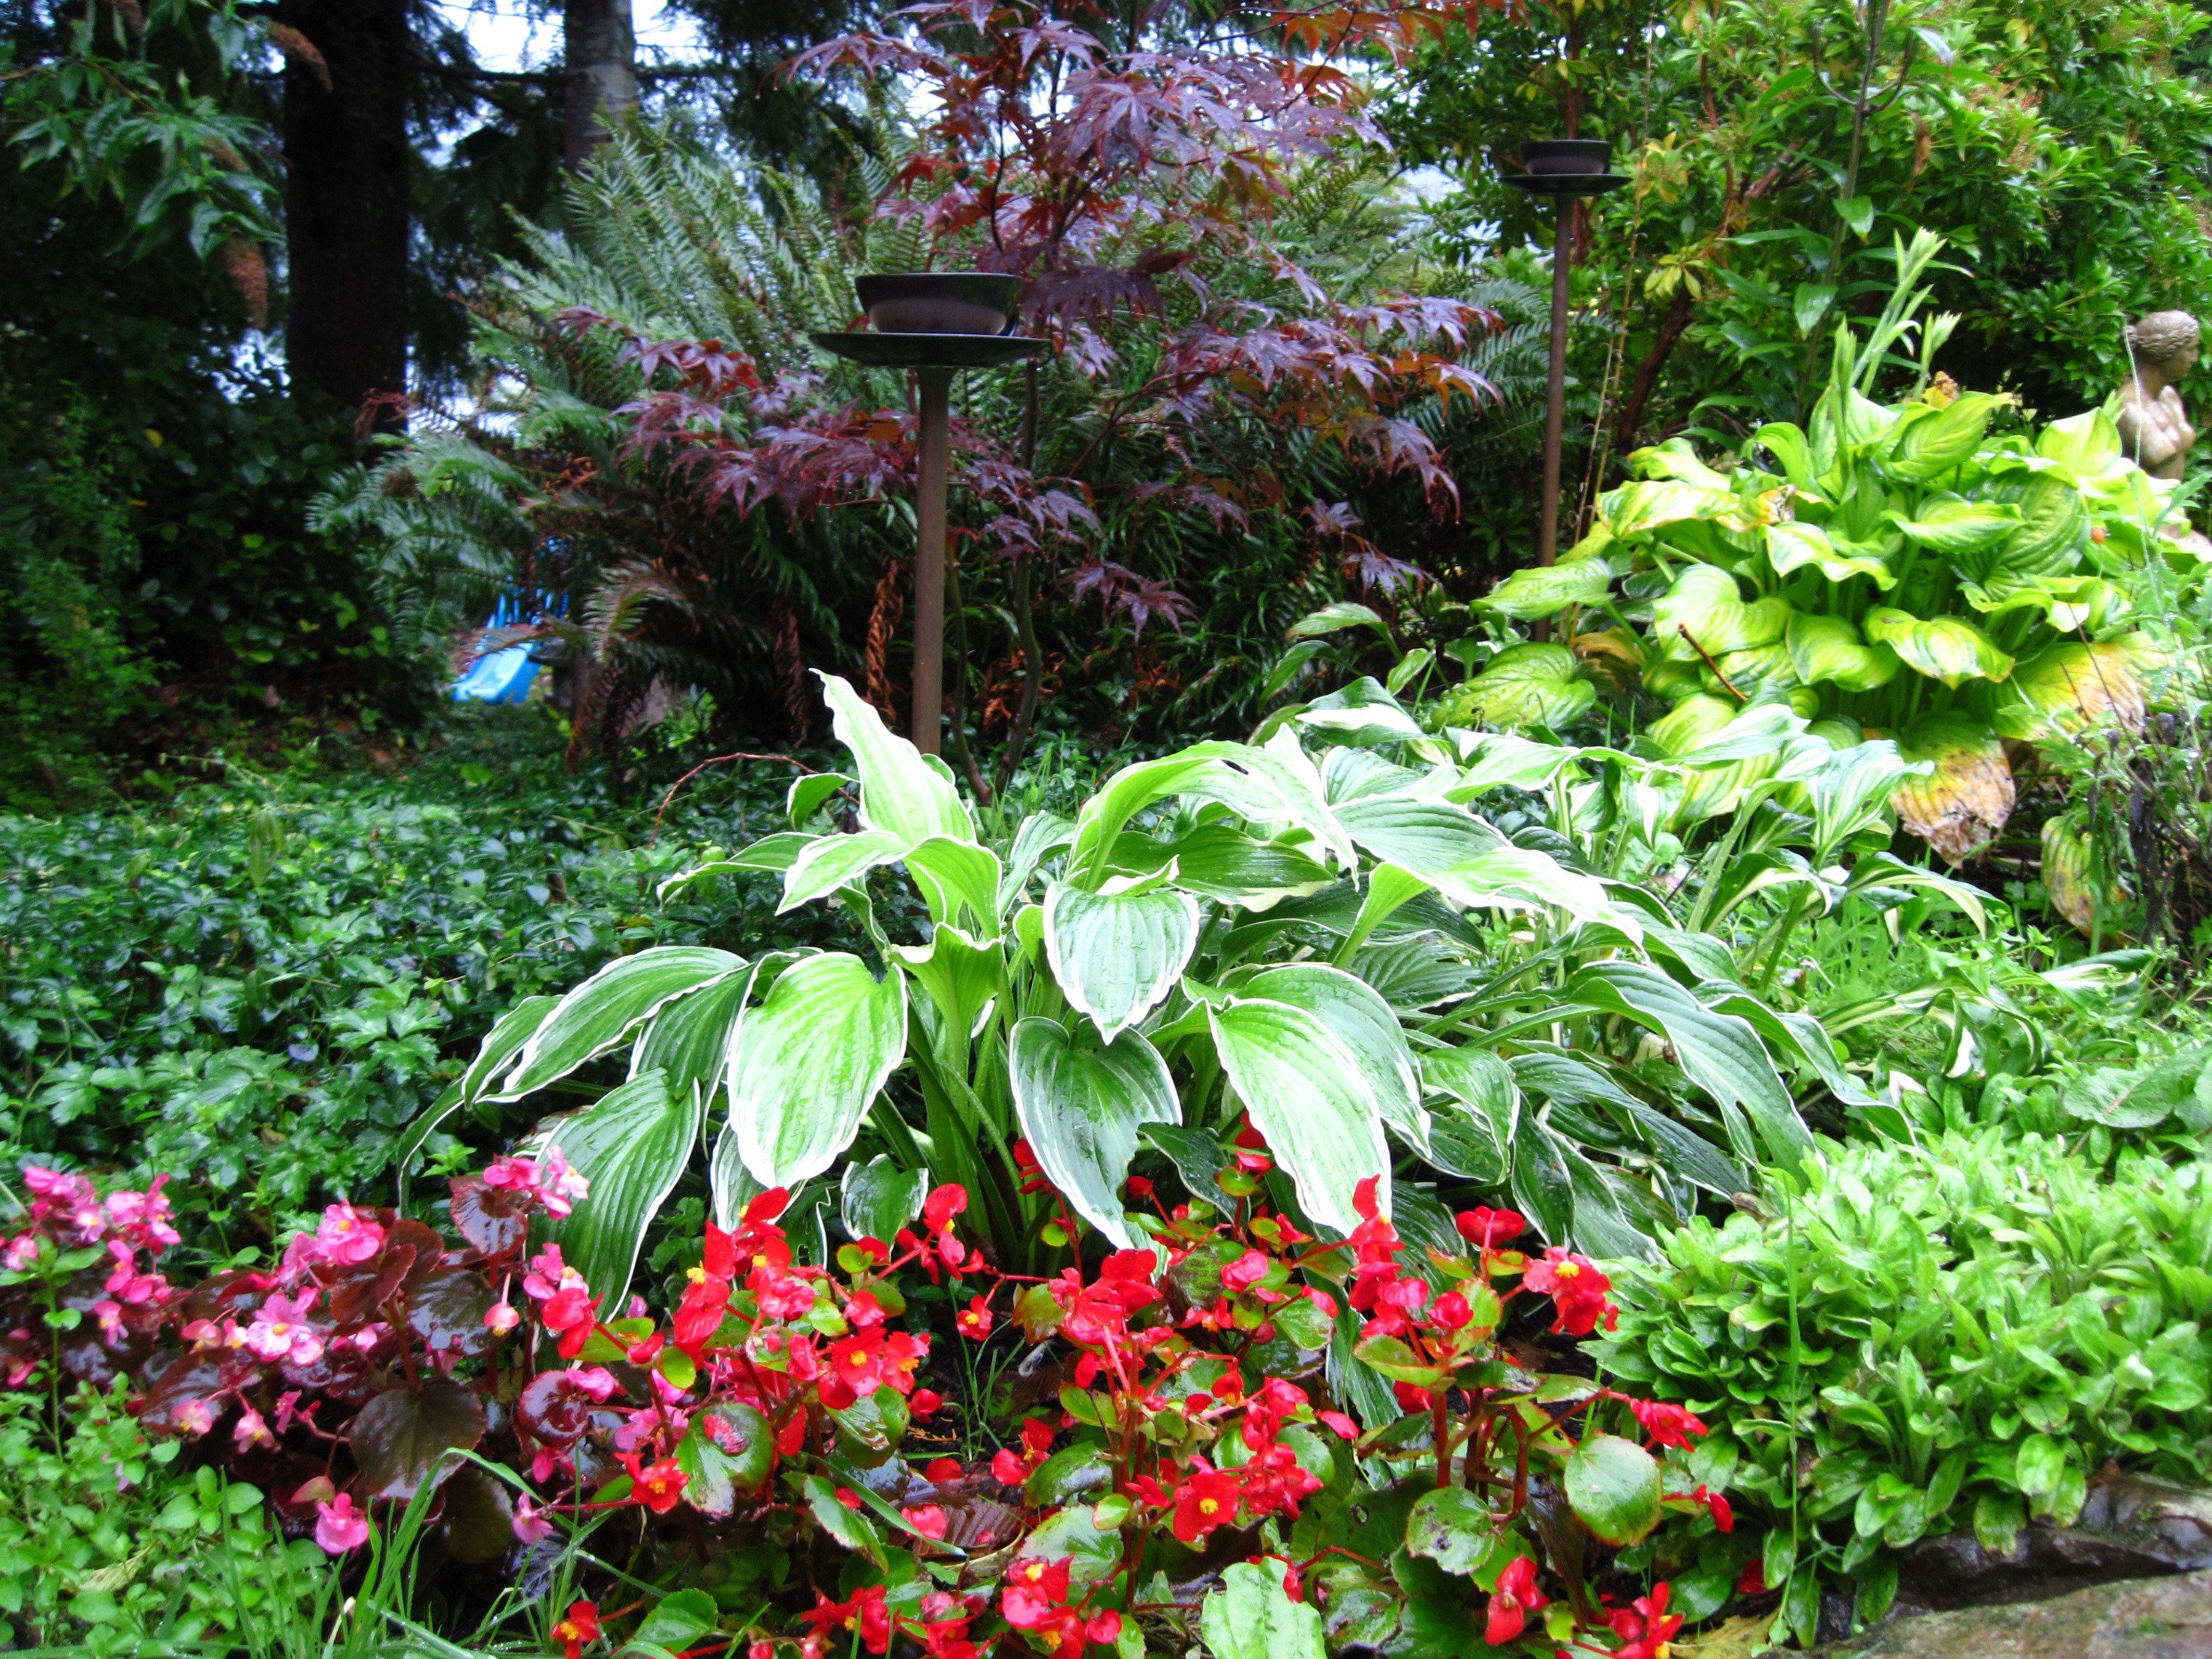
Write what you know. It’s a common sense piece of advice. After all, fiction writers have enough work in the making-things-up department. When I first envisioned writing a novel, it was because a group of characters had made a sudden appearance in my imagination. I always knew they would live in a rural setting, on the shores of a lake, some in elaborate cabins with expansive gardens and some in more rustic dwellings. Fiction mirroring reality – where I live is somewhere in the grandiose middle.
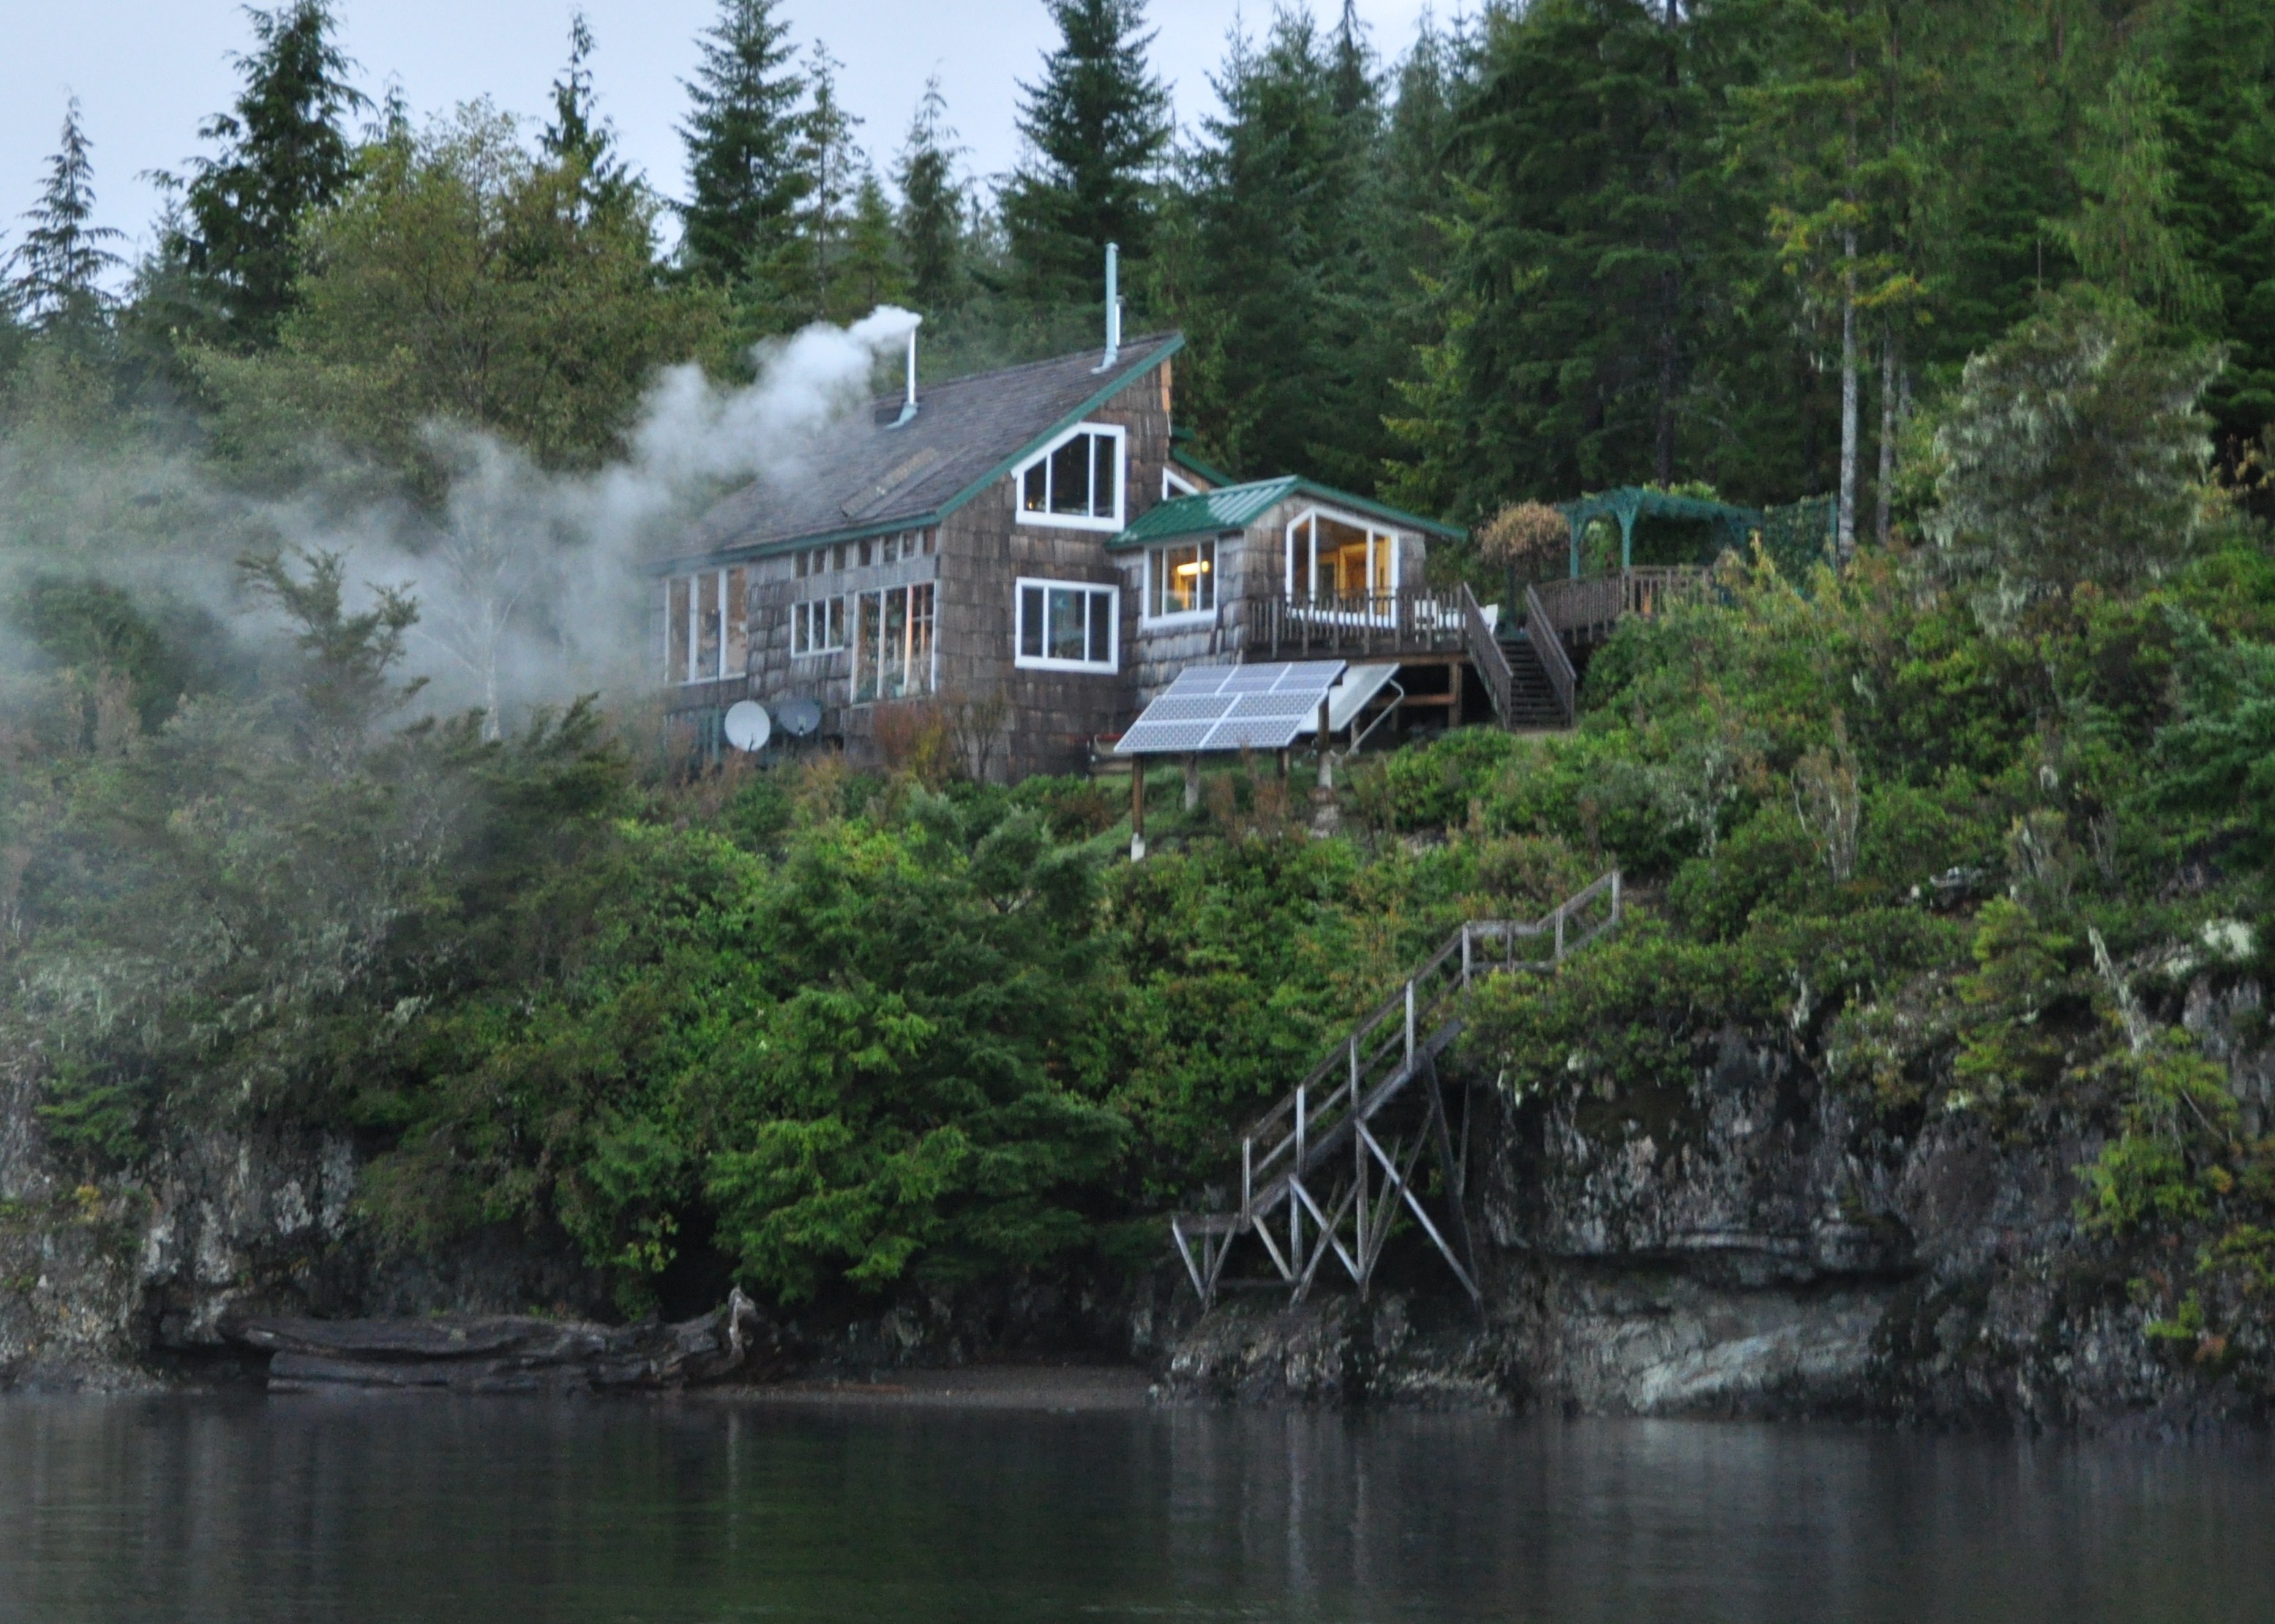
I thought about my own home and a few cabins in the vicinity and from there I embellished, stretched and massaged the reality of these settings into a small community on the shores of a fictional place called Crater Lake.
I have lived on the shores of a lake, in a cabin, with a garden in the wilderness for over twenty years. I’ve walked the trails around this place so many times my feet have worn smooth my route. In many ways, it’s hard for me to separate my own environment from that of the books – except to stress that Crater Lake is fictional, Micah Camp is a product of my imagination, the characters likewise. The cabins and gardens described are all altered, sometimes to a grander scale, sometimes to include elements not present anywhere but in my imagination. I suspect many writers have gone through a similar process.

Living in a particular place shapes people. A rural, semi-isolated setting, homes that reflect local materials open to multiple views of lake, mountains and trees, gardens and small businesses carved out of wild landscapes – all of these factors make the characters in my books the people they are and dictate (to a degree) the situations they find themselves in.
I have a couple of anecdotes that illustrate well a juxtaposition of fiction and reality. A close friend who has never visited our lakeside home, read Disappearing in Plain Sight and she loved it. When her husband managed a quick visit last summer, he told me he would tell his wife that our cabin and the view were just like walking into the book. The view perhaps – the cabin not so close, but close enough to resonate.
I recently ran into a woman who borrowed one of my books from her daughter. She and her husband had bought some land out in the wild and were getting ready to build. She asked me it the architect Caleb used to design his cabin in Disappearing in Plain Sight was based on a real person. She shrugged and said, “Oh, I suppose that would be too much to ask, but I want a place like the one you described in that book.”

Here is a dichotomy, for sure. If you come and visit me, at first glance you will recognize, in broad brush strokes, the setting of Disappearing in Plain Sight and The Light Never Lies. But don’t go looking for more. You’ll only end up disappointed. It is in the fine details that fiction has taken off to soar away from the landing strip of reality.
~
~

Francis Guenette has spent most of her life on the west coast of British Columbia. She lives with her husband and finds inspiration for writing in the beauty and drama of their lakeshore cabin and garden. She has a graduate degree in Counselling Psychology from the University of Victoria, British Columbia, Canada. She has worked as an educator, trauma counsellor and researcher. The Light Never Lies is her second novel. Francis blogs over at http://disappearinginplainsight.com and maintains a Facebook author page. Please stop by and say hello.

http://www.amazon.com/dp/B00I8XKIDK
finally !!!! spring
Finally, spring!!! The last bit of snow is melted from our lawn (although there are still patches of snow in the woods) and I have crocuses in bloom!
~
This past weekend, I attended a strategic planning event at Falls Brook Center in west-central New Brunswick. Falls Brook Center is a non-profit group working within the community to teach skills for more sustainable living.
~
Setting goals for an organisation is never easy and we enjoyed a welcome break from all the group discussion and brainstorming when one of the program coordinators gave us a short workshop about how to make seed sprouters from newspaper. In the past, I have often used peat pots, milk cartons and even Styrofoam cups to start my seeds. Making plant pots from newspaper is easy, saves money, and reduces waste! And making the pots is fun!
~
We used PotMaker® to make our seed pots. PotMaker® is made in Canada by Richters (Goodwood, Ontario, L0C 1A0) http://www.PotMaker.com . The kit includes two wooden shapes, one to wrap the newspaper into a tube, and the other to ‘crimp’ the lower part of the tube into a closed pot.
~

~
This morning, after a few minutes of rolling newspaper strips and tucking ends, I have enough pots to start a new batch of herbs for my kitchen window garden! Now, all I have to do is fill the newspaper pots with some planting mix and sprinkle some seeds. The pots support one another and keep their shape even wet. They can be planted directly into the garden … the roots grow through the paper and the pots disintegrate.
~

~
~
greenhouse, early spring
~
dead plantings rustle
skeletons brittle
pods and packets rattle
whisper me to the greenhouse
~
weak sunshine warms the glass
my prints a path on late snow
meltwater sinks into grass
soaks into clay
~
bits of crockery
wooden handles
leaf mould and sand
soil pressed into pots
~
the gardener
awakened from winter
rooted in moss and clay
~
~
Published as ‘greenhouse, early spring’, Canadian Stories 15 (87), Oct/Nov, 2012
Copyright 2014 Jane Tims
harvesting colour – soaking the bark
Birch bark is on my top ten list of natural phenomena. Just the outer covering of a tree, but for me it has so many associations.
~

~
Walking in a stand of birch is an experience like no other. The trees are ghosts, wavering and pale, unable to speak but capable of subtle quiet communication. In the slightest breeze, they whisper in short syllables, dry murmurings I cannot quite understand.
~
Birch bark is magical. Unravelled from its tree by a little tugging of the wind. Like paper, in thin dry sheets. Covered in unreadable script. You know removing the bark could be dangerous for the tree but it lures you, encourages you to reach out and strip it away in unbroken, unblemished reels.
~
Such a useful tree: birch bark canoes, tinder for a campfire, sweet sap from yellow birch, the wintergreen scent of crushed yellow birch twigs. And now, the promise of colour.
~
Using bark as dyestuff requires time rather than heat. Jenny Dean (Wild Colour, New York, 2010) suggests soaking the bark for days, even weeks to extract the first colour. She says never to boil bark since heat may release tannins and dull any resulting colour. From her book, I expect birch bark to yield colours ranging from purple to pinkish-red.
~

birch bark, donated by my brother-in-law
~
I am so grateful to my brother-in-law for allowing me to use the birch bark he has collected as he works on next winter’s stove-wood supply. I am sure he was saving it for a project of his own.
~

strips of birch bark layered in the dyepot
~
To start, I stripped the sheets of bark into narrow pieces and set it to soak in cool water in my big dye pot.
~

strips of birch bark, set to soak in water
~
I intend to leave it for a month before I take the next step of simmering the bark and dying my wool.
~
~
requesting the favour of a reply
~
these leafless trees
brush against
a linen sky
ink strokes
on rice paper
letters penned
at midnight
~
hidden in the hollow
heart of an oak
afraid to reach in
to feel only
curls of birch bark
desiccated leaves
~
these trees
all seem the same
empty envelopes
parchment ghosts
~
branches tangled
messages
lost
~
black spruce scribbled on sky
~
~
Poem previously posted 19/08/2011
Copyright 2014 Jane Tims
family history – the Johnson brothers
If you have followed my blog for a while, you may be wondering what has happened to my virtual biking along the northern coast of New Brunswick.
~
Well, this is what happened. As I cycled one day, I took a side road. It was a narrow road I had not travelled in quite a few years. And as I cycled, I felt drawn further and further into the past. I began to explore this past, lured by wiggling leaves that popped up as I biked along. Yes, you have guessed it … I found myself at http://www.Ancestry.ca , building a forest of family trees.
~
I discovered I could learn about my family quite quickly… thirty minutes of biking gives me time to explore an ancestor or two … I can travel back in time to the 1880 USA Census to search the byways of Wyoming or the country roads of Pennsylvania … I can discover great-grandparents I have known for some time, or great-great grandparents I have never encountered before.
~
So, for a little while, my exercise program will not be about discovering new places, but about discovering new family members. I promise to return to the present and my virtual geographic travels eventually.
~
The first people I have met on my new travels are the Johnson brothers, my great-granduncles. They are the sons of my great-great-grandfather James Johnson. My Mom was very interested in this part of our family and worked to leave us a little of their history. I have photos of most of them, including a family grouping in a sepia tin-type. The original tin-type is small, about 2″ by 3″. Tin-types are photos imprinted on a metal surface. Most tin-types are on iron, coated with black paint or lacquer. This type of photo was popular from the 1860s through to the 1910s.
~

some of the Johnson brothers in an old tin-type photo
~
The brothers were John (born 1849 ), Daniel (born 1851), James (1854), Alexander (1857), and Isaac (1866). They had two sisters Kate (born 1847) and Mary Jane (my grandmother, born 1859). There is some question about which of the brothers are in the photo, but my Mom had it figured out based on the boys’ ages, and photos of them at an older age.
~
Only a few details survive for the brothers. I know birth and death dates, as well as the names of wives and children. John, James and Alexander were farmers. John and James were adventurers and visited the west. Daniel and Isaac were doctors.
~
So much information is lost, but for now, I am enjoying small discoveries about their lives.
~
Copyright 2014 Jane Tims
harvesting colour – rose petals in a pickle jar – results
On April 9, I tried dyeing white silk with dried rose petals.
~
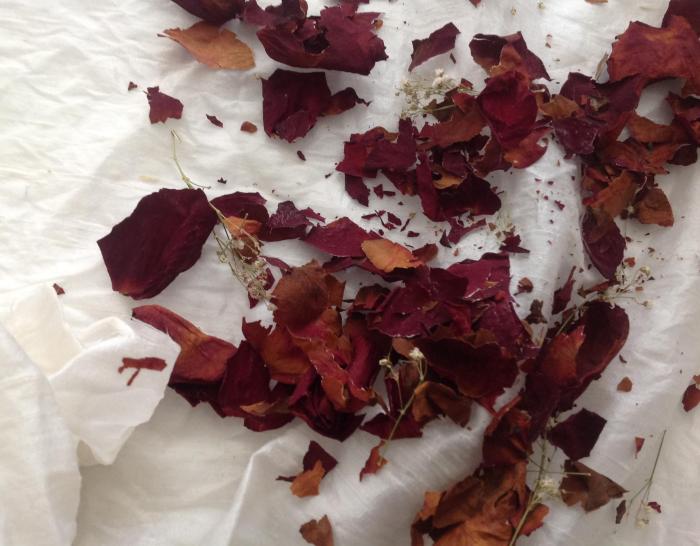
rose petals, scattered on the silk
~
Originally, I intended to let the colour develop for at least a month on the silk in my pickle jar. But curiosity got the better of me after six days. Colour had developed in the first two days, a deep magenta in the vinegar and on the fabric.
~

~
Tonight I opened the jar and rinsed out the silk. The process is a little messy, with lots of petals floating in the rinse water. And the results …
~

silk fabric dyed with dried flower petals … the deep pink is from the extra flowers I added
~
You may remember that I folded a few other flowers into the silk. In retrospect, I should have seen the unnatural pink of some of the flowers … I think the florists did a little dyeing of their own and that is what is making the bright pink on the fabric. It looks a bit artificial for my taste, but I do love the brownish magenta that colours the background of the fabric – that colour seems to be from the rose petals. Silk certainly takes up colour eagerly!
~

the magenta seems to be from the rose petals – a more natural colour
~
Once the fabric is dry, I intend to hem the silk for a tablecloth. I use tablecloths all the time and this one will remind me of a special bouquet!
~
Snippet of a longer poem I wrote after this adventure …
~
~
remnants of the bouquet
~
petal colour
stains fabric
eager to make
an impression
~
~

deep pink dried flowers I added to the rose petal mix … I should have realised they were too bright to be ‘real’
~
I have carefully rinsed my pickle jar, intending to use it again!
~
Copyright 2014 Jane Tims
another gate in Cornwall
Isaac’s Way restaurant in Fredericton has announced that the 20th Art Auction for Kids-in-Need (sponsoring theatre classes for underprivileged children) has already raised over $6000 from the sale of over 50 pieces of art. The goal for this auction is $8000.
~
The art may be seen at http://isaacsway.ca/art/ If you are in the Fredericton area, come to the restaurant in person and make a bid. The auction ends Sunday May 25th at closing time. If you bid on my watercolour ‘gate at Ponsonooth’, remember, I am donating 80% of the proceeds towards Kids-in-Need!
~

January 23, 2014 ‘gate in Ponsanooth’ Jane Tims
~
In the next art auction, from May 25, 2014 through the summer, I am contributing another of the watercolours from my gates in Cornwall series, called ‘gate on Old Church Road’.
~
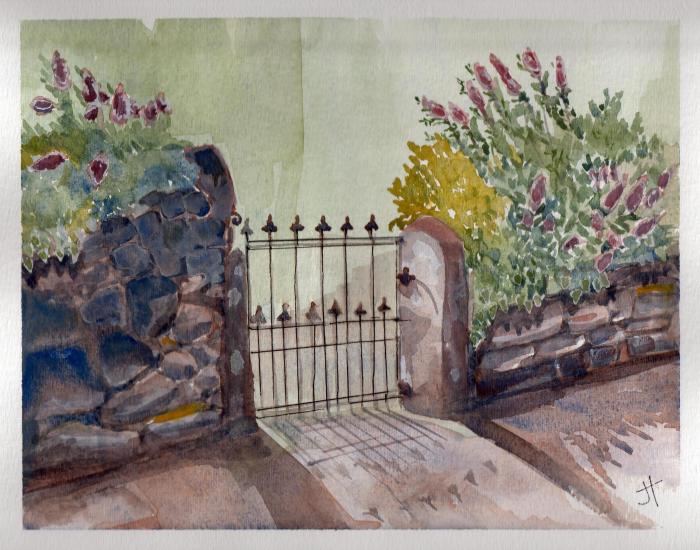
‘gate on Old Church Road’ Jane Tims
~
I hope wherever you are, you will be able to take in some great art shows this summer!
~
Copyright 2014 Jane Tims
harvesting colour – more colour from the pickle jar
One more dyeing project with the pickle jar! I am growing impatient, waiting for the growing season to begin so I can collect plants for my dyeing projects. So, I looked around my house and decided to use some of the various jars of rose petals and other flowers I have dried over the years.
~

a jar of rose petals and other flowers from a saved bouquet (the fabric is the silk I intend to dye)
~
For fabric, I decided to use the square of silk I purchased for the project back in February. From my reading, I know that silk accepts dye very well and responds well to an acidic dye bath.
First I soaked the silk in tepid water to prepare the fibres to accept the dye. I decided this fabric has already been prepared with mordant. If not, I can always add the mordant later.
Then I spread the petals on the fabric, spraying as I went with a weak solution of cider vinegar.
~
rose petals, scattered on the silk
~
I added some other dried flower petals from another bouquet. Then I rolled the fabric and petals very tightly.
~
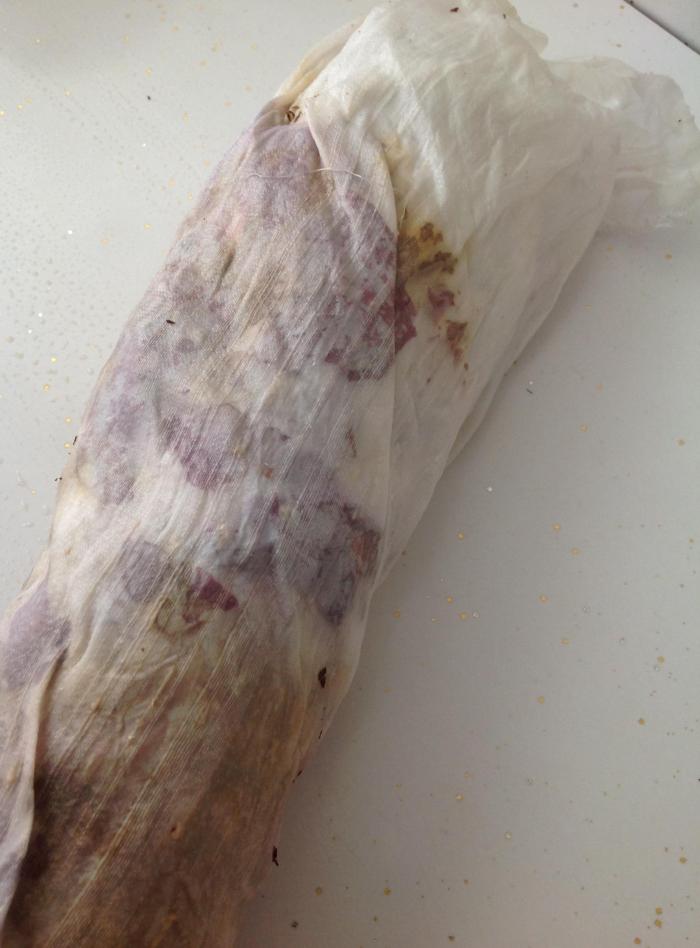
a roll of silk and flower petals, sprayed with vinegar and ready for the pickle jar
~
As with my last project ( https://nichepoetryandprose.wordpress.com/2014/04/02/harvesting-colour-onion-yellow/ ), I had trouble stuffing the roll into the jar. Once I had the silk crammed into the jar, I added more vinegar solution to the jar and closed it.
~
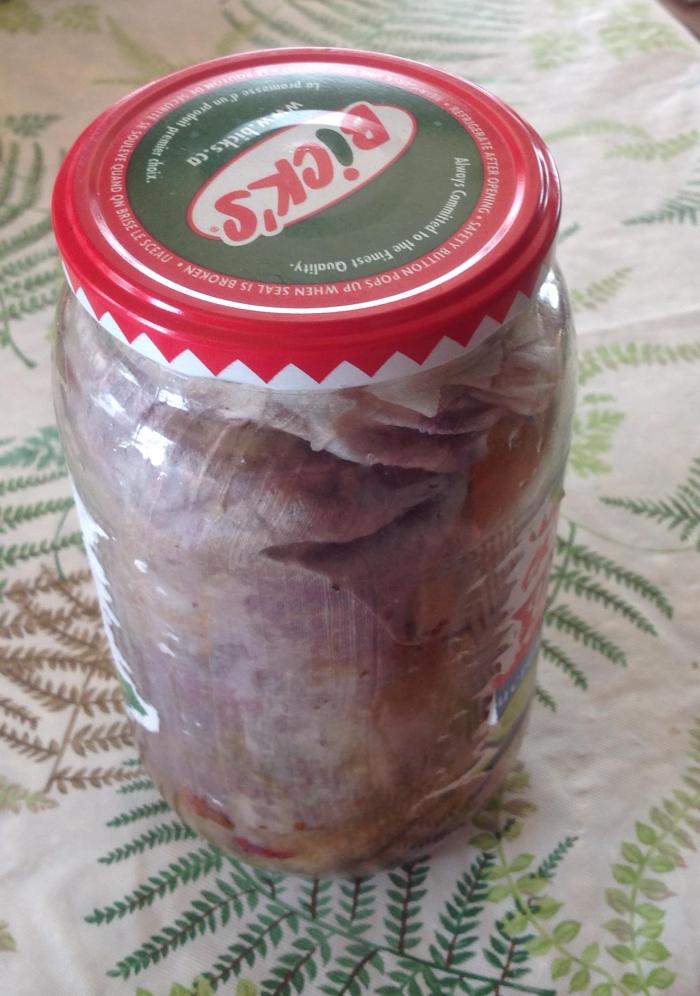
pickle jar stuffed with silk, rose petals and other dried flowers
~
And now we wait …
~
~
Copyright 2014 Jane Tims
the unknown thousands – family history
Today, I will divert a little from my usual topics and mutter about genealogy. Along with my other projects, I try to keep learning about my family. Fortunately, I have a lots of materials to look at: family letters, post cards, diaries, well-researched family trees and so on.
~
I am always surprised at how much is lost. Some of this is due to the loss of records, some is due to the overwhelming numbers of people involved in the family history of just one person. When I first became interested in family history, I thought about how many lives have contributed to make ‘me’. The numbers of ‘grandparents’ add up quickly as I go back in time.
~
| Generation | Numbers of parents/‘grandparents’ |
| 1 (me) | |
| 2 (my parents) | 2 |
| 3 (my grandparents) | 4 |
| 4 (my great-grandparents) | 8 |
| 5 (great-great-grandparents) | 16 |
| 6 | 32 |
| 7 | 64 |
| 8 | 128 |
| 9 | 256 |
| 10 | 512 |
| 11 | 1024 |
| 12 | 2048 |
| 13 | 4096 |
| 14 | 8192 |
| 15 | 16384 |
| 16 | 32768 |
| 17 | 65536 |
| 18 | 131072 … and so on … |
~
So, to make any one of us, it took thousands of people. I knew this before, but knowing I have 131 thousand ‘grand-parents’ in 18 generations is unsettling.
~
I began by just trying to know the names of those 16 great-grandparents in the 5th generation. I have them almost figured out. Those with an * beside their name have a published family tree. Those with a ? are uncertain.
~
Charles Clark (*) (farmer)
Margaret Aitcheson
James Johnson (farmer)
Mary MacIntosh
Lewis Norramon (?) (farmer)
Mary ……. (?)
Josiah Hawk (*) (shoemaker) https://nichepoetryandprose.wordpress.com/2012/10/17/occupation-shoemaker/ )
Sara Kresge (*)
William Spavold (carpenter) (shipwrecked off Briar Island) (https://nichepoetryandprose.wordpress.com/2011/12/03/briar-island-rock-2-the-shipwreck/ )
Phelena Warner
Robert Manzer
Eleanor Evan
George Cook
Eliza Jane Smith
George Sabean (*)
Jane Mullen
~
~
About some, like William Spavold, I know quite a lot (thanks to the efforts of my Dad). I am also gradually assembling a history of my great-grandmother Ella Hawk (daughter of Josiah and Sara) (thanks to the efforts of my aunt). The sad thing is, all I will ever know about most of these people is a name. In spite of this, I owe them my existence.
~

my drawing of William Spavold, his mother and brother after their shipwreck
~
Copyright 2014 Jane Tims
harvesting colour – the yellow of tansy
Since last September, a small bunch of Tansy (Tanacetum vulgare L.) has hung on the line in my kitchen. Now, with a small batch of alum-treated wool, I am able to see what colour will come from the dried and lifeless flowers.
~

dried Tansy, collected in 2013
~
To extract the dye, I crumbled the flowers and leaves and soaked them in water overnight. Then I added more water and brought them slowly to a boil in my big, well-marked dyepot (marked so I will not use it for food by mistake). After an hour’s boil, I let the dye cool and strained the liquid. The result was a clear, amber-yellow dye.
~

dye from Tansy and water, simmered
~
To dye the wool, I added water, immersed a shank of alum-treated wool and slowly brought the dye to a simmer – one hour and then the long process of cooling (I am realising that dyeing is more about waiting than doing!!!!!!!!!!!). The result is a green-yellow, almost exactly the colour shown for Tansy-dyed fibre in Jenny Dean’s book (Wild Color) !!! My photo is not clear because the drying line insists on vibrating but you can clearly see the colours – left to right – the brown of the lichen-dyed wool from a few days ago), the green-yellow of the Tansy-dyed wool and the tan of the undyed wool.
~

three shanks of wool, dyed with the lichen Usnea (left), dyed with Tansy (center) and raw wool (treated with alum)
~
I wrote my poem to the heady yet sleepy smells of the Tansy boiling in its dye pot. I remembered the living Tansy, growing in the ditch last summer, each flower cluster hiding a sleepy bumblebee that had to be shaken from its resting. I was also reminded in my reading that Tansy was used so often at funerals in New England in the 19th century that people associated its smell with death.
~

Tansy in the ditch
~
sleep before dyeing
~
Tanacetum vulgare L. – Common Tansy, Mugwort, Bitter Buttons
~
Bitter Buttons hover in the dye pot
simmering on the kitchen stove
drowsy scent of camomile
camphor and rosemary
liquid amber, saffron sallow
jaundiced pale of Tansy
reclines in the roadside ditch
each flat-topped cluster
hibernaculum
for a furred and yellow
unconcerned
and mellow
bumblebee
~
~
Copyright 2014 Jane Tims
harvesting colour – beautiful brown!
I will never see brown with the same eyes again!
~
Today I finished a batch of alum-treated raw wool and I was ready to try my first experiment with dyeing animal fibre. The alum, you will remember, is a mordant, added to the fibre to increase its colour-fast and light-fast qualities. In some cases, it also makes the colours brighter.
~
Remember my gathering of Old Man’s Beard lichen? (https://nichepoetryandprose.wordpress.com/2014/03/26/colour-on-the-snow/)
~

jar with Old Man’s Beard lichen, water and ammonia
~
The lichen has been ‘fermenting’ in ammonia about a week and developed a lovely brown colour with tones of orange, reminiscent of root beer.
~

a sample of the dye obtained from the Old Man’s Beard lichen
~
I sieved out the lichen and added the dye to my dye pot. I added a little vinegar to neutralize the alkalinity since basic solutions can harm the wool. I put about one once of the alum-treated wool into the dye pot and added water, to cover the wool. Then I increased the temperature very, very slowly since sudden changes in temperature can damage the texture and weaken the fibres. I left the dye pot on simmer for about an hour and then left it to cool slowly. Now the wool is drying on the line in my dining room.
~
The result may seem like an unimpressive brown, but to me it is the most wonderful brown in the world. Reminds me of the ice cream in a root beer float! My first effort at dyeing wool, and obtained from a lichen of the palest green. I feel a poem stirring!
~

to the right, my lichen-dyed wool, and to the left, my un-dyed alum-treated wool
~
Copyright 2014 Jane Tims