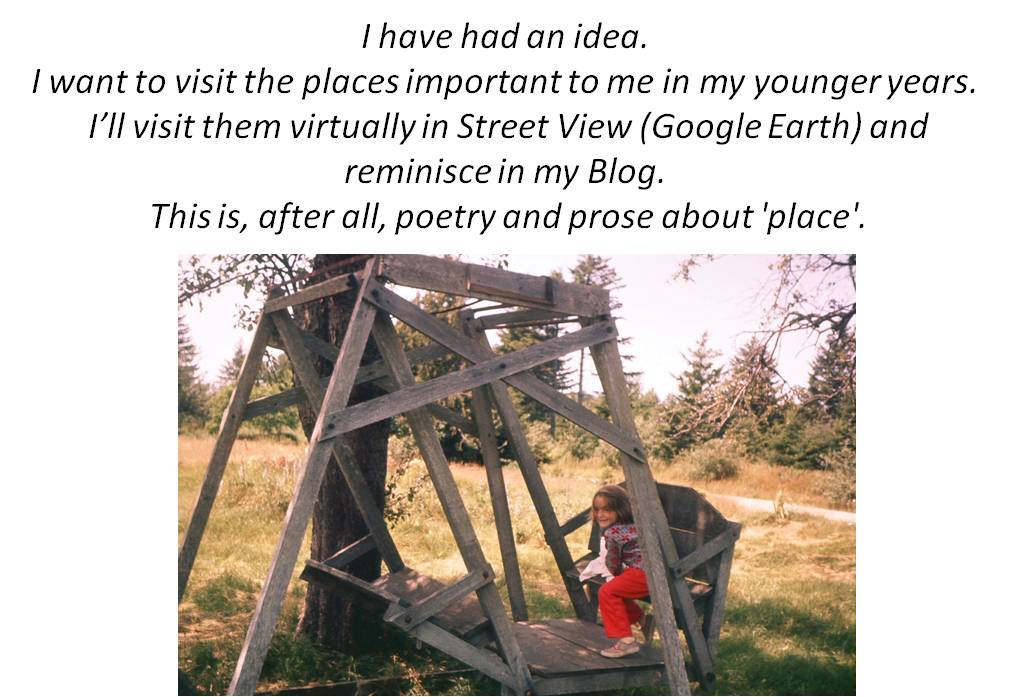
Posts Tagged ‘plants’
blue in the woodland
About a decade ago, we took a drive from Canterbury to McAdam on a gravel road. The memory I have carried with me for years is of a section of woodland absolutely blue with flowers. I often wondered what the flowers were and if I’d be able to find the spot again. This weekend we tried to find the place and the sea of blue in the woodland.
~

Highway 630 from Canterbury to McAdam in New Brunswick (map from Google Maps)
~
Canterbury, like many rural communities of New Brunswick, has faced a shrinking population over the years. Settled by Loyalists, it was a center for logging and railroad traffic and, in the late 1800s, had a population of over 1000. Today it has only about 340 residents. Nevertheless, it is a charming village and has a newly renovated school, housing all 12 grades.
~
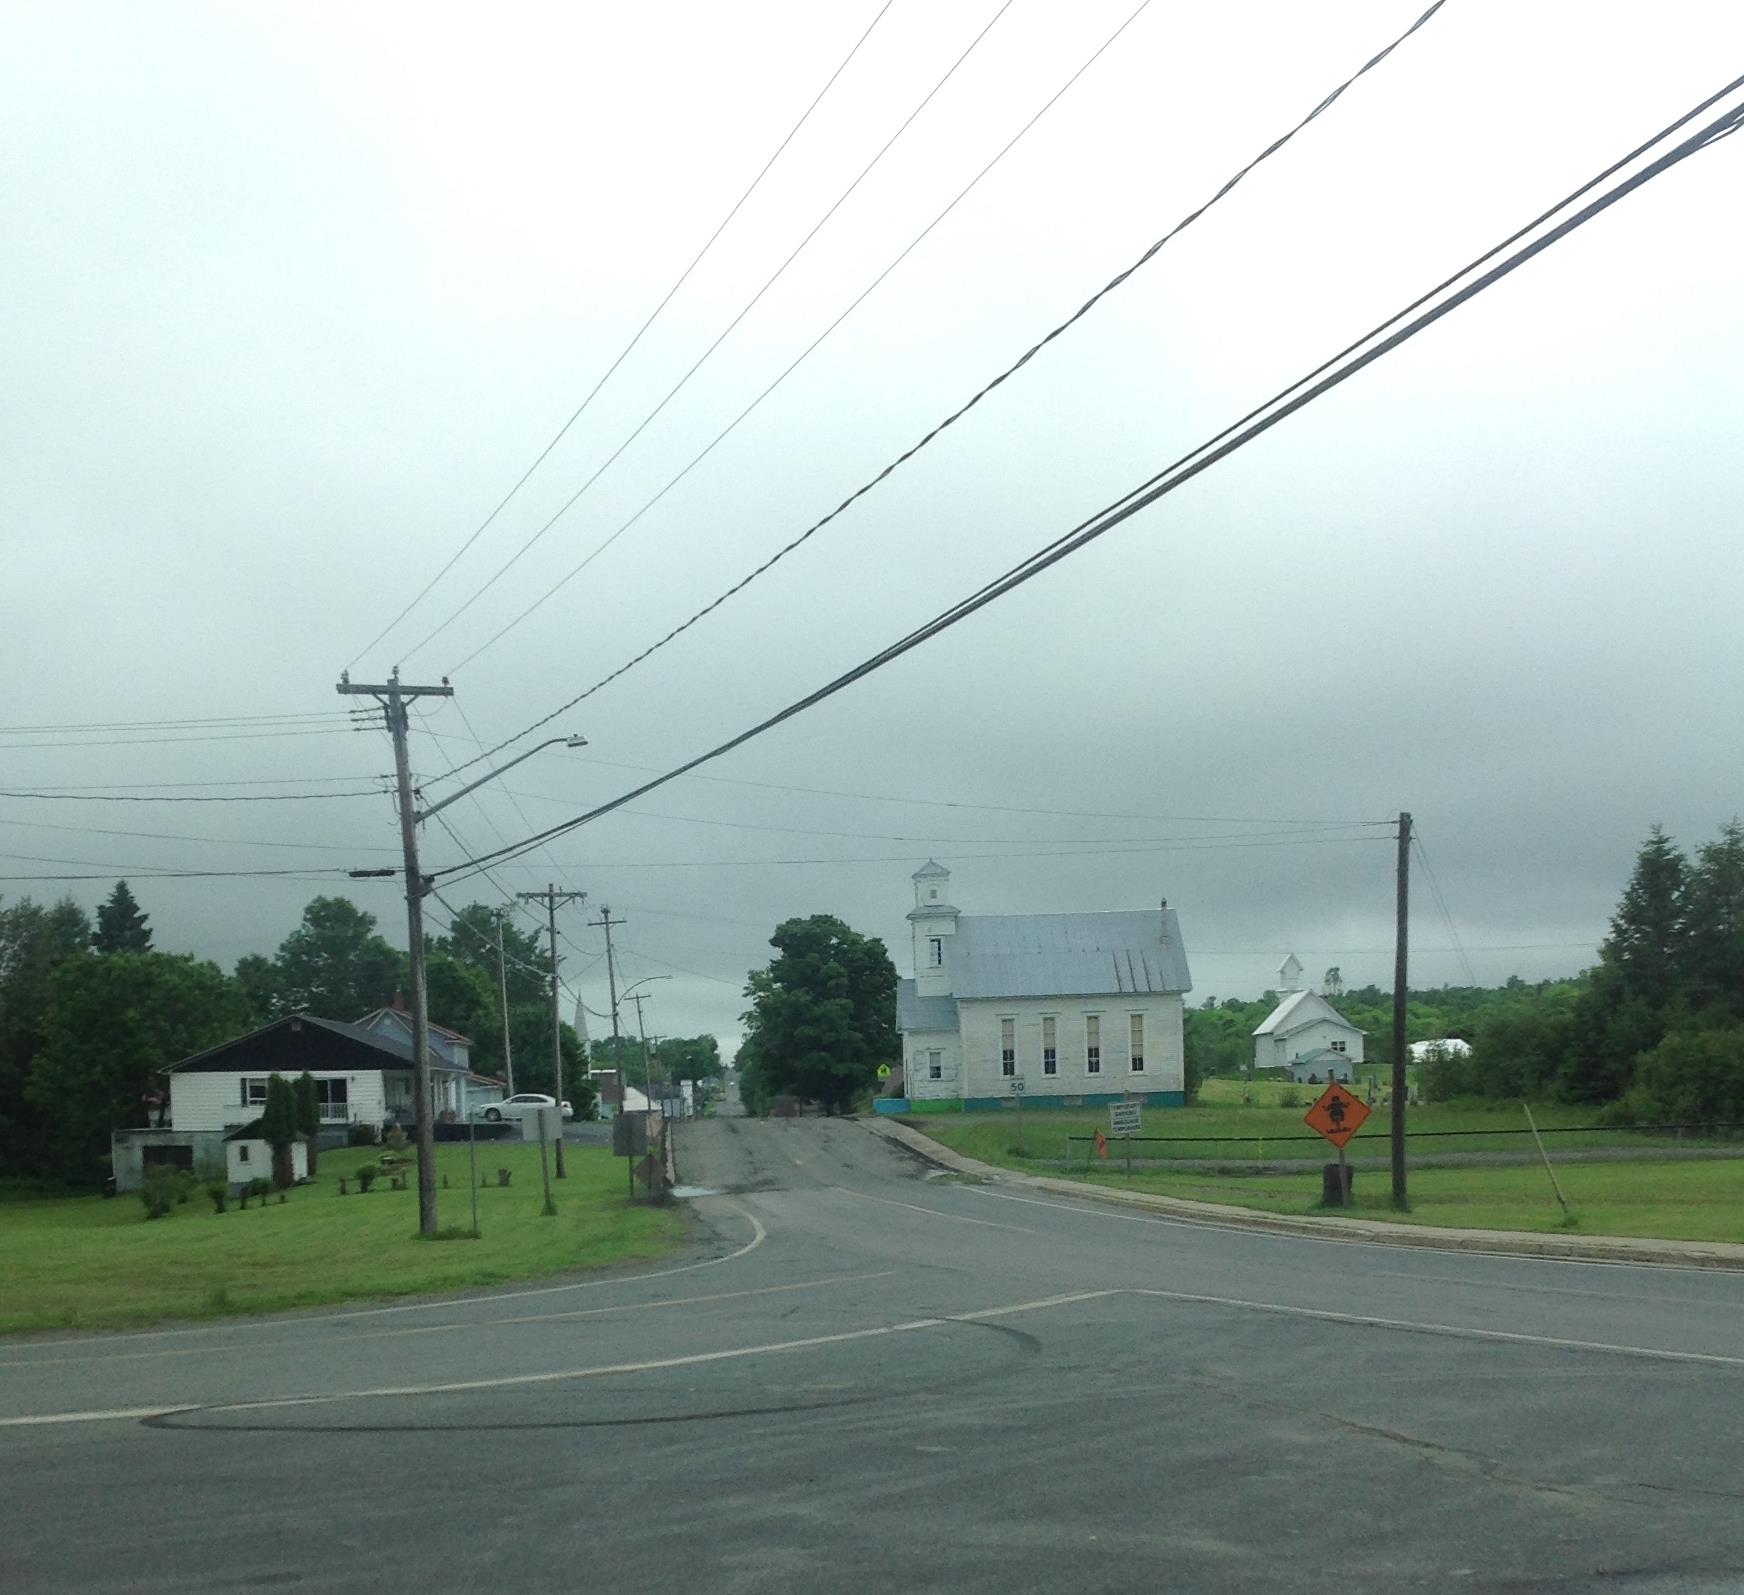
Village of Canterbury at the turn to Highway 630
~
The route from Canterbury toward the south is a numbered road. But Highway 630 is not paved and quite rutted in some sections. In one place we had to ask some ATVers if we were on the right road!
~

Highway 630
~
As we drove, I watched the woods for those blue flowers. Wildflowers were certainly a theme of our drive. By the road we saw Pink Lady’s Slipper (Cypripedium acaule), Bluebead Lily (Clintonia borealis), Bunchberry (Cornus canadensis) and Quaker Ladies (Houstonia caerulea).
~
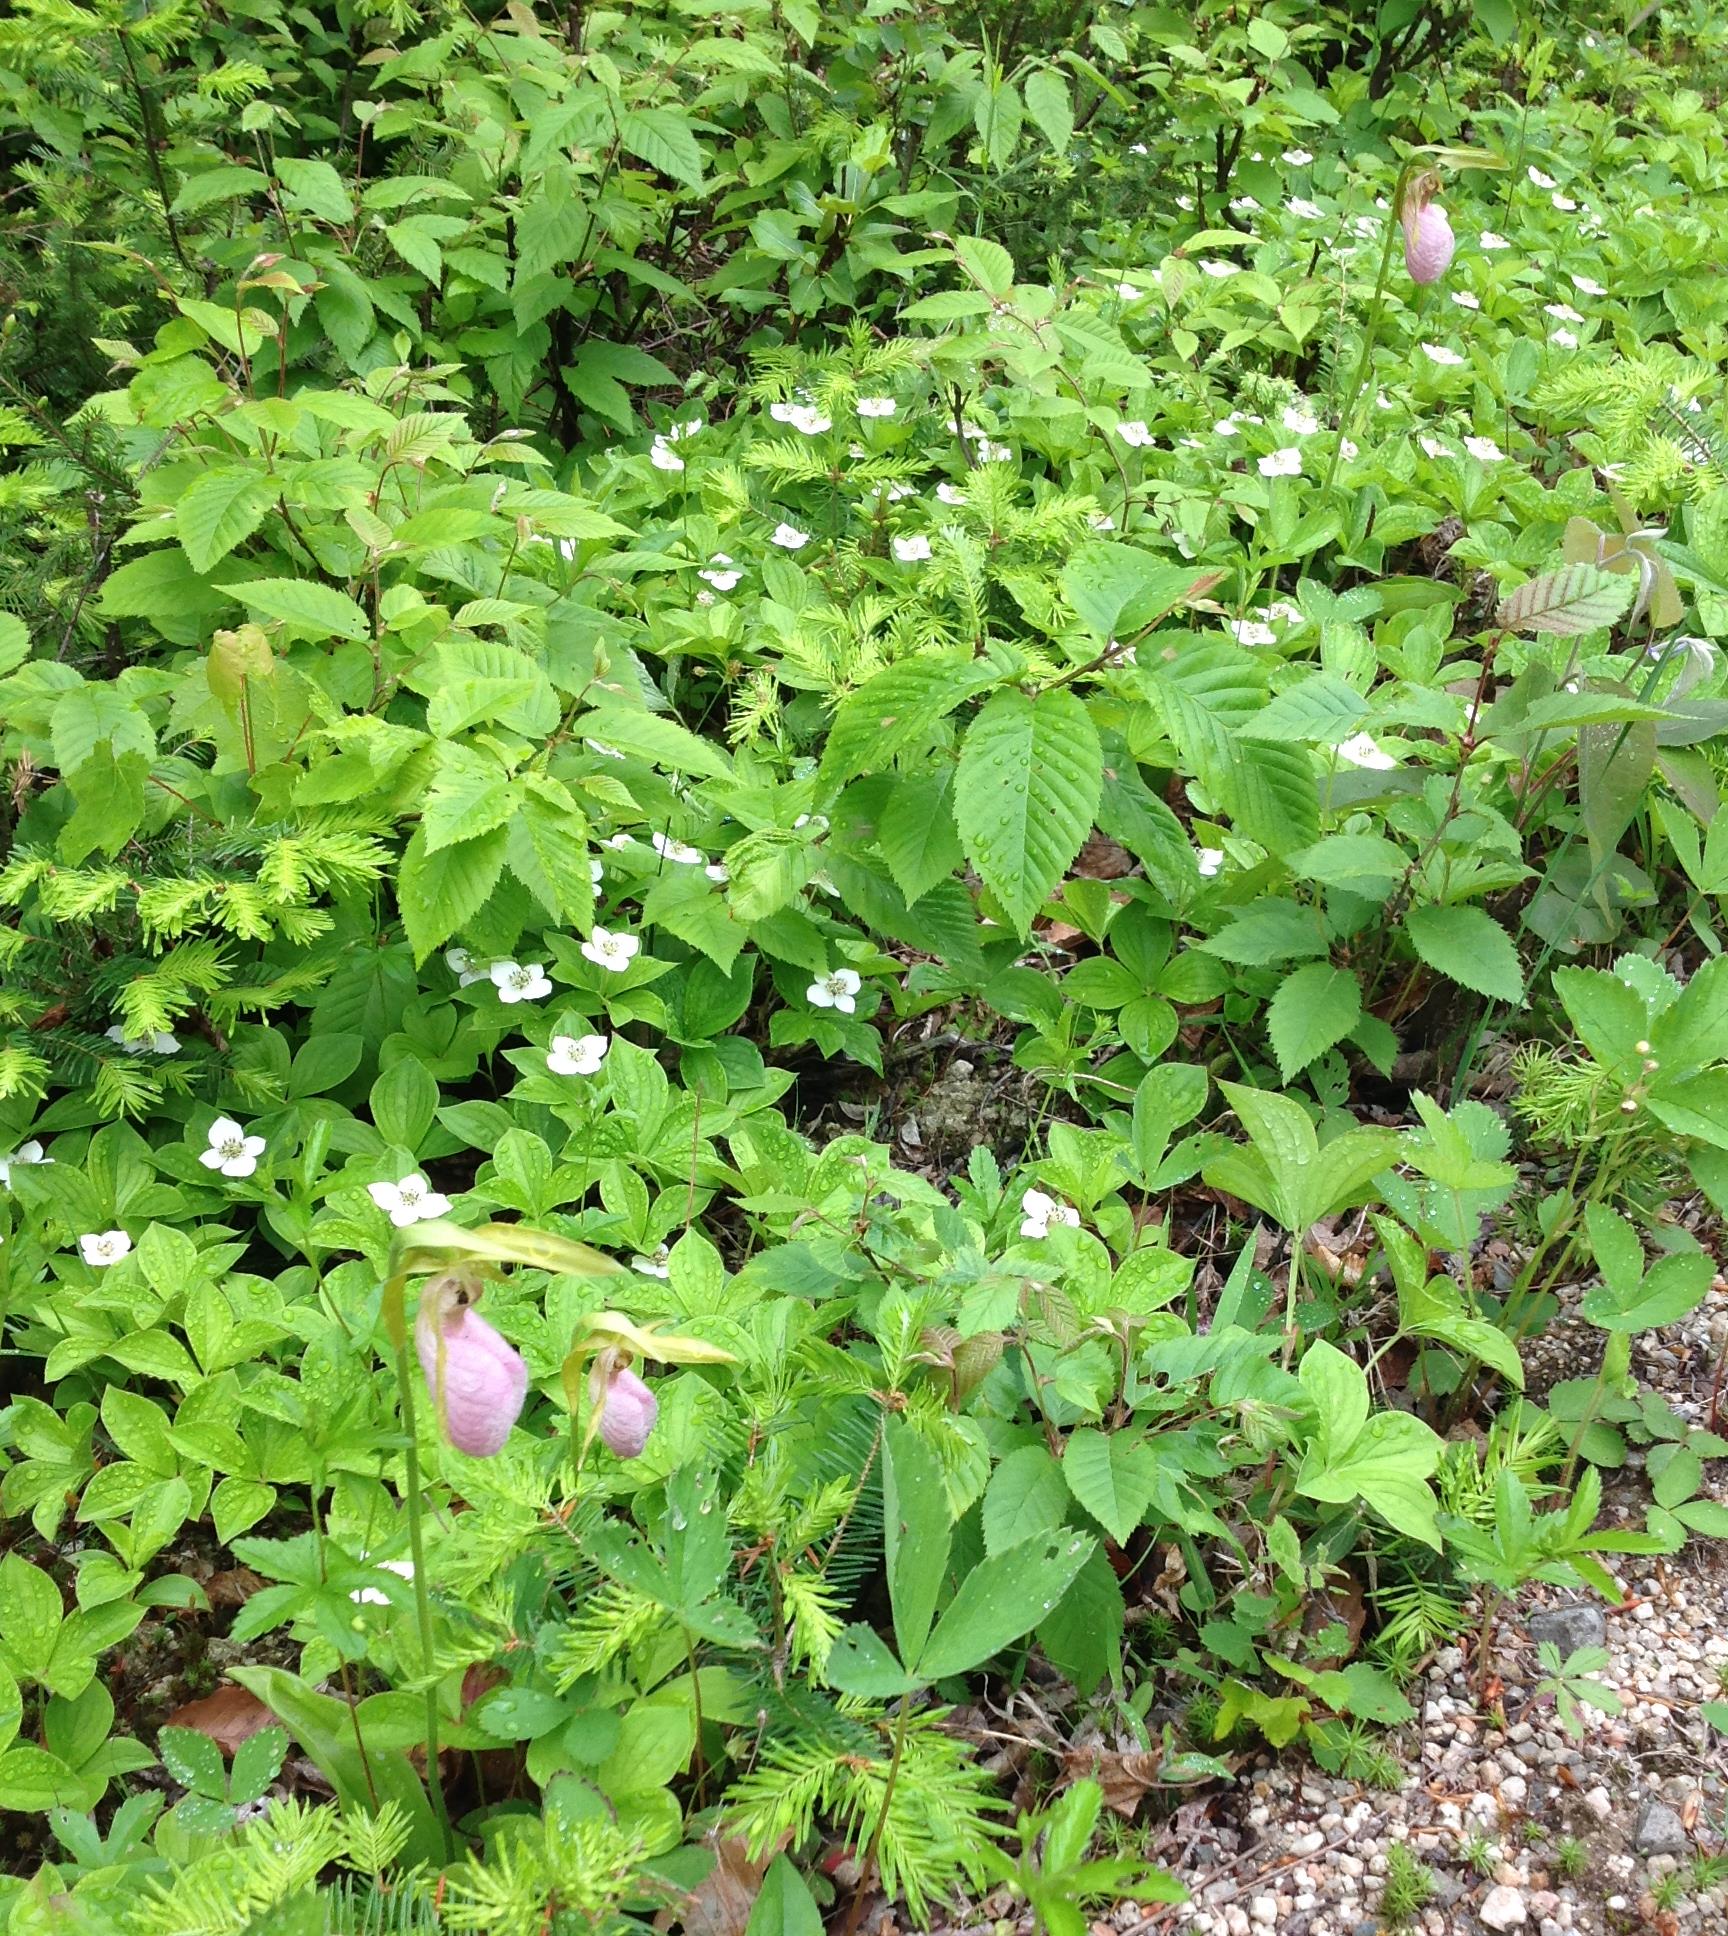
Lady’s Slipper and Bunchberry along the road
~
The map shows a community named Carroll’s Ridge just south of Canterbury. When we reached the location marked on the map, there were no homes or buildings, only a few old roads and cleared areas. But there in the woods was evidence people had once lived there. I found my sea of blue! Forget-me-nots, escaped from some forgotten garden to thrive in the near by woods.
~

Forget-me-nots escaped from an old garden
~
In my memory, the ‘blue’ of the flowers was more intense a decade ago. But we noticed many of the Forget-me-nots there now are a white variety. Who knows if flower colour or memory really changed during those ten years.
~

blue flowers in the woodland
~
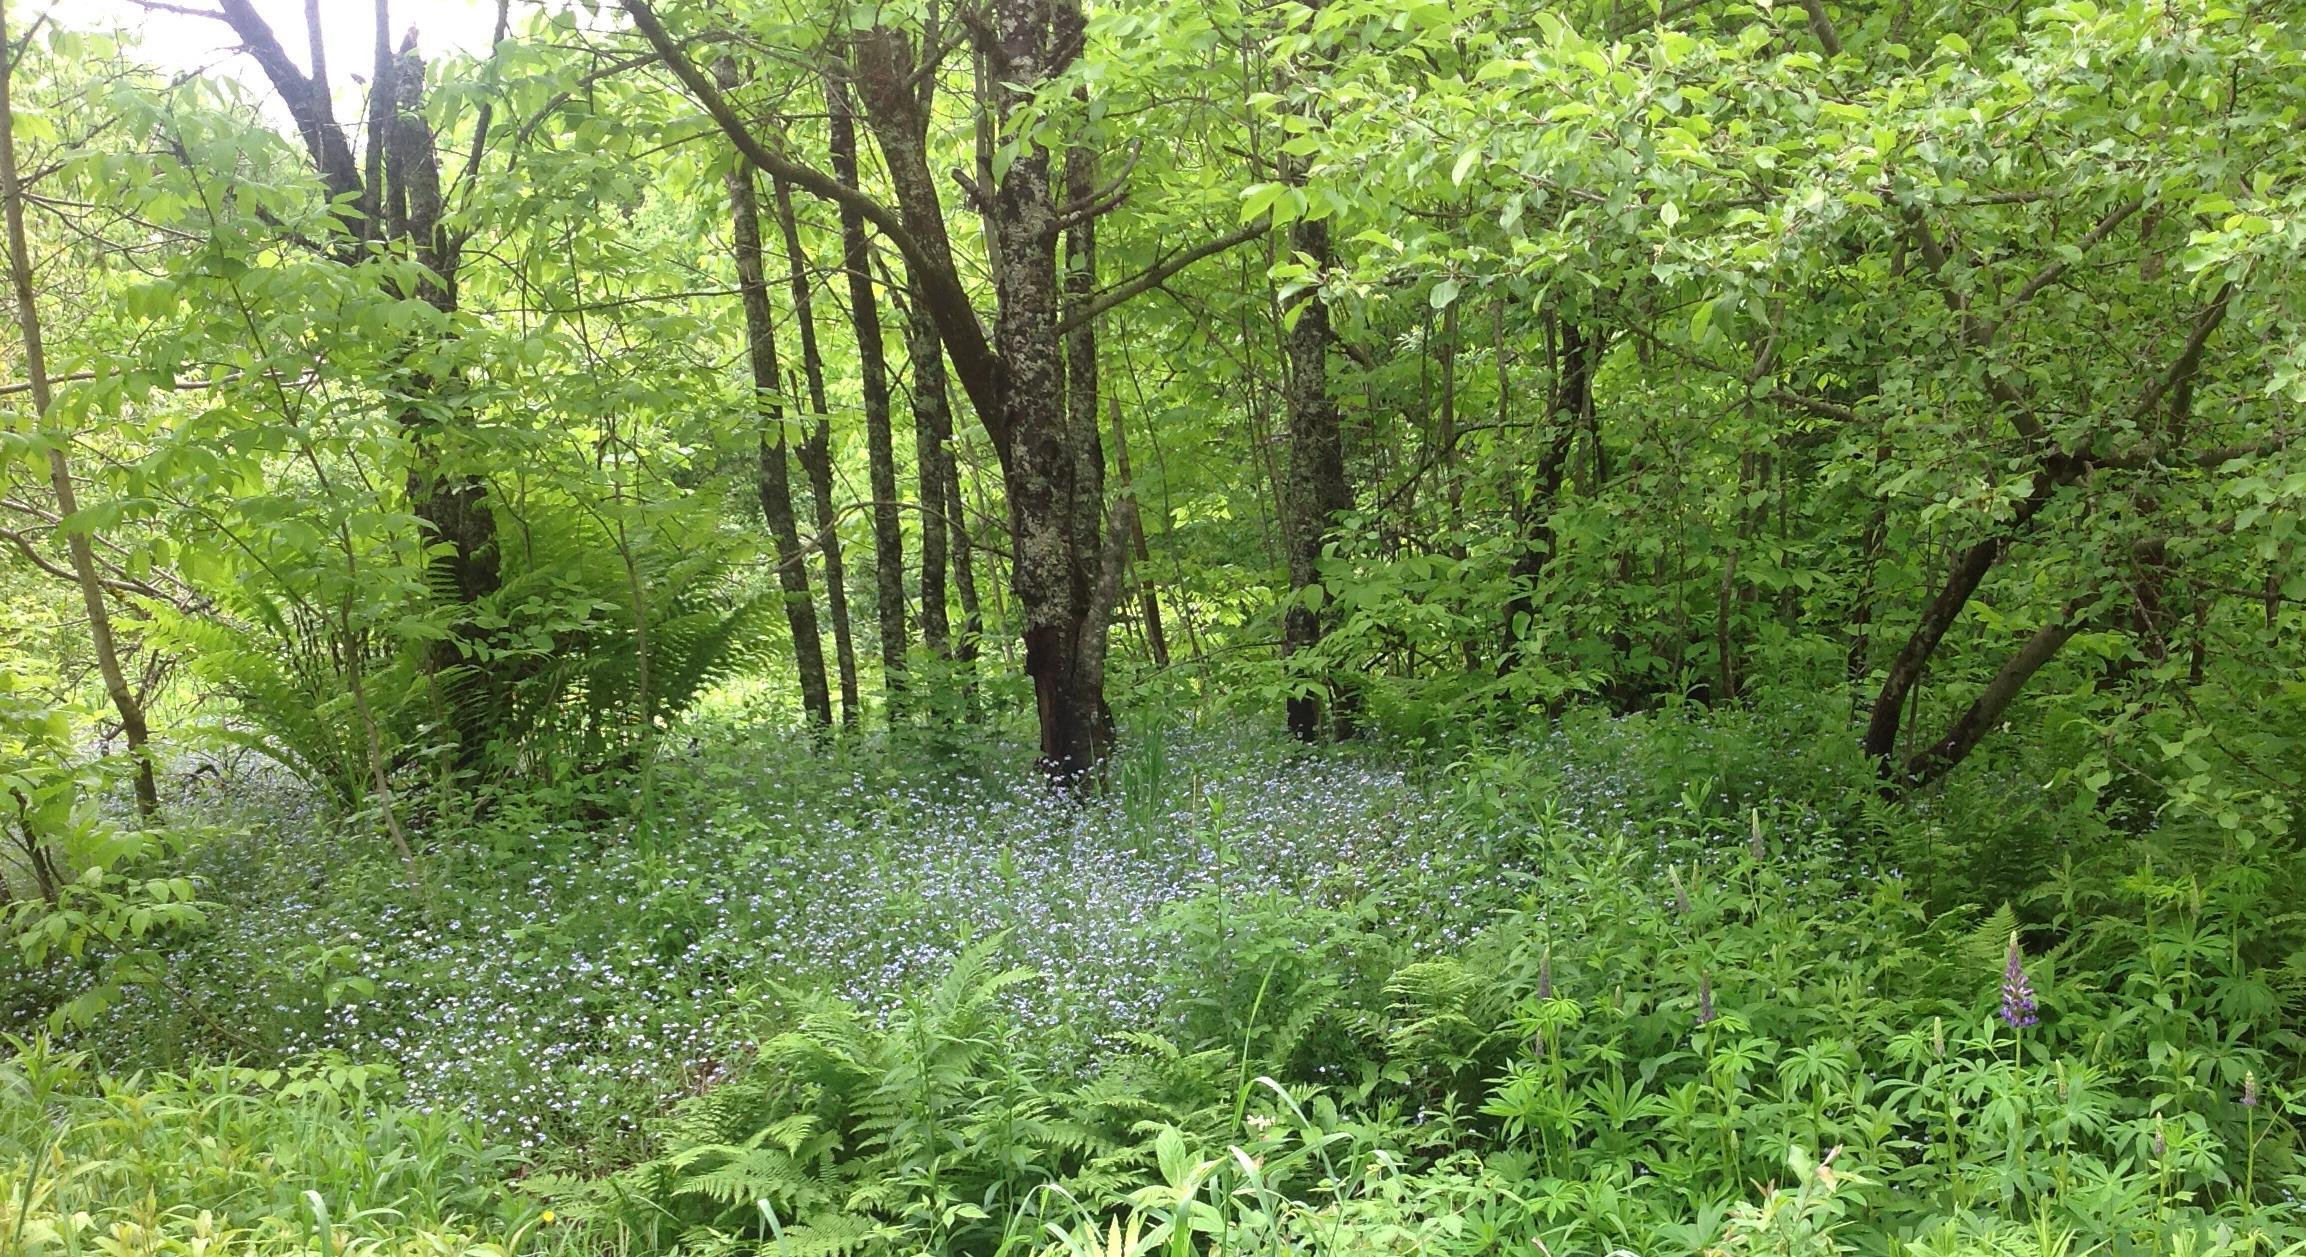
Forget-me-nots in the woods
~
I picked a few of the Forget-me-nots, to try an ‘eco-print’ dyeing experiment in coming days. But what I really took away was another image of a sea of blue flowers in the woods.
~
Copyright 2014 Jane Tims
comforting Comfrey brown
As I try using various plants as a source of dye, I am realising how many shades of brown there are !!!
~
Over the weekend, I did a dye vat of Comfrey. Comfrey (Symphytum officinale) is a flowering plant often found in older gardens. It is a useful plant for gardeners … as a fertilizer, it contributes impressive amounts of nitrogen and potassium. As a compost component, it adds heat and moisture, and helps to speed up the composting process. In the past, Comfrey was recommended as a tea and a medicinal. However, the plant contains alkaloids. Taken internally, these can cause severe damage to the liver and, in Canada, the sale of products containing Comfrey is prohibited.
~
Comfrey grows in large clumps of linear leaves, up to a meter tall. Its stately foliage provides a great backdrop for smaller plants. Later in the season, it will produce curved clusters of bluish-purple flowers.
~
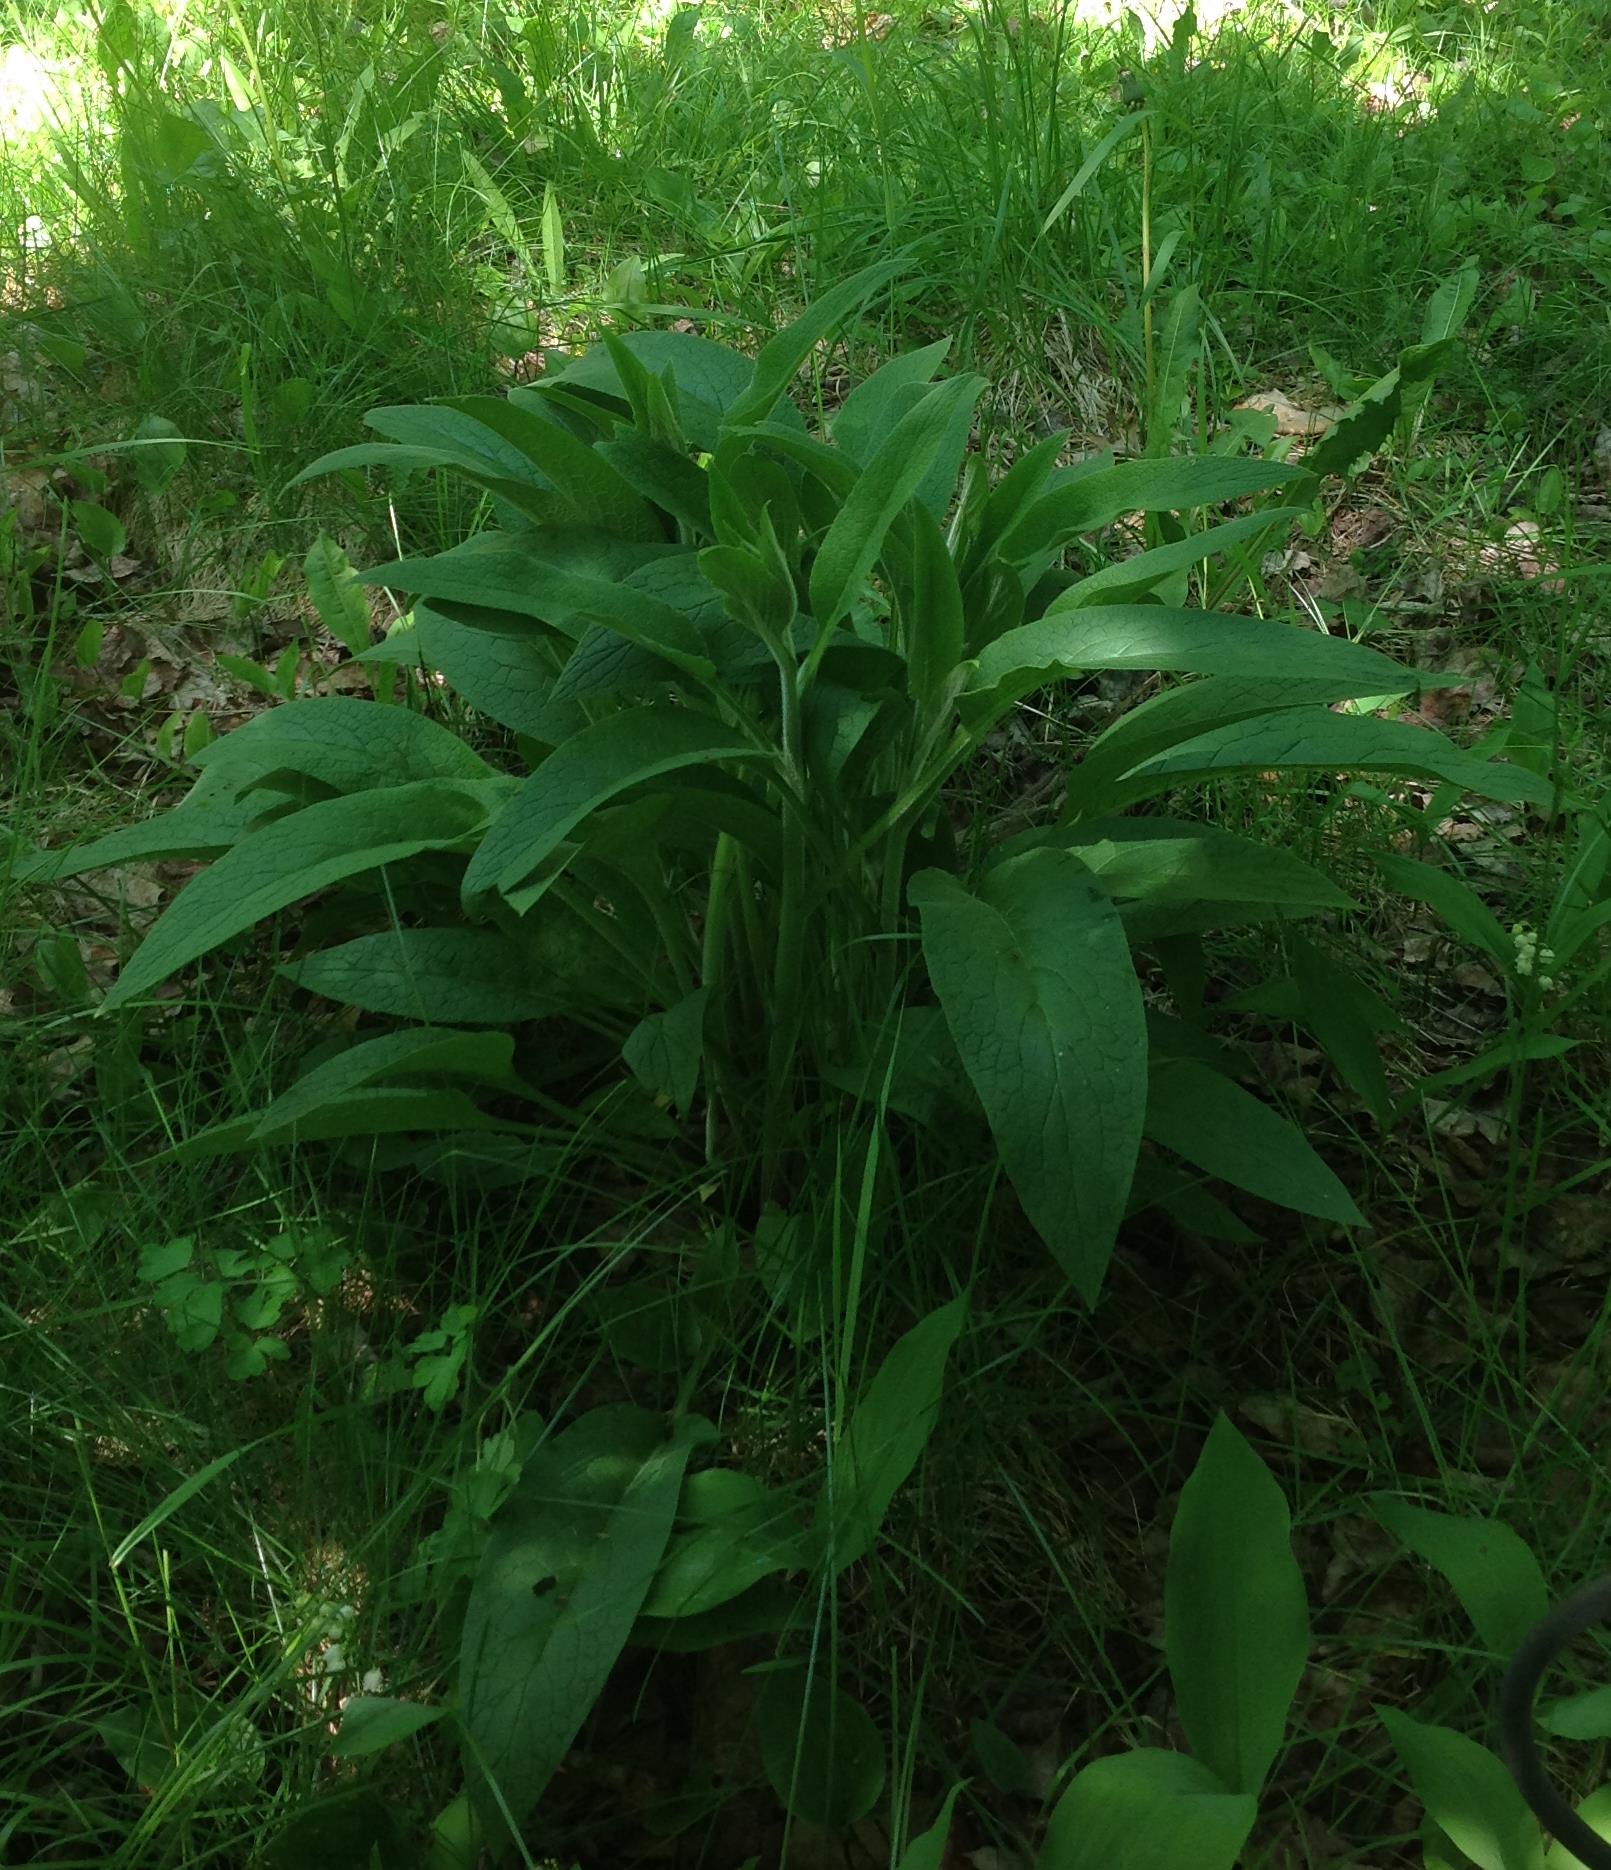
Comfrey in my garden
~
The underside of each Comfrey leaf is a maze of raised veins …
~
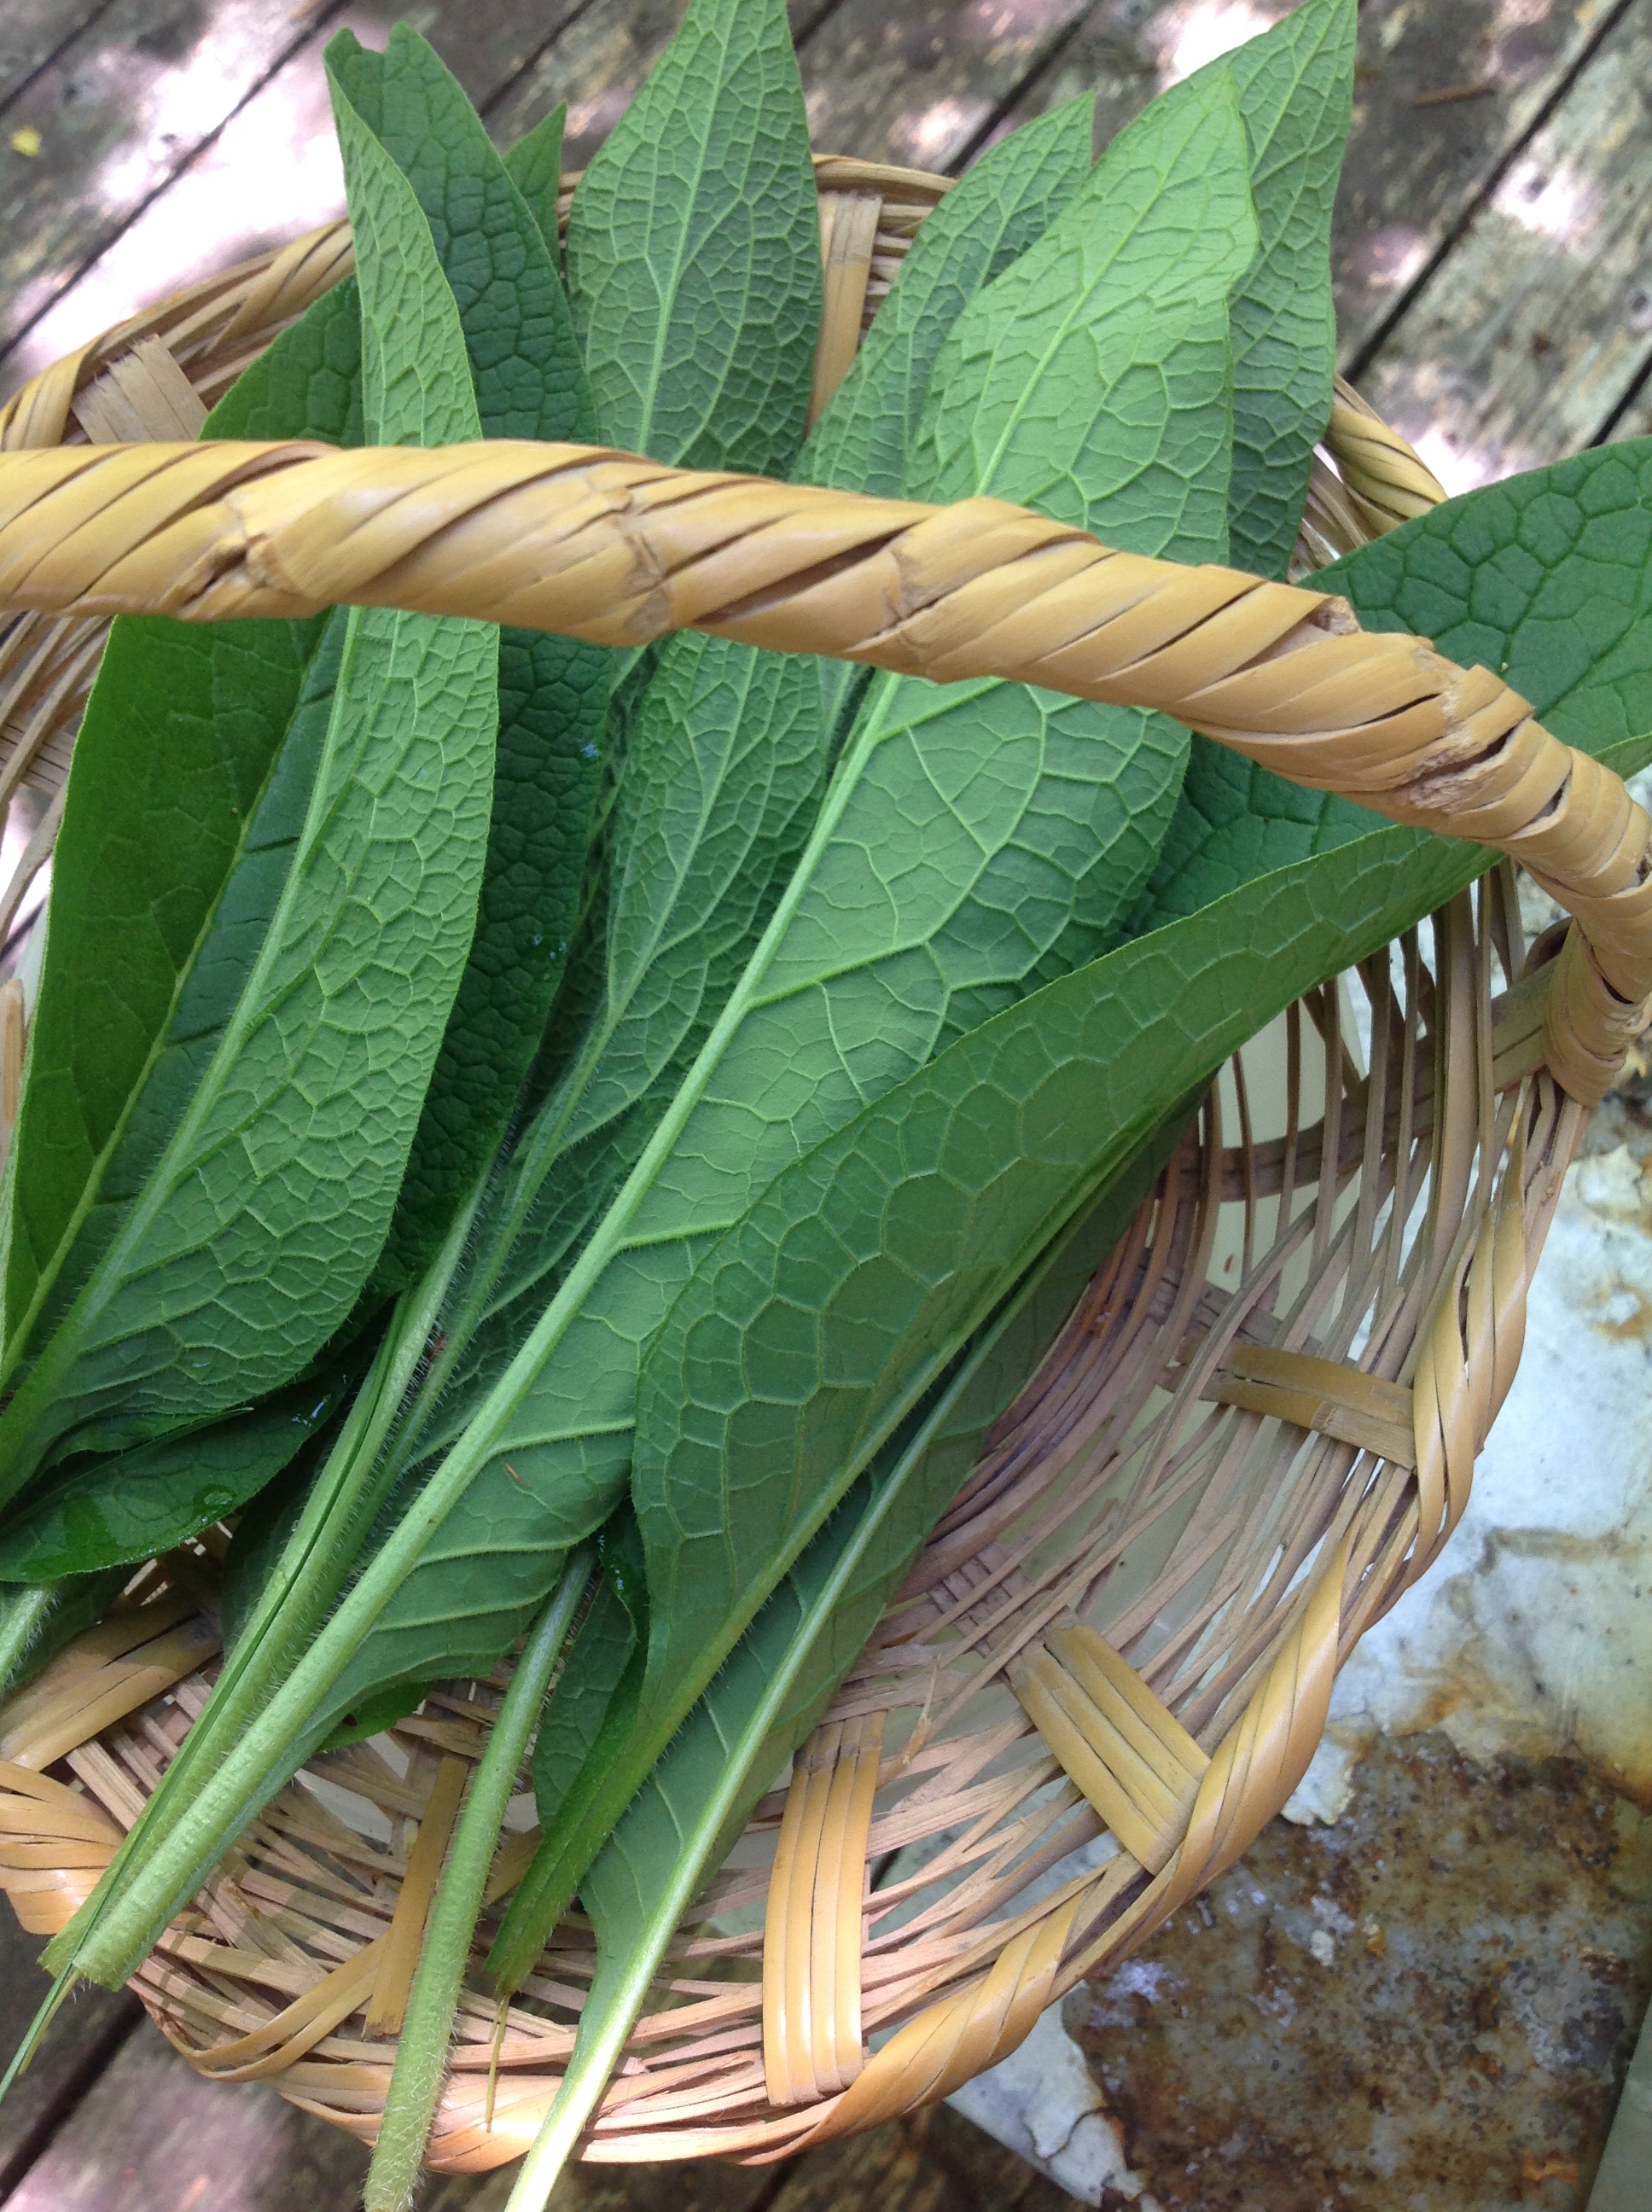
leaves of Comfrey, showing the veins on the underside of each leaf
~
To make the dye, I added the leaves, coarsely chopped, to 6 liters of water. I couldn’t resist throwing in my rusty square nail, to add a touch of iron to the mix …
~

Comfrey leaves in water, cut up and ready for the boil
~
After boiling for an hour, I had a pale apricot-coloured liquid …
~

pale apricot colour of the Comfrey dye
~
I strained and discarded the leaves (in my compost of course) and allowed the liquid to cool. Then I added some of my wool roving, pre-treated with alum, and simmered the wool for about an hour.
~
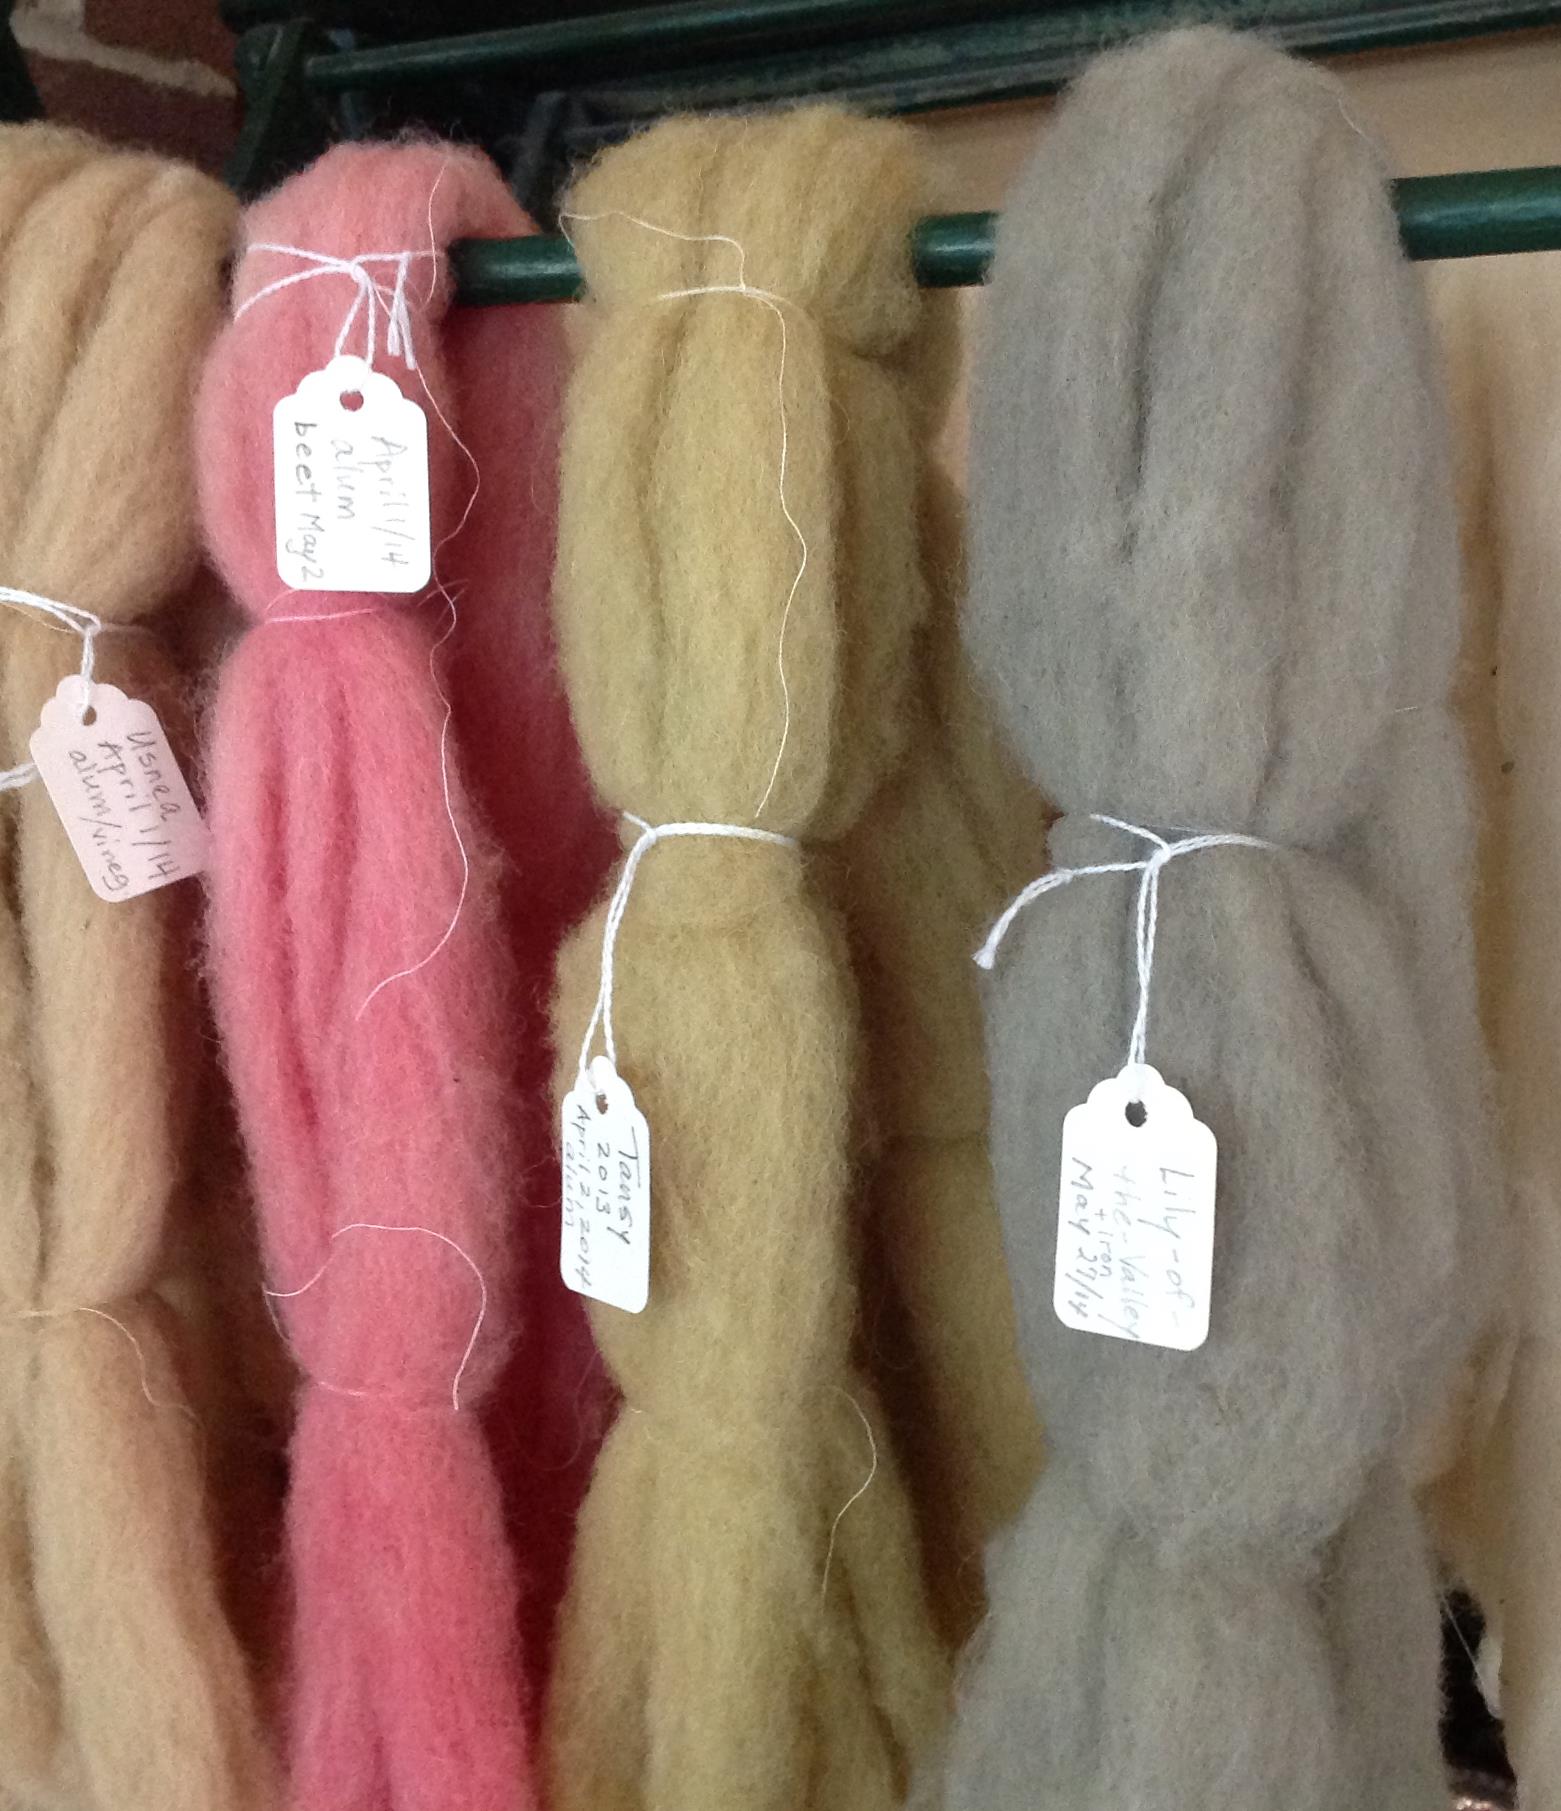
The result was yet another shade of brown, so similar, yet so different from the browns I obtained from Alder, Old Man’s Beard lichen and Tansy …
~

various dyes on wool roving (left to right): Alder bark, Old Man’s Beard lichen, Comfrey, Tansy and a glimpse of Beet
~
The Comfrey brown is a brown of the forest, without the orange or yellow undertones of the other browns I have made. This is the brown of the wild rabbit I saw in our driveway last week. It is the buff brown of the heads of Pine Siskins visiting our bird feeders in winter. This brown reminds me of soft mitten wool and caterpillar cocoons. From Comfrey comes a very comforting brown.
~
Although I could use my wool roving ‘as is’ in my weaving, I have decided to spin the wool. First, of course, I have to learn to spin. A maple drop spindle should be waiting in my mailbox later in the week. So many projects … good thing the days are getting longer !!!
~
Copyright 2014 Jane Tims
harvesting colour … lily of the valley
Now that green is the dominant colour outside my door, I am anxious to try dyeing with every plant I see. I was particularly anxious to see if I could coax colour from the Lily of the Valley crowding around my walkway.
~

leaves of Lily of the Valley and Wild Lily of the Valley
~
The green leaves in the photo above are from two different plants, the smaller single leaves of Wild Lily of the Valley (Maianthemum canadense) and the larger furled Lily of the Valley (Convallaria majalis). The larger Lily of the Valley produces a dye with seasonal qualities – dark green in spring and yellow in fall.
~

‘pips’ of Lily of the Valley
~
The rolled emerging leaves of the Lily of the Valley are called ‘pips’. The pips squeak as they are collected. I think they want to be left alone!
~

Lily of the Valley leaves in water
~
I cut the leaves into one inch pieces and left them for an hour to simmer in water. I added some iron to the mix, to serve as a colour modifier – a square-headed nail, a railroad spike and a rusty horseshoe. The water was pale green at first, but as it began to cool, it became a dark, almost black, green …
~

dark dye from Lily of the Valley
~
Once the water cooled, I strained the liquid and added the wool. After bringing it to a boil, I let it cool gradually – wool hates sudden changes in temperature …
~

wool roving, treated with alum, in the dark Lily of the Valley dye
~
The resulting colour was dark grey. I also did a vat without the addition of iron and the result was a slightly paler grey.
~
dark grey of wool roving dyed with Lily of the Valley
~
This is my last dyeing experiment with Lily of the Valley. All the parts of the plant are poisonous with compounds known as glycosides. Ingested, these compounds have an effect on the heart and can cause fatal circulatory, gastrointestinal and respiratory problems. If you are a fan of the TV show Breaking Bad, you will know that Walt used Lily of the Valley in a scheme to kill one of his enemies.
~
Although I took precautions, doing the boiling outside and disposing of the liquid in the woods, far from our well or the stream, I was not comfortable working with such a poisonous plant. While the water was boiling, the smell was thick and noxious and my mouth had a metallic taste all day. I was jittery before I went to bed, convinced that breathing the vapours would be the end of me. I am fine today, but I don’t recommend using Lily of the Valley as a dye. The dark grey colour obtained is not worth the risk. And the lovely scent of the Lily of the Valley flowers is the plant’s first, best use.
~
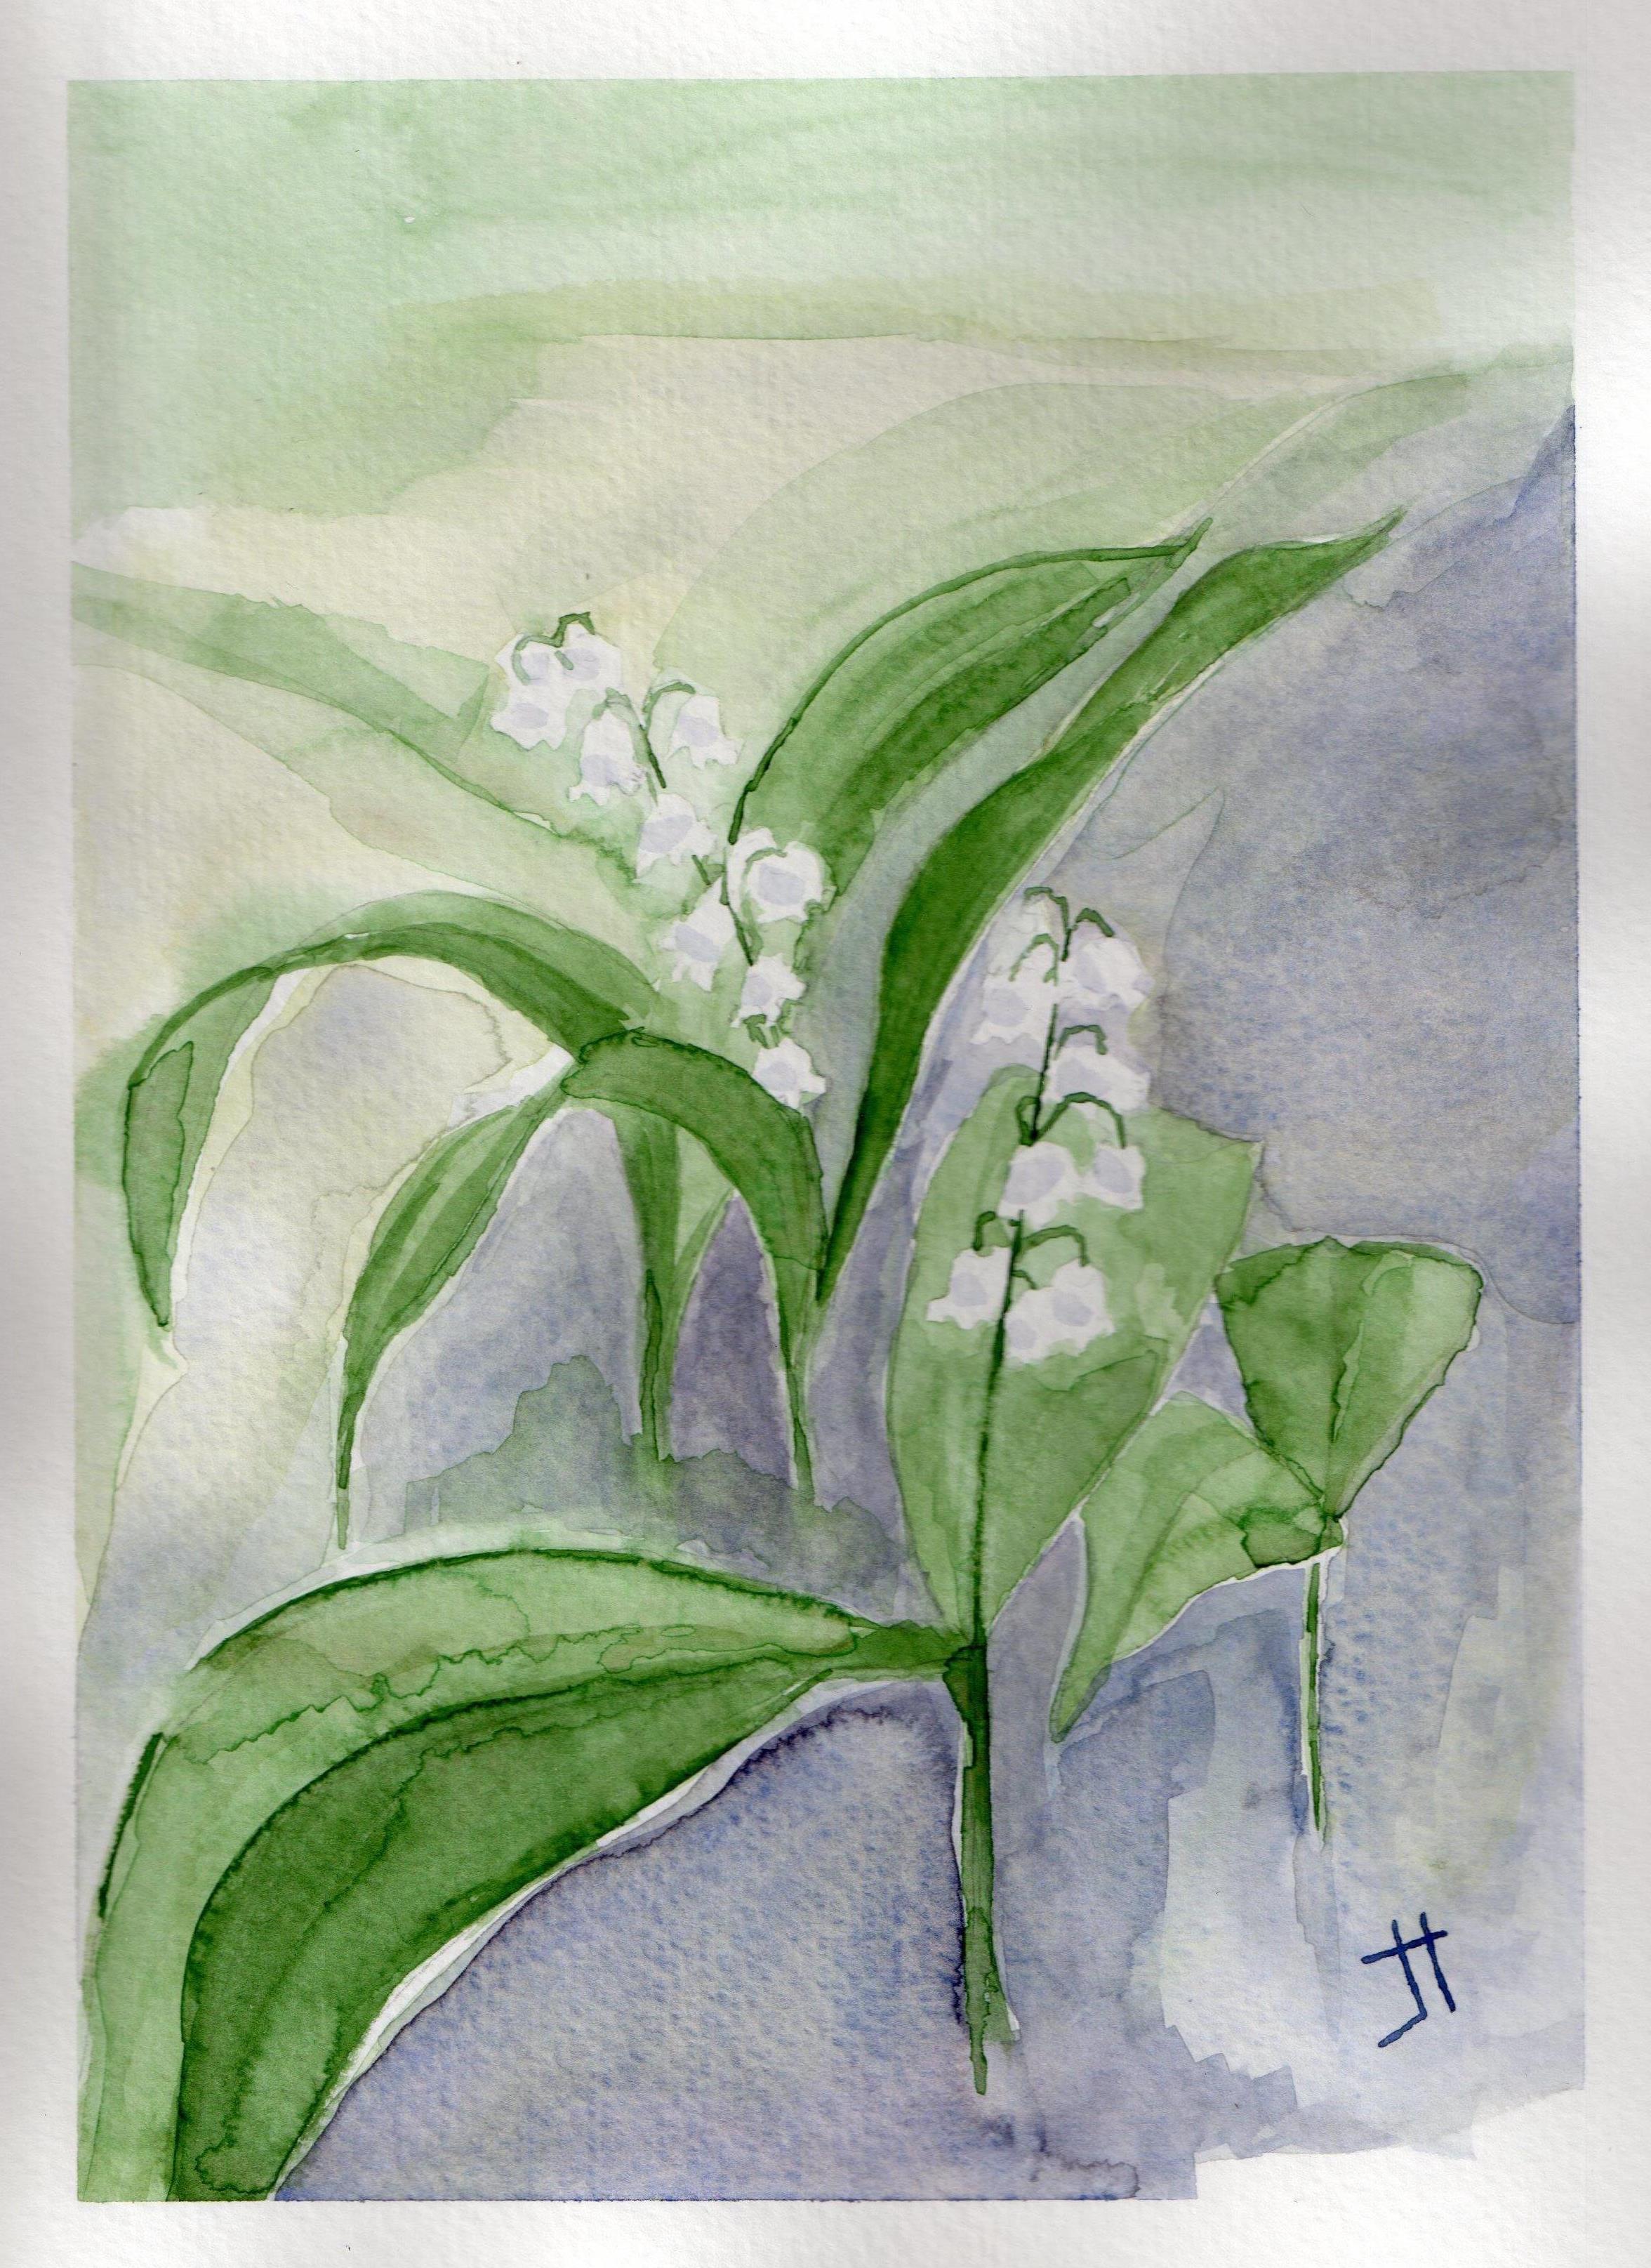
2013 ‘lily-of-the-valley’ Jane Tims
~
Copyright 2014 Jane Tims
remembering place: a gift on a spring day
~
When I was a teenager, my family lived in Lower Sackville in Nova Scotia. I went to Junior High and Senior High there and began my university days.
~
I have many great memories of living in our house … of spending time with friends and family. I remember painting the kitchen cupboards with my Dad, painting a huge seascape on the living room wall, decorating the Christmas tree with the ‘help’ of our dog Snoopy, and doing homework and learning to sew while watching Audie Murphy movies. One of my earliest ‘projects’ was raising wild violets from seed along the back fence. I can remember spending hours on the phone with my friend Donna, pulling the long telephone cord down the basement stairs so I could sit and giggle in privacy.
~
On that same phone, my sister and I practiced for days how we would be the tenth caller to win tickets to see Elvis Presley in Halifax. When the moment came, we counted the time just as we had carefully calculated. Then I dialed in, at the precise moment. They answered! And, in my excitement, I HUNG UP. My sister was so put out at me. And we will never know if we were the lucky tenth caller! We never did see Elvis in person.
~
As an exercise for a writing class I am taking, I wrote a little about attending my best friend’s wedding after graduation in 1972. I walked to the church which was just at the bottom of our street. As I wrote the story, I thought how I would like to see that street, to better remember the walk I took. So, I went to Street View (Google Earth). I began at the top of the hill and virtually ‘walked ‘ along the street where I had lived. At the first of the walk, I saw our house in July of 2012, when the Street View image was taken. I was amazed to see how the trees we planted had grown … the house is hard to see !
~
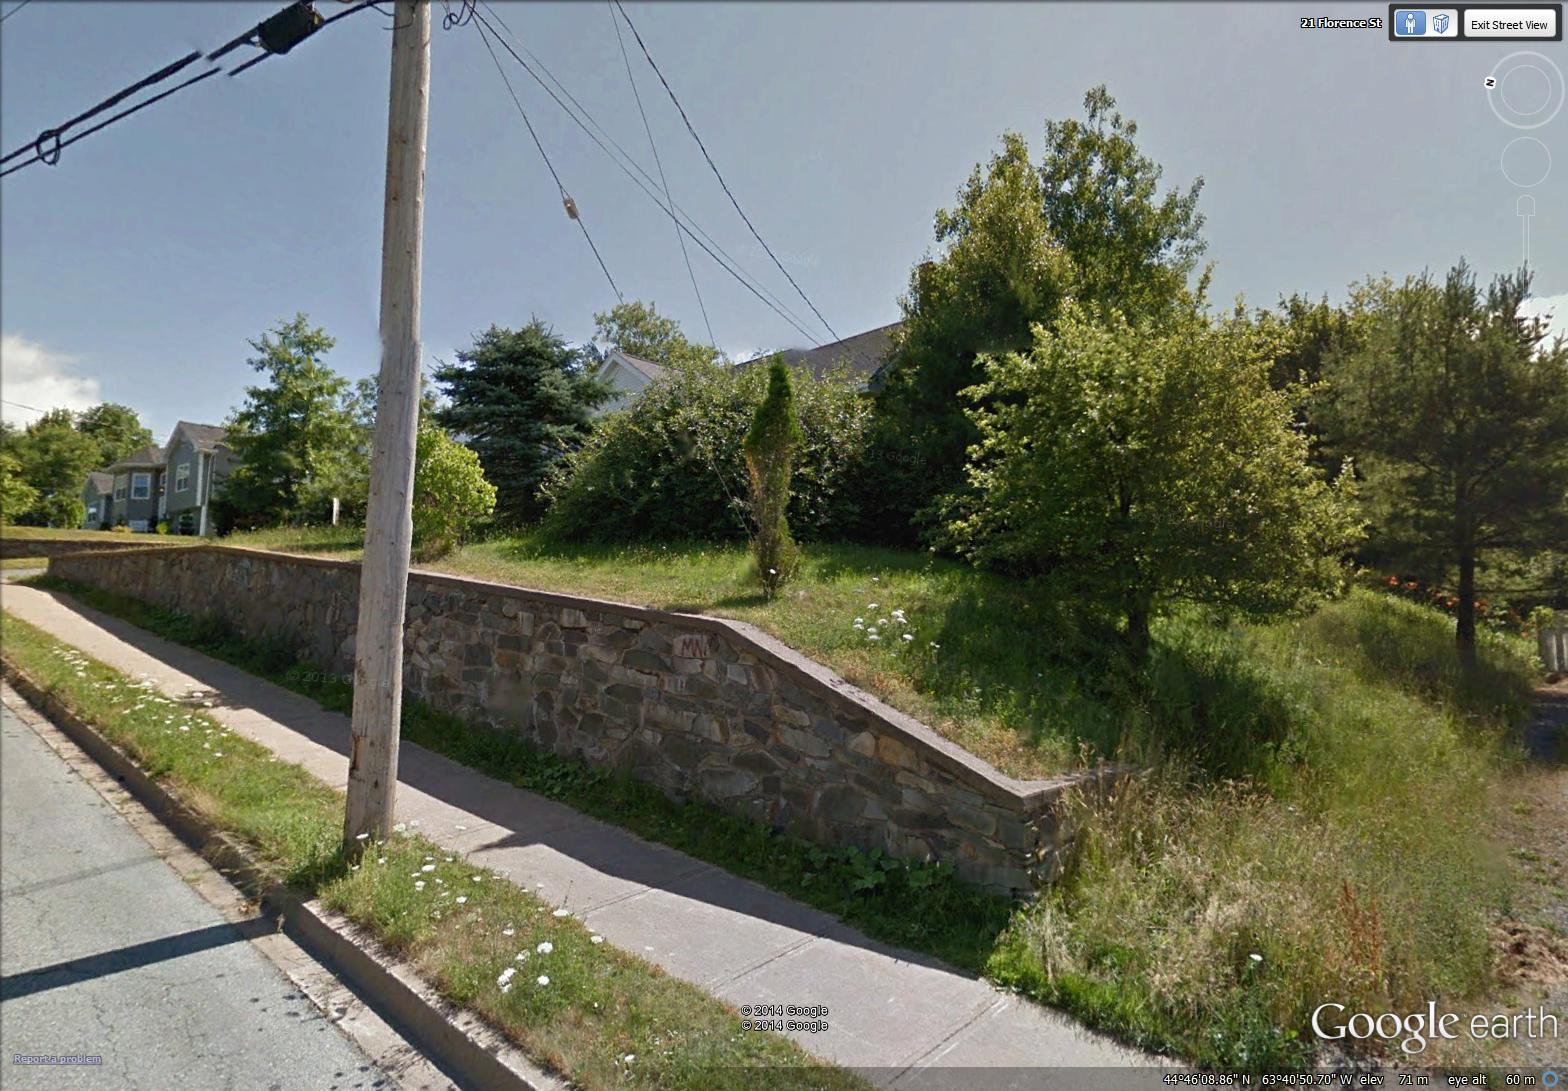
the house where we used to live, the trees all grown
~
A few more ‘steps’ and Street View switched to an image taken in May of 2009. I turned back to ‘see’ the house. And this is what I saw …
~

Forsythia in bloom in front of the house where I used to live
~
My Mom loved the big Forsythia that grew in our front yard. She always said it reminded her of my grandmother (her mother). And there it was, in full bloom and grown huge over the 40 years since we lived there. What a lovely gift on a spring day!
~
Copyright 2014 Jane Tims
harvesting colour – the orange of alder bark
Last week we went out to our cabin lot to collect some material for my dyeing experiments. We are constantly battling the alders which move in quickly after any clearing. I think my husband was quite agreeable to cutting some alder sticks for me to use as dyestuff. Our alder is Alnus rugosa (Du Roi) Spreng, the speckled alder.
~
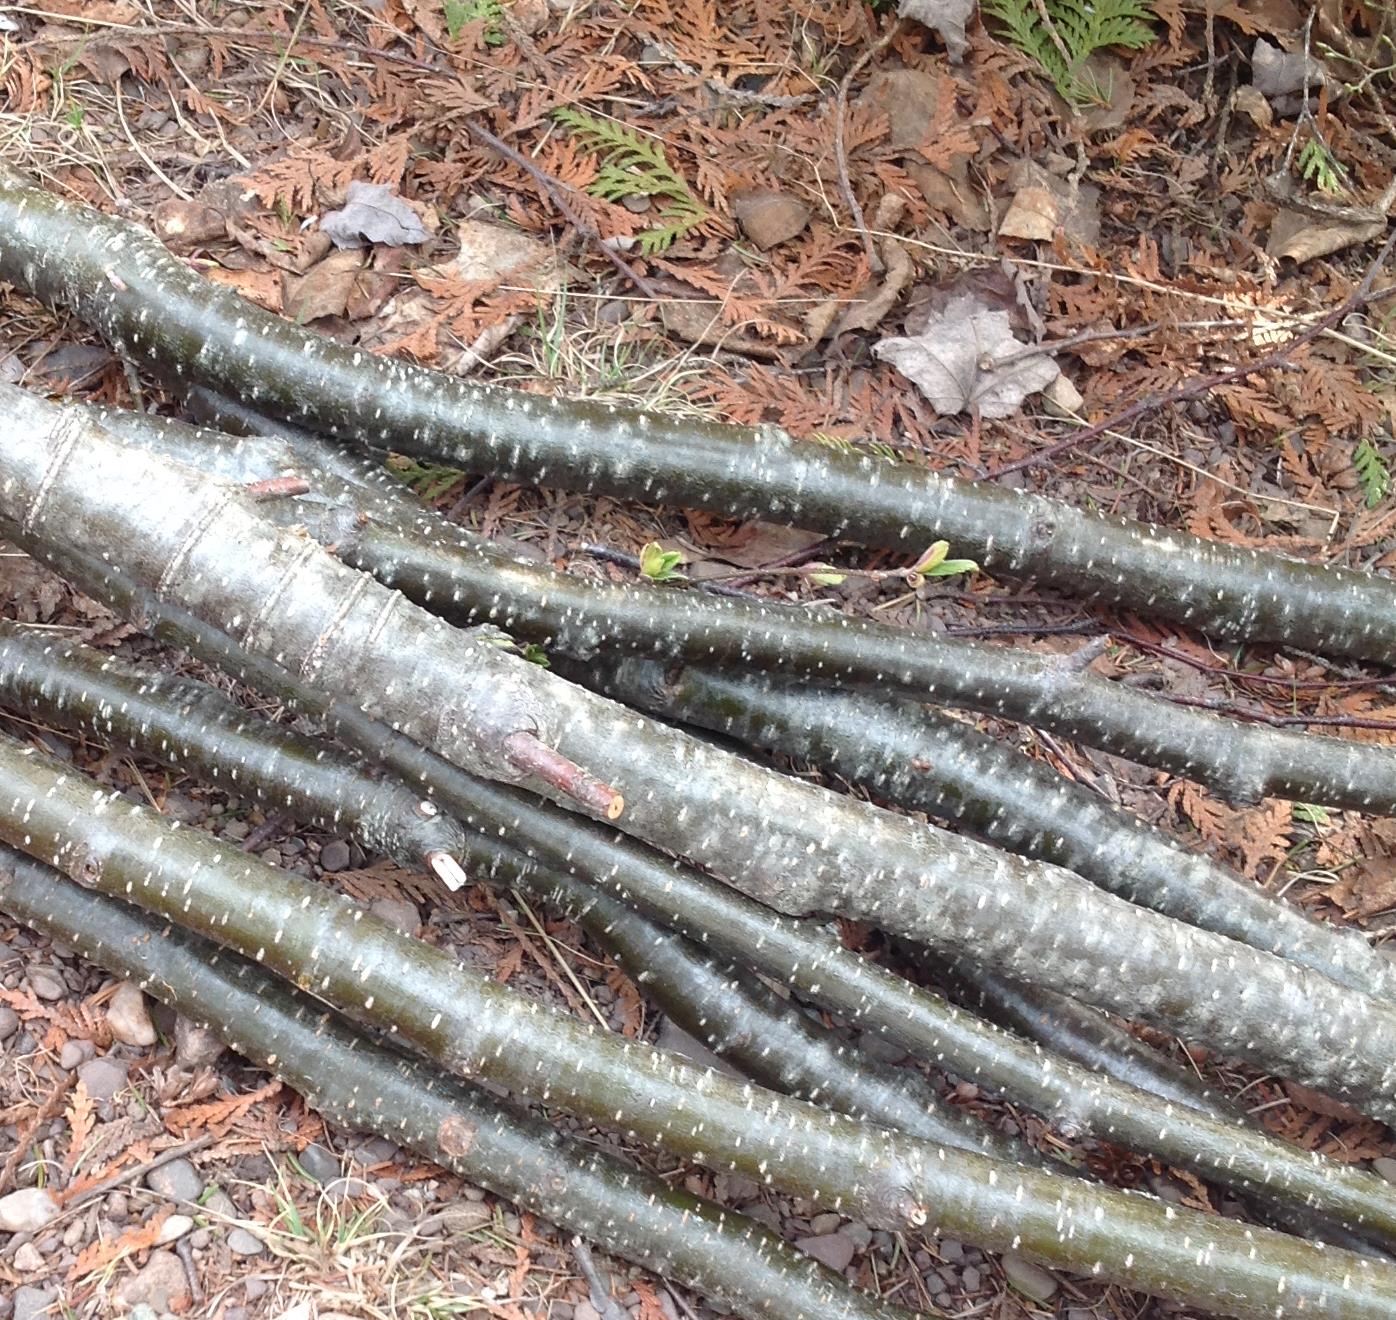
our harvest of alder stems
~
Yesterday, I sat on our deck to peel the bark from the alder sticks. I was acclimatized to the orange dye I expected from the alders by the leavings of last autumn – the piles of dry maple leaves still on the deck and the bright sienna of my terra cotta pots.
The alders peel easily, revealing a bright green inner bark. The green quickly oxidizes to a bright orange, due to the presence of the chemical oregonin. By the end of the debarking session, my jean were stained dark orange and my palms of my hands were covered in the colour of tangerines.
~

~
I was glad to have moved my dyeing adventures out to the back deck because the smell was quite acrid. As I boiled the bark, the water became a dark orange.
~
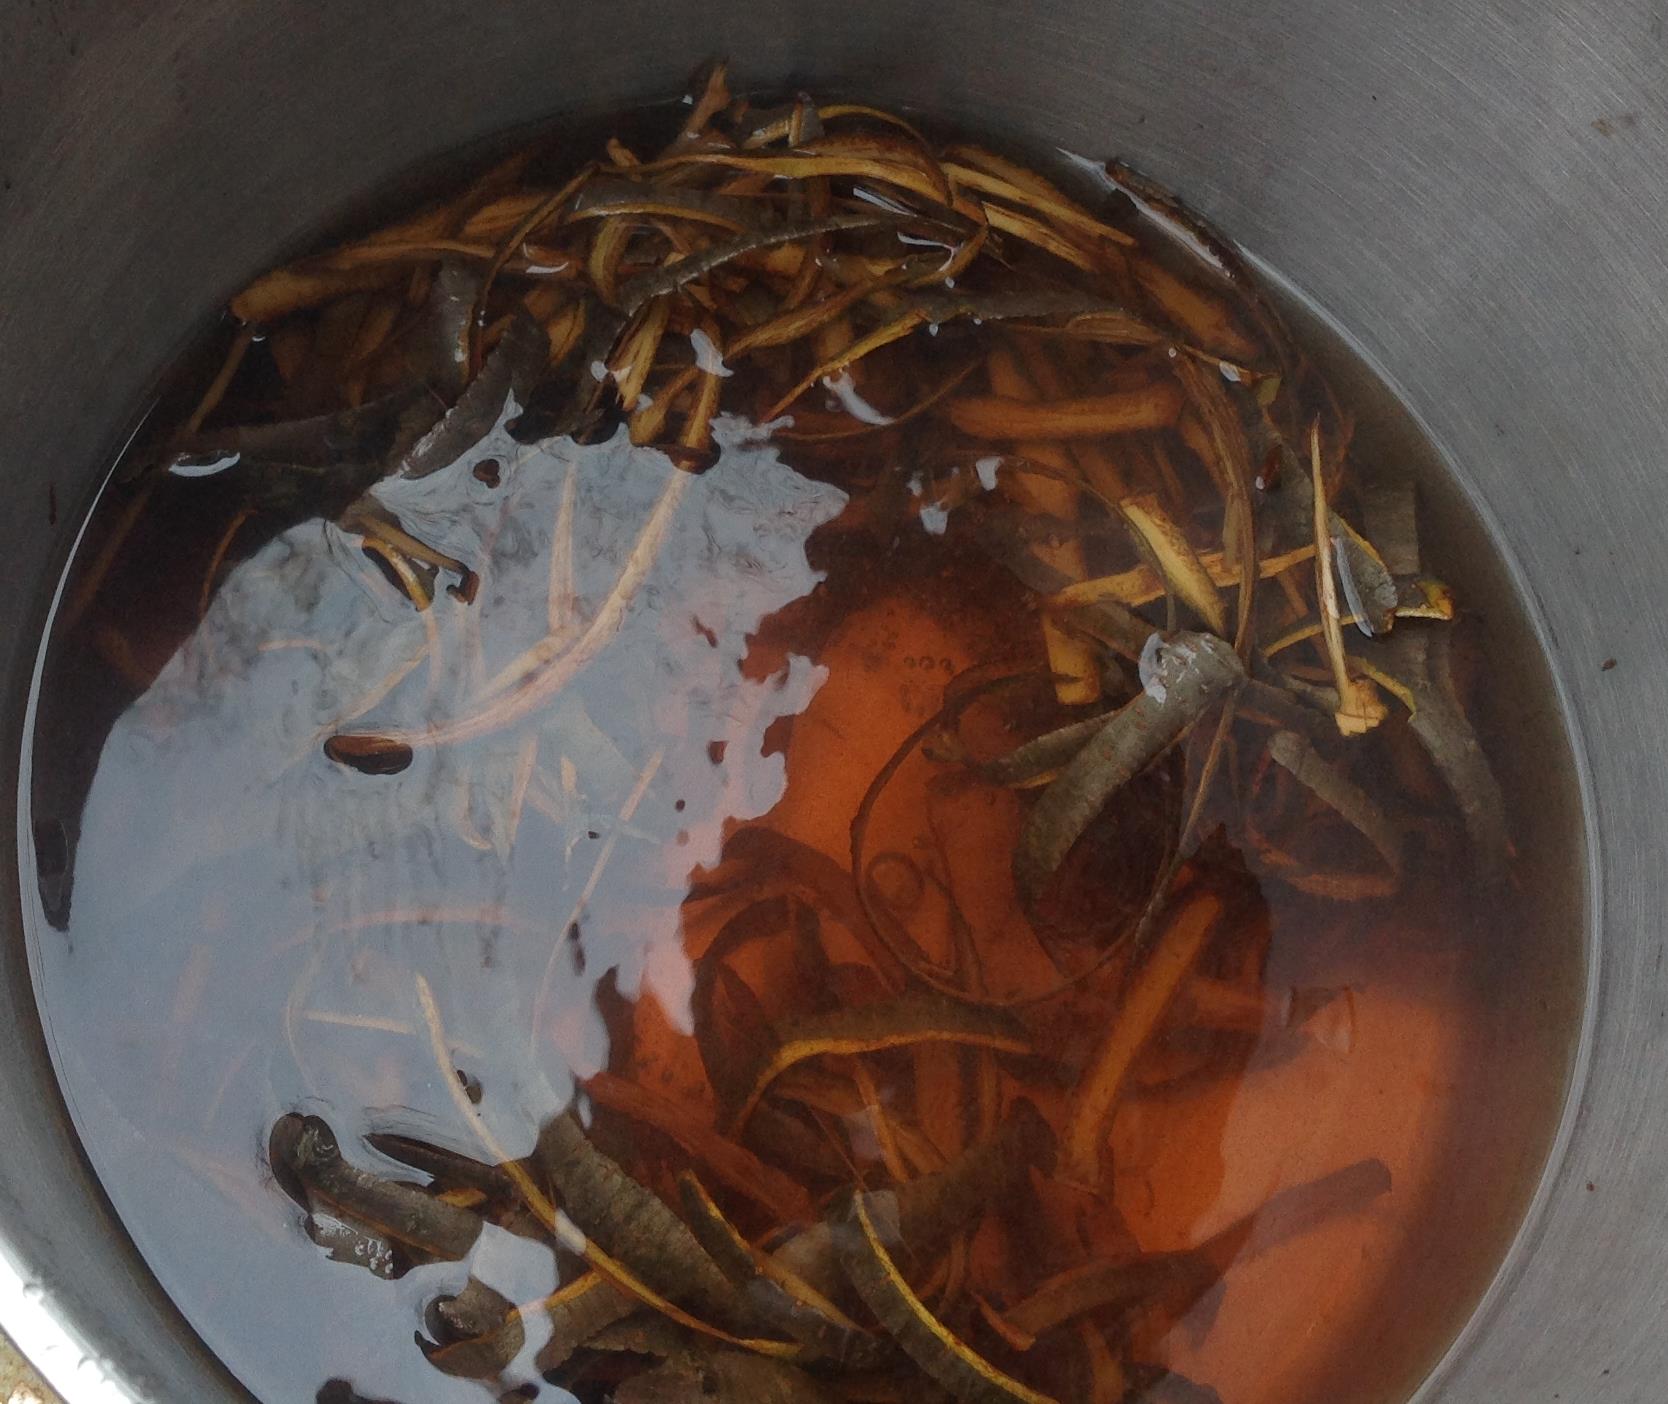
orange colour resulting from boiling the alder bark
~
I simmered my length of alum-treated wool roving in the liquid for about an hour.
~

wool simmering in the orange alder water – looks like sky and clouds are in there too!
~
Although it is not orange, the colour is a pleasing yellowish-brown, similar to but more yellow than the colour obtained from Old Man’s Beard lichen.
~

wool dyed with ( left to right) alder bark, lichen and beets
~
Now that the warm weather is here, I am looking forward to more hours on the deck, watching over my concoctions and seeing more colours emerge!!!
~
Copyright 2014 Jane Tims
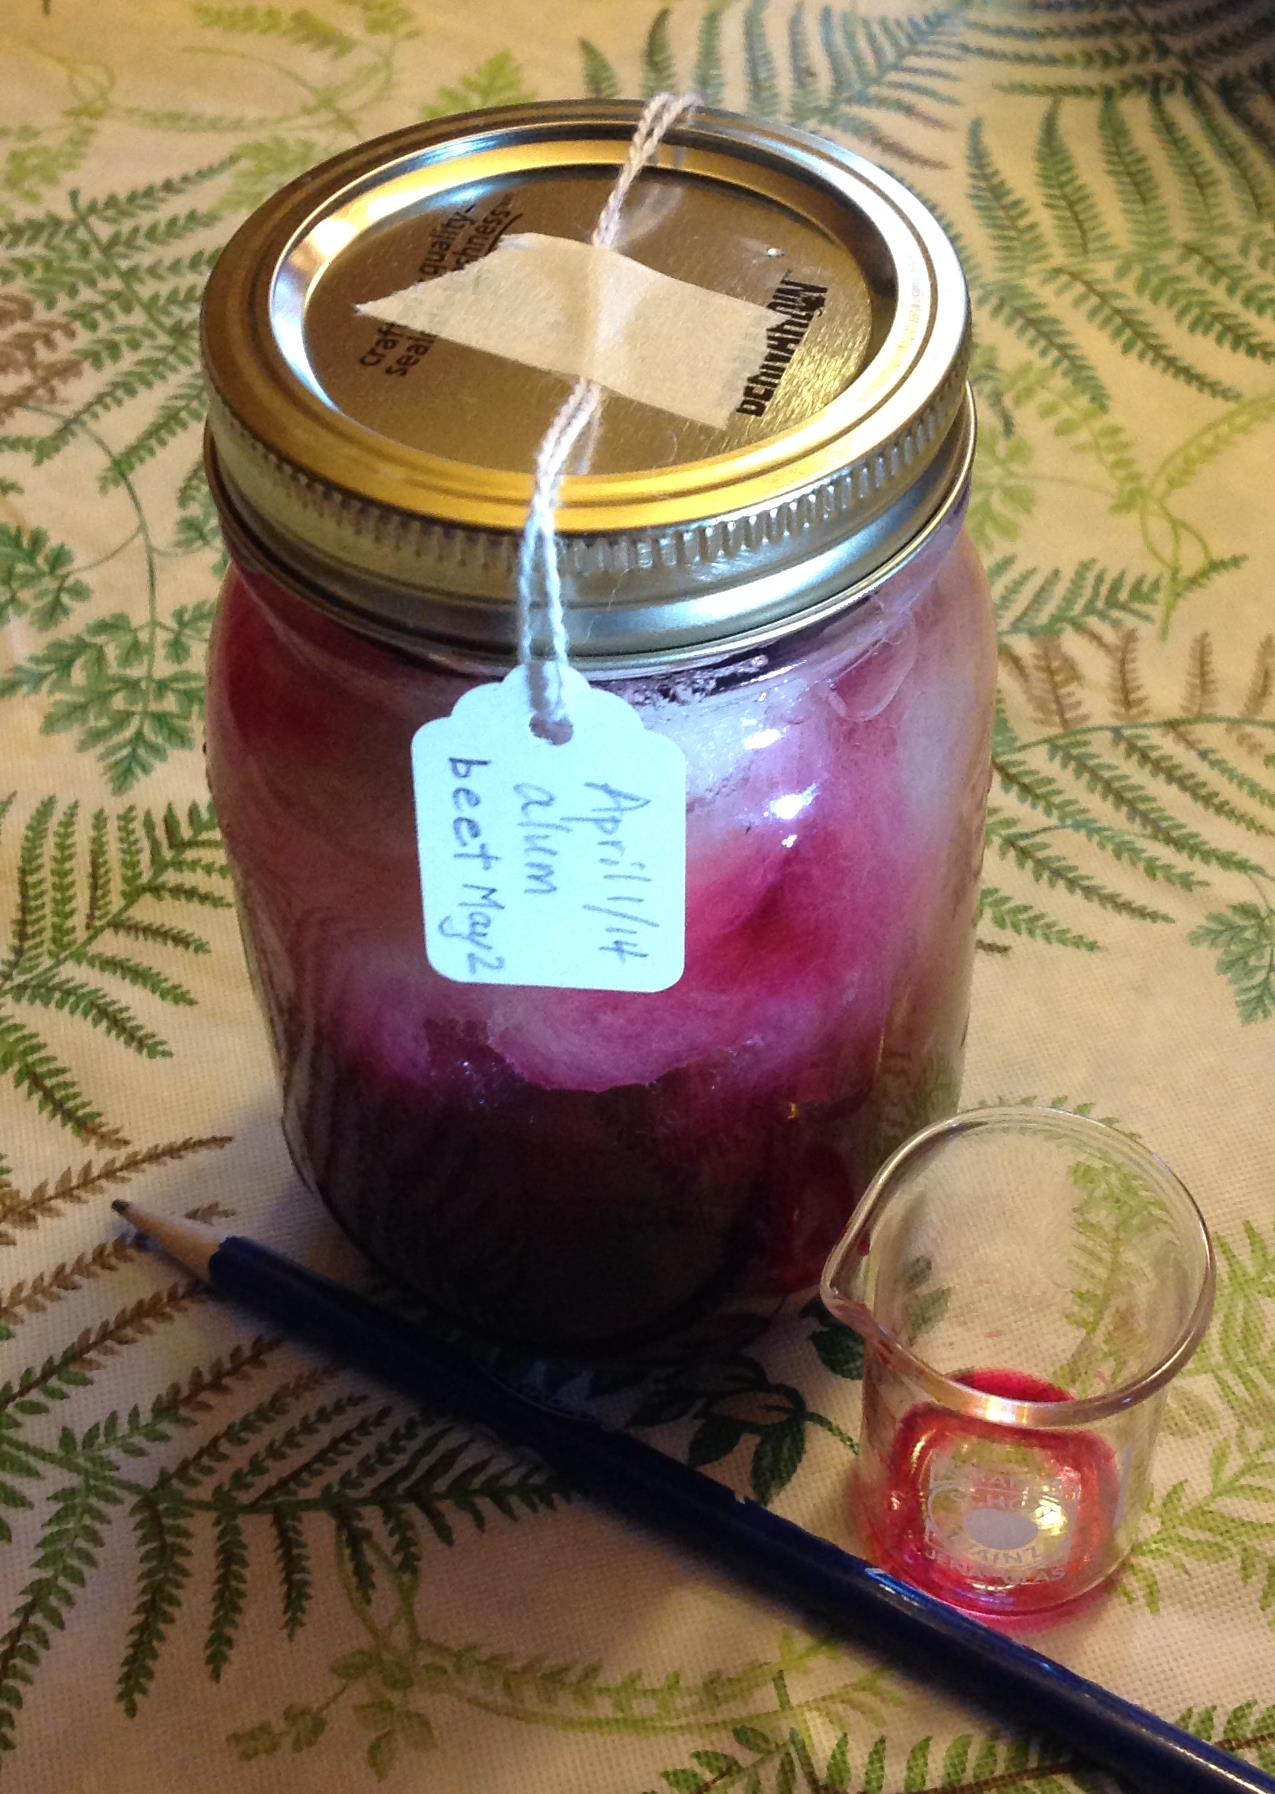
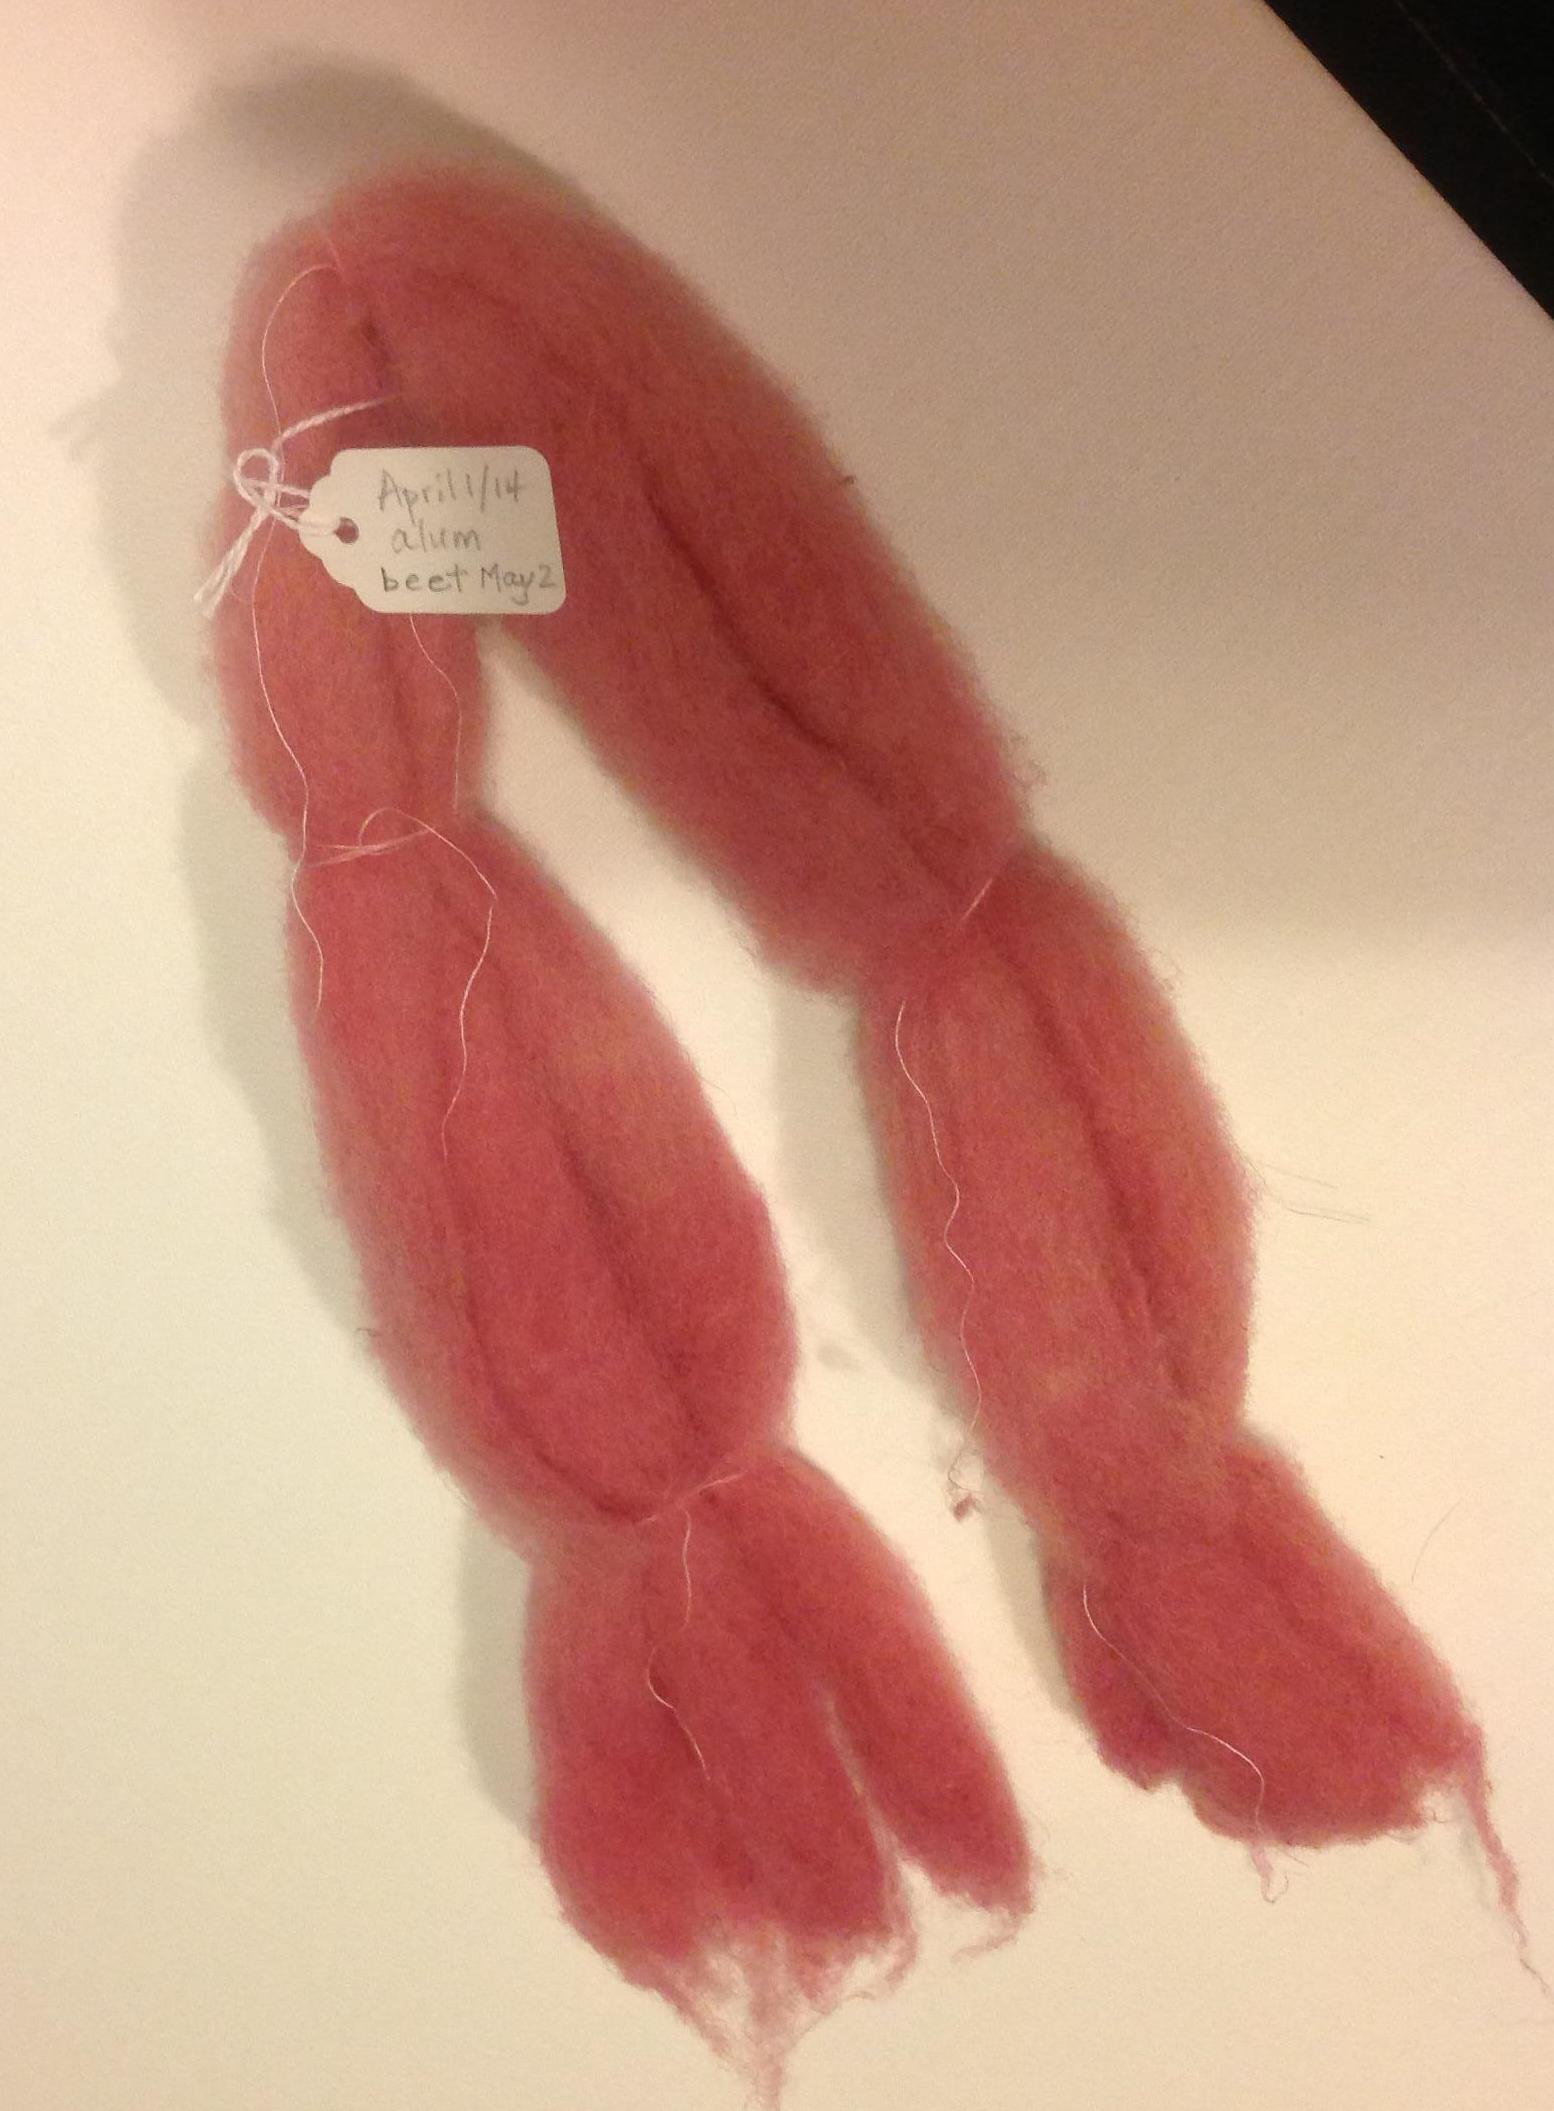
beet pink
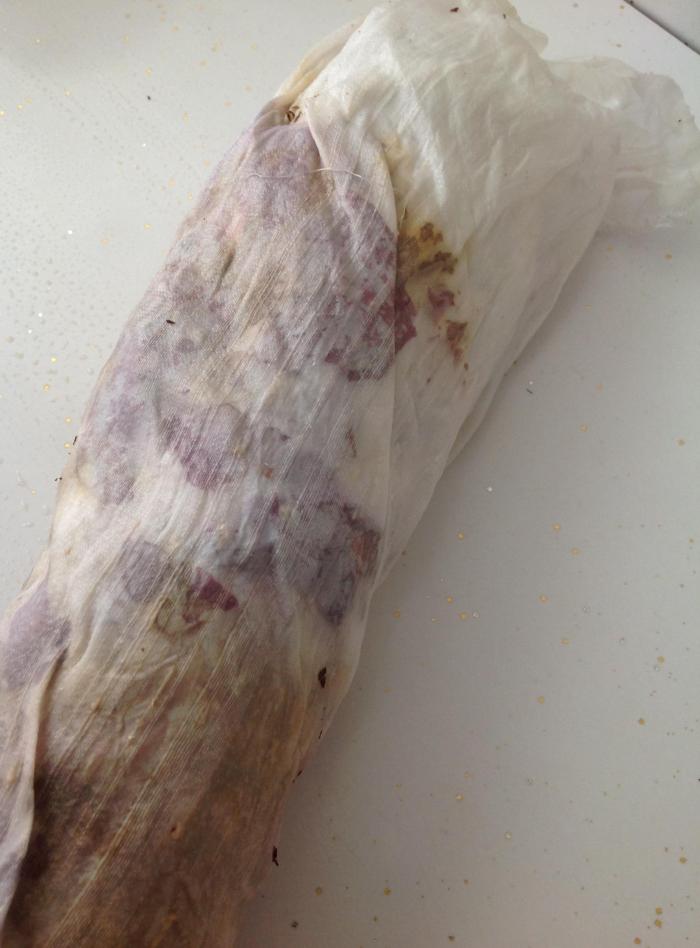
Last week, I tried dyeing some wool roving with the juice of pickled beets …
~
~
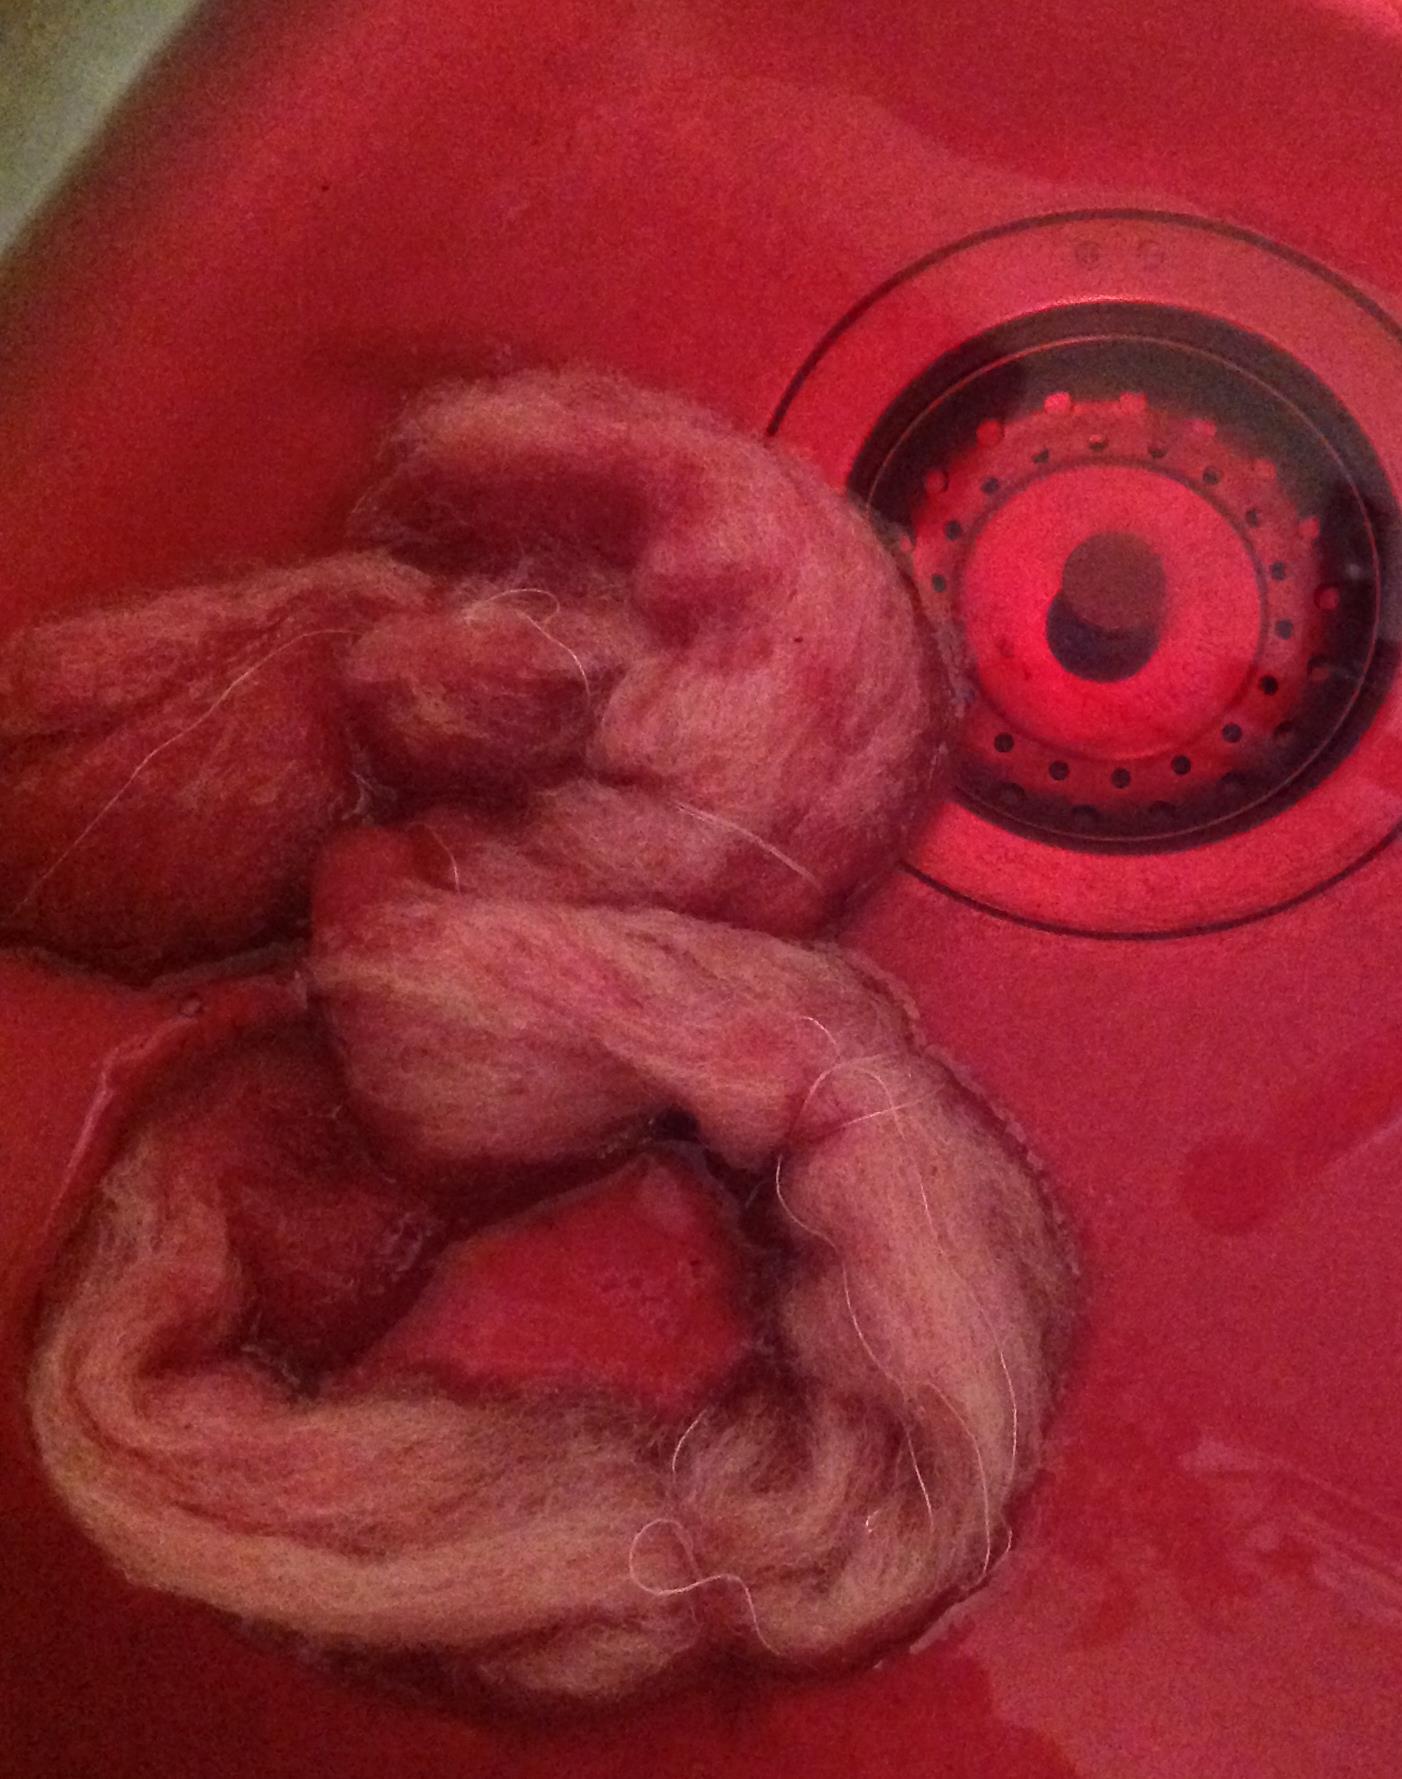
Yesterday I opened the jar and rinsed the wool in cool water. Looks like a lot of the colour still went down the drain …
~
~
And the final result? A pretty pink. Reminds me of the pink batts of insulation we installed in our walls! The wool is not scratchy at all, but soft and fragrant.
~
~
Gradually I am building a rainbow of colour on my drying rack …
~

from right to left: wool roving prepared with alum as a mordant; wool dyed with Tansy; wool dyed with Old Man’s Beard lichen; and wool dyed with pickled beet juice
~
I am still working on the poem to capture this experience … it’s not quite ready to share.
~
Copyright 2014 Jane Tims
beet red
For my next dyeing project, I want to use beets as dyestuff. Although my writing project is called ‘harvesting colour’, there no beets in my garden and none in the store where I shop. So I have decided to see what commercially available pickled beets will contribute to my experience of dyeing.
~
My eagerness to use beets for dyeing is due to the encouragement of a friend of mine. When I asked her to do an evaluation of my project for artsnb she wrote about how she loves the colour of the water after she cooks beets. She also said how much fun it would be to keep the ‘ruby red water’ on the windowsill in a jar. I hope to be able to capture an experience like this in my poetry.
~

~
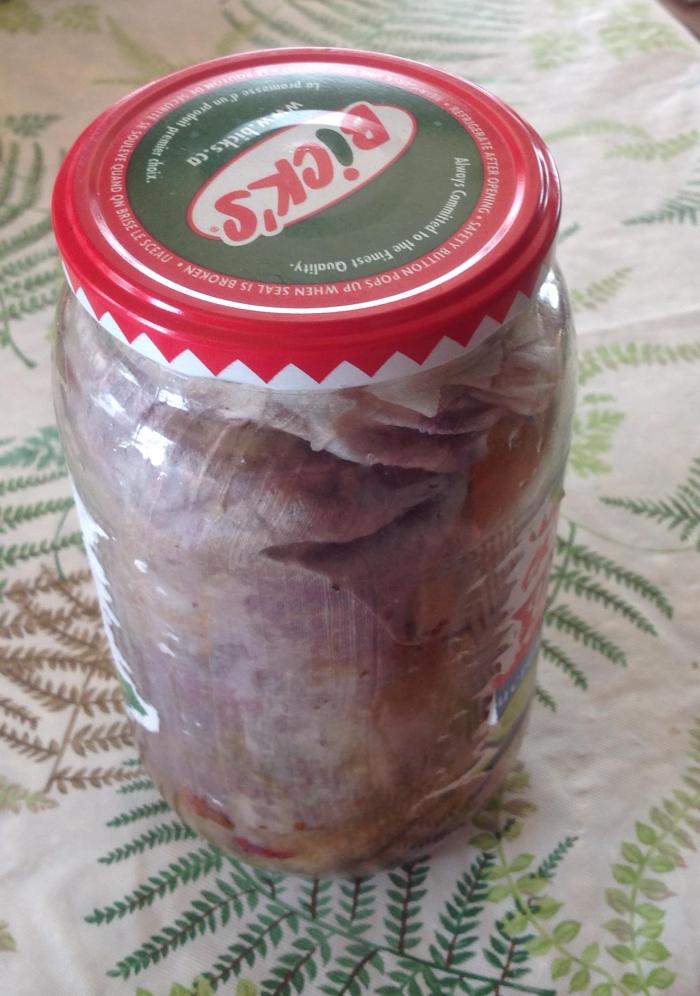
First, I bought a jar of pickled beets. I read the label carefully, just to make sure there is no artificial colour added to the jar.
~

~
Eating the beets is a side-benefit of this project. The taste reminds me of my Mom’s pickled beets. I remember her showing me how to boil the beets and how easy it was to slip the skins from the boiled roots.
~

~
The beet juice is a bright rosy-red, clear and jewel-like …
~

~
For this project, I used a length of my alum-treated wool … I have learned these mechanically-carded lengths of wool are called ‘roving’ …
~

~
I had a scary moment when I realised adding the wool to the juice was not the best idea – danger of overflow!!! Fortunately, the wool absorbed the juice and I had to top it up with water.
~

~
Now, again, I have to wait to see the results. I expect the beet juice to turn the wool red or even pink. But who knows what colour will emerge? I will show you the results in about one week’s time.
~
I spent a while today working on drafts of a poem to accompany my beet-dyed wool. First, I thought about my friend’s comment about how wasteful it seems to pour the beautiful beet colour down the drain. Then, I focused on identifying a real-life experience to fit the metaphor.
~
Since I have been working on my family history lately, I know about lost and wasted memories … I wish so much I had paid better attention when my Mom told me stories about her family. Sometimes I can remember a snippet, or a name, but the story never seems complete. Because I didn’t listen carefully to her stories, I wasted her words the way the colour is wasted as it pours down the drain.
~
Once I think about what I want to express in the poem, I explore the ideas in a rapid-write. With this first step, I often find the poem begins to take form. I hand-write several drafts (usually six or seven), refining the poem’s structure and ideas. After the third or fourth draft, I begin to vary my word choices and ‘press’ on certain words to make them work harder in the poem. At some point, the form and words of the poem have become clear to me and at that time, I type the draft into the computer. Once the keyboard takes over from the pen, I concentrate on line length and punctuation.
~
If this all sounds very mechanical, I will say that I believe the poem found its life in my head, before it ever reached the pen and paper stage.
~
It will be while before I finish the poem and feel like it is ready to publish. Like the chemistry occurring in the mason jar of beet juice and wool, my poem will take time and patience.
~
Copyright 2014 Jane Tims
finally !!!! spring
Finally, spring!!! The last bit of snow is melted from our lawn (although there are still patches of snow in the woods) and I have crocuses in bloom!
~
This past weekend, I attended a strategic planning event at Falls Brook Center in west-central New Brunswick. Falls Brook Center is a non-profit group working within the community to teach skills for more sustainable living.
~
Setting goals for an organisation is never easy and we enjoyed a welcome break from all the group discussion and brainstorming when one of the program coordinators gave us a short workshop about how to make seed sprouters from newspaper. In the past, I have often used peat pots, milk cartons and even Styrofoam cups to start my seeds. Making plant pots from newspaper is easy, saves money, and reduces waste! And making the pots is fun!
~
We used PotMaker® to make our seed pots. PotMaker® is made in Canada by Richters (Goodwood, Ontario, L0C 1A0) http://www.PotMaker.com . The kit includes two wooden shapes, one to wrap the newspaper into a tube, and the other to ‘crimp’ the lower part of the tube into a closed pot.
~

~
This morning, after a few minutes of rolling newspaper strips and tucking ends, I have enough pots to start a new batch of herbs for my kitchen window garden! Now, all I have to do is fill the newspaper pots with some planting mix and sprinkle some seeds. The pots support one another and keep their shape even wet. They can be planted directly into the garden … the roots grow through the paper and the pots disintegrate.
~

~
~
greenhouse, early spring
~
dead plantings rustle
skeletons brittle
pods and packets rattle
whisper me to the greenhouse
~
weak sunshine warms the glass
my prints a path on late snow
meltwater sinks into grass
soaks into clay
~
bits of crockery
wooden handles
leaf mould and sand
soil pressed into pots
~
the gardener
awakened from winter
rooted in moss and clay
~
~
Published as ‘greenhouse, early spring’, Canadian Stories 15 (87), Oct/Nov, 2012
Copyright 2014 Jane Tims
harvesting colour – more colour from the pickle jar
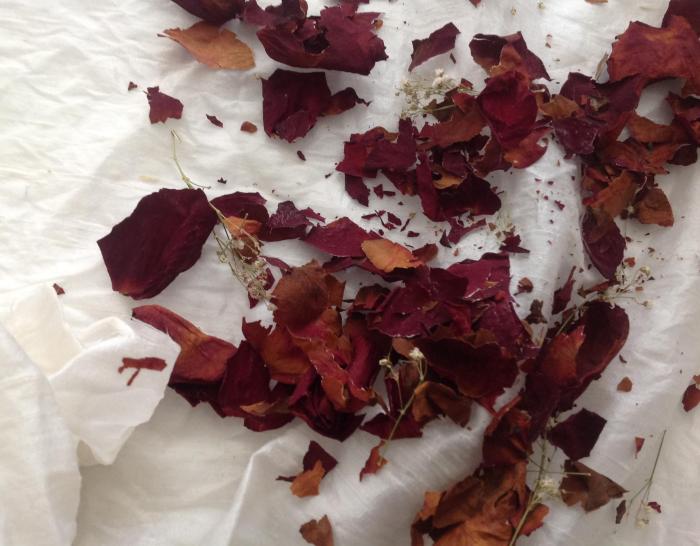
One more dyeing project with the pickle jar! I am growing impatient, waiting for the growing season to begin so I can collect plants for my dyeing projects. So, I looked around my house and decided to use some of the various jars of rose petals and other flowers I have dried over the years.
~

a jar of rose petals and other flowers from a saved bouquet (the fabric is the silk I intend to dye)
~
For fabric, I decided to use the square of silk I purchased for the project back in February. From my reading, I know that silk accepts dye very well and responds well to an acidic dye bath.
First I soaked the silk in tepid water to prepare the fibres to accept the dye. I decided this fabric has already been prepared with mordant. If not, I can always add the mordant later.
Then I spread the petals on the fabric, spraying as I went with a weak solution of cider vinegar.
~
rose petals, scattered on the silk
~
I added some other dried flower petals from another bouquet. Then I rolled the fabric and petals very tightly.
~
a roll of silk and flower petals, sprayed with vinegar and ready for the pickle jar
~
As with my last project ( https://nichepoetryandprose.wordpress.com/2014/04/02/harvesting-colour-onion-yellow/ ), I had trouble stuffing the roll into the jar. Once I had the silk crammed into the jar, I added more vinegar solution to the jar and closed it.
~
pickle jar stuffed with silk, rose petals and other dried flowers
~
And now we wait …
~
~
Copyright 2014 Jane Tims
harvesting colour – the yellow of tansy
Since last September, a small bunch of Tansy (Tanacetum vulgare L.) has hung on the line in my kitchen. Now, with a small batch of alum-treated wool, I am able to see what colour will come from the dried and lifeless flowers.
~

dried Tansy, collected in 2013
~
To extract the dye, I crumbled the flowers and leaves and soaked them in water overnight. Then I added more water and brought them slowly to a boil in my big, well-marked dyepot (marked so I will not use it for food by mistake). After an hour’s boil, I let the dye cool and strained the liquid. The result was a clear, amber-yellow dye.
~

dye from Tansy and water, simmered
~
To dye the wool, I added water, immersed a shank of alum-treated wool and slowly brought the dye to a simmer – one hour and then the long process of cooling (I am realising that dyeing is more about waiting than doing!!!!!!!!!!!). The result is a green-yellow, almost exactly the colour shown for Tansy-dyed fibre in Jenny Dean’s book (Wild Color) !!! My photo is not clear because the drying line insists on vibrating but you can clearly see the colours – left to right – the brown of the lichen-dyed wool from a few days ago), the green-yellow of the Tansy-dyed wool and the tan of the undyed wool.
~

three shanks of wool, dyed with the lichen Usnea (left), dyed with Tansy (center) and raw wool (treated with alum)
~
I wrote my poem to the heady yet sleepy smells of the Tansy boiling in its dye pot. I remembered the living Tansy, growing in the ditch last summer, each flower cluster hiding a sleepy bumblebee that had to be shaken from its resting. I was also reminded in my reading that Tansy was used so often at funerals in New England in the 19th century that people associated its smell with death.
~

Tansy in the ditch
~
sleep before dyeing
~
Tanacetum vulgare L. – Common Tansy, Mugwort, Bitter Buttons
~
Bitter Buttons hover in the dye pot
simmering on the kitchen stove
drowsy scent of camomile
camphor and rosemary
liquid amber, saffron sallow
jaundiced pale of Tansy
reclines in the roadside ditch
each flat-topped cluster
hibernaculum
for a furred and yellow
unconcerned
and mellow
bumblebee
~
~
Copyright 2014 Jane Tims